
Knife Making |


 Colorado Prospector - Gem and mineral prospecting and mining forums > Miners Crafts, Goods & Classified ads > Prospector's Crafts & Creations
  |
Knife Making |
 Jul 8 2012, 02:18 PM Jul 8 2012, 02:18 PM
Post
#31
|
|
 Moderator  Group: Members Posts: 4,459 Joined: 25-August 09 From: way on up thar Member No.: 6,983 |
QUOTE (swizz @ Jul 8 2012, 08:54 AM)  I may add another (smaller) brass rivet to the handle near the ricasso area for more durability and I'll post that if I do it. Drilling to add another rivet to this part of the handle. 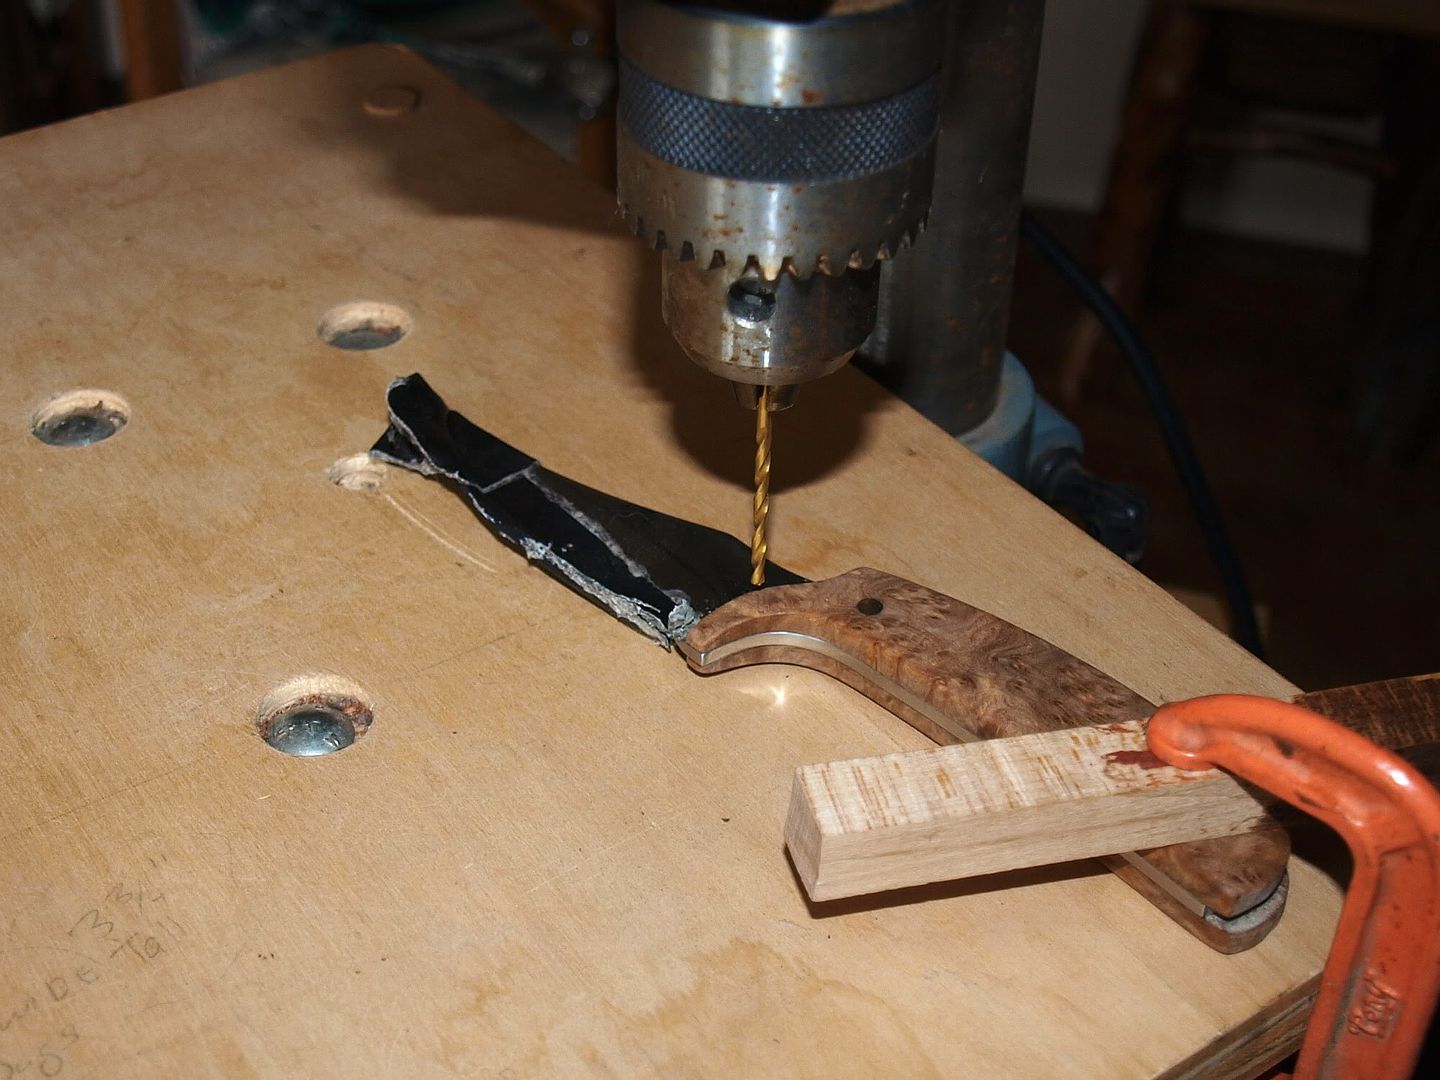 I done broke the wood! On both sides of the knife. Not to worry... this was a weak point in my handle design and needed to be addressed. My solution was to put a small peened rivet there. I'm glad I finally screwed something up with this build, it was going waaaay too smooth.  Can't say I didn't see this coming. I have a plan.  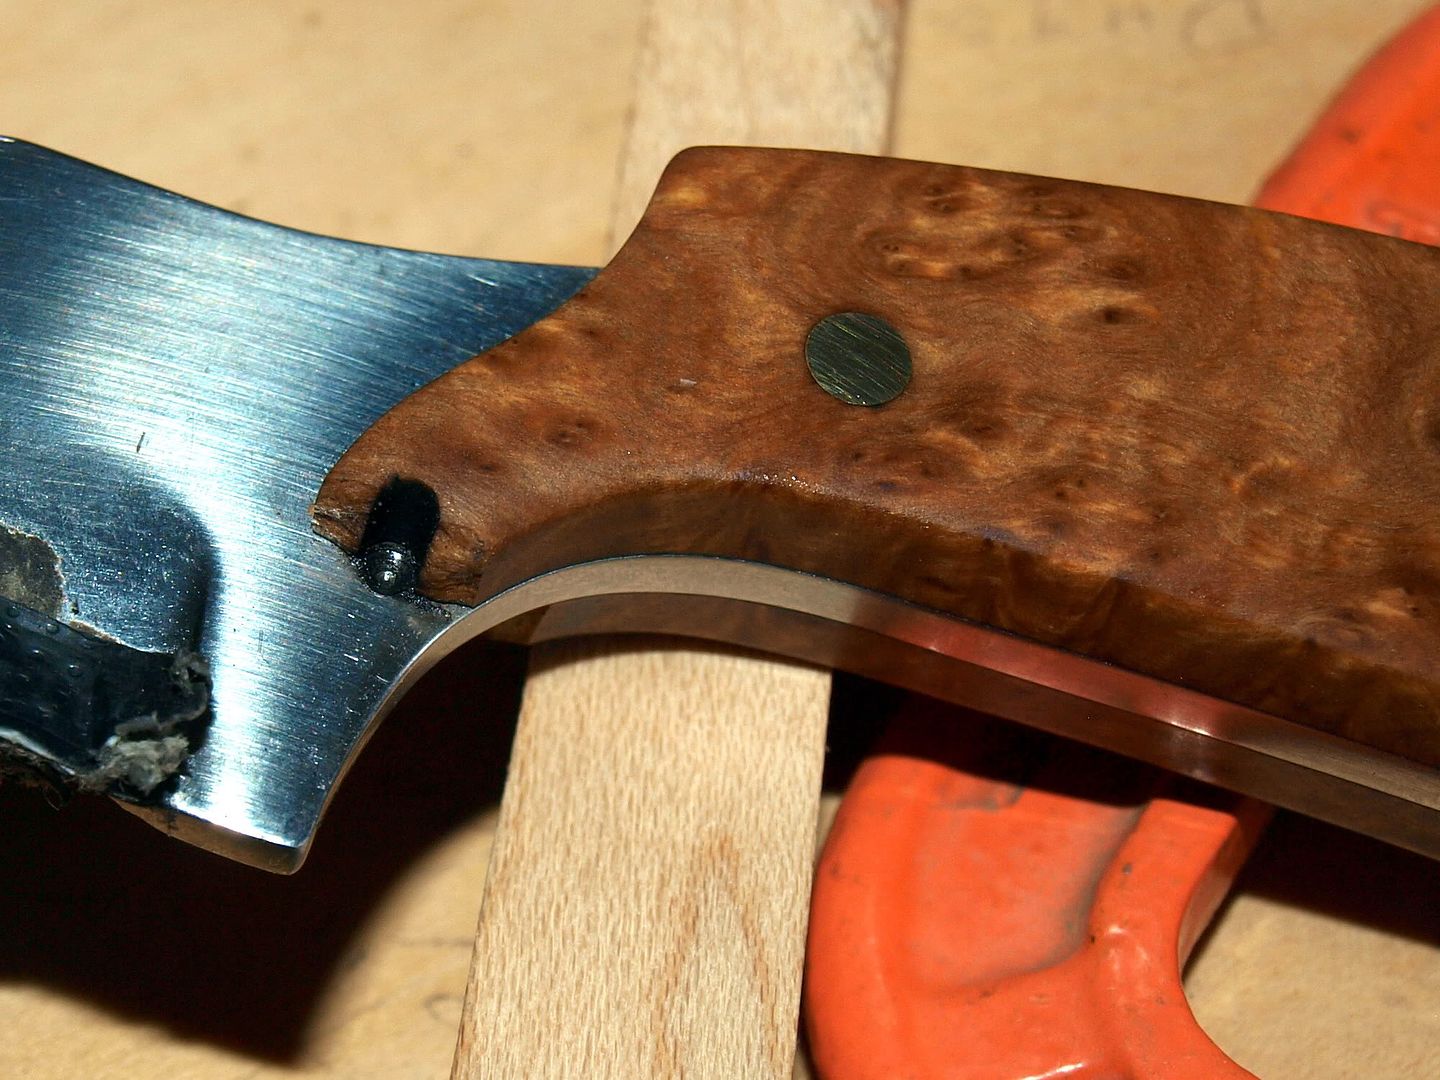
-------------------- /l ,[____], l---L-OlllllllO- ()_) ()_)--o-)_) BLACK SANDS MATTER! Very Happy CP Lifetime Member CP CORE TEAM Referral Code CE213 |
 |
 
|
|
Jul 8 2012, 07:08 PM
Post
#32
|
|
|
Moderator Group: Members Posts: 4,459 Joined: 25-August 09 From: way on up thar Member No.: 6,983 |
QUOTE (swizz @ Jul 8 2012, 02:18 PM) I have a plan. The plan didn't work out so I removed the handle and will make a new one. No biggie, I like the practice! This time I'm not going to buy exotic wood. That stuff was strange to work with. It was hard, but kind of brittle. Not pleasant to breathe when sanding it either. I'm going to use my own wood this time, which the knife is sitting on here.... good ol Maple and it won't cost me a dime. 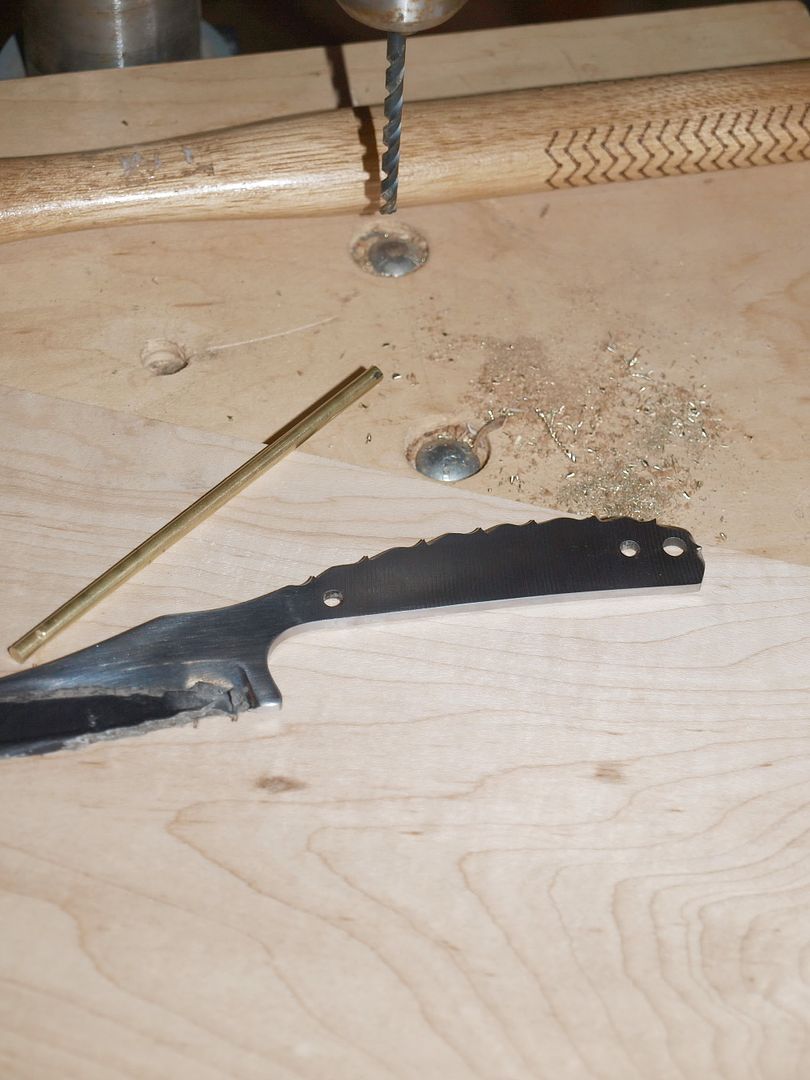
-------------------- /l ,[____], l---L-OlllllllO- ()_) ()_)--o-)_) BLACK SANDS MATTER! Very Happy CP Lifetime Member CP CORE TEAM Referral Code CE213 |
|
|
|
|
Jul 8 2012, 08:17 PM
Post
#33
|
|
|
Moderator Group: Members Posts: 4,459 Joined: 25-August 09 From: way on up thar Member No.: 6,983 |
Ok... back on track.
I've traced my new handle design and am about to cut them out with a scroll saw. You can use any saw, I used a hand coping saw last time. 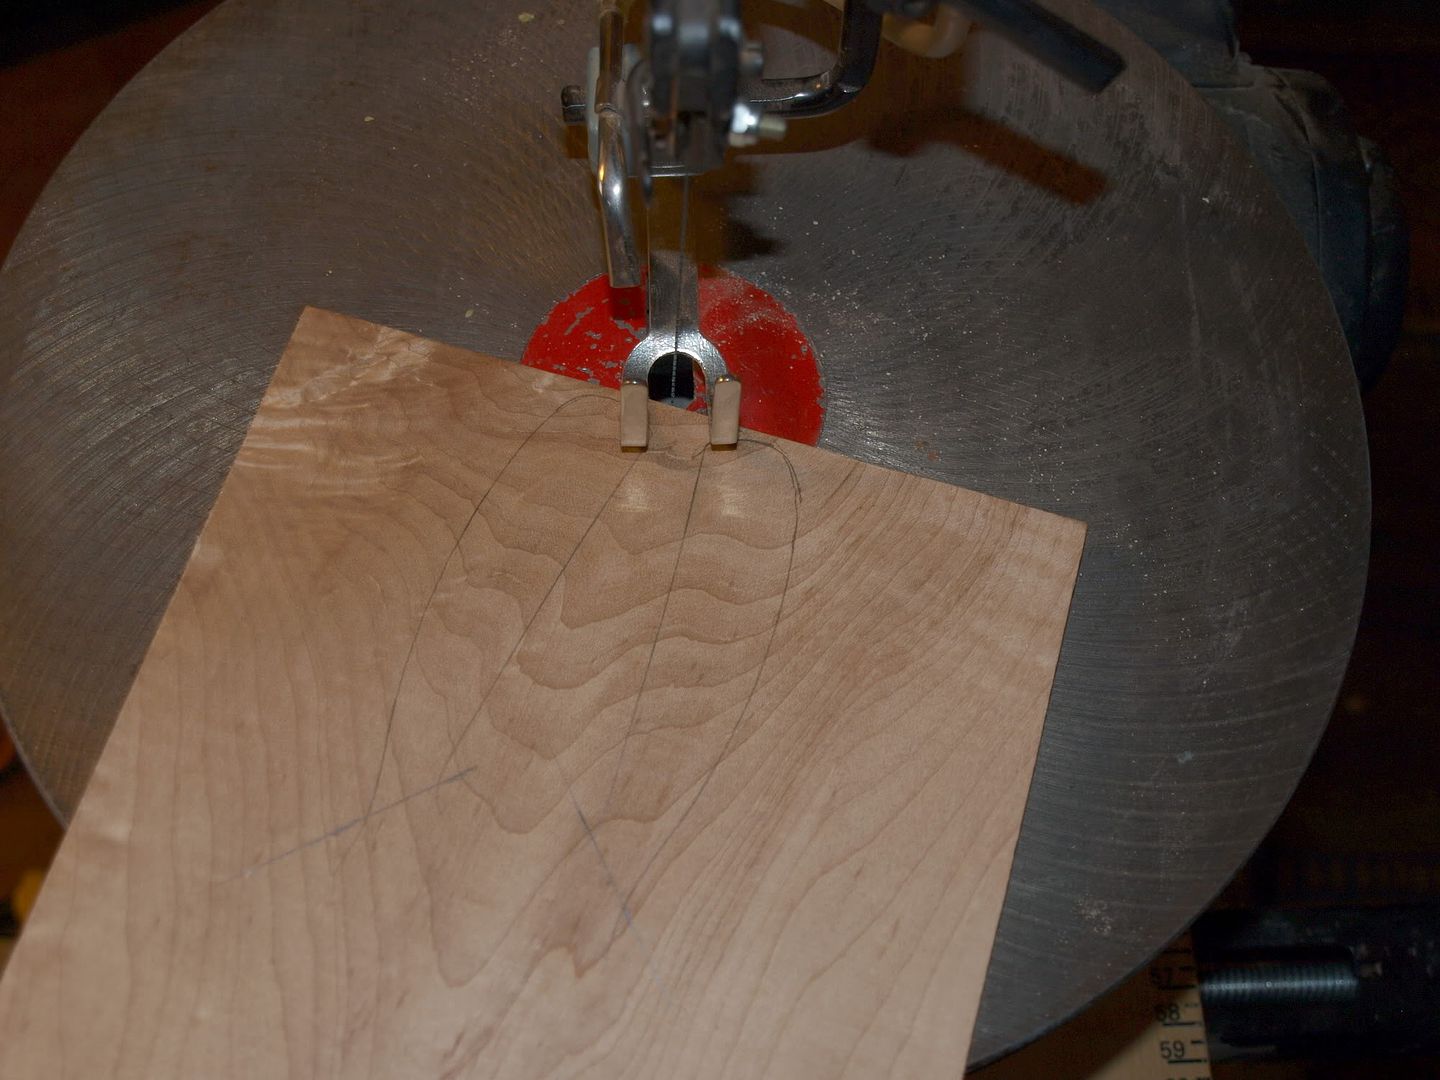
-------------------- /l ,[____], l---L-OlllllllO- ()_) ()_)--o-)_) BLACK SANDS MATTER! Very Happy CP Lifetime Member CP CORE TEAM Referral Code CE213 |
|
|
|
|
Jul 9 2012, 06:04 AM
Post
#34
|
|
|
russau Group: Members Posts: 2,841 Joined: 4-December 03 From: st.louis missouri Member No.: 43 |
nice grain pattern of that maple! it ought to look equally nice!
|
|
|
|
|
Jul 9 2012, 12:55 PM
Post
#35
|
|
 Master Mucker! Group: Admin Posts: 7,188 Joined: 7-October 03 From: Colorado Member No.: 4 |
Dang it, that stinks about the other wood but I have to agree with Russ. The patterns in the Maple are going to look great for the handle!
-------------------- Education is the key to the future,
and participation opens the door to opportunity. Discover your prospecting independence & success! ColoradoProspector.com Owner/Webmaster Core team member ♥  |
|
|
|
|
Jul 9 2012, 06:45 PM
Post
#36
|
|
|
Moderator Group: Members Posts: 4,459 Joined: 25-August 09 From: way on up thar Member No.: 6,983 |
Back in business... I've epoxied the first handle scale and will leave it clamped overnight.
 -------------------- /l ,[____], l---L-OlllllllO- ()_) ()_)--o-)_) BLACK SANDS MATTER! Very Happy CP Lifetime Member CP CORE TEAM Referral Code CE213 |
|
|
|
|
Jul 10 2012, 04:10 PM
Post
#37
|
|
|
Moderator Group: Members Posts: 4,459 Joined: 25-August 09 From: way on up thar Member No.: 6,983 |
oops again..... this time I was overly ambitious peening. Still learnin'
-------------------- /l ,[____], l---L-OlllllllO- ()_) ()_)--o-)_) BLACK SANDS MATTER! Very Happy CP Lifetime Member CP CORE TEAM Referral Code CE213 |
|
|
|
|
Jul 10 2012, 05:26 PM
Post
#38
|
|
|
Moderator Group: Members Posts: 4,459 Joined: 25-August 09 From: way on up thar Member No.: 6,983 |
OK... I jumped right back up on that hoss!
 Handle attempt #3  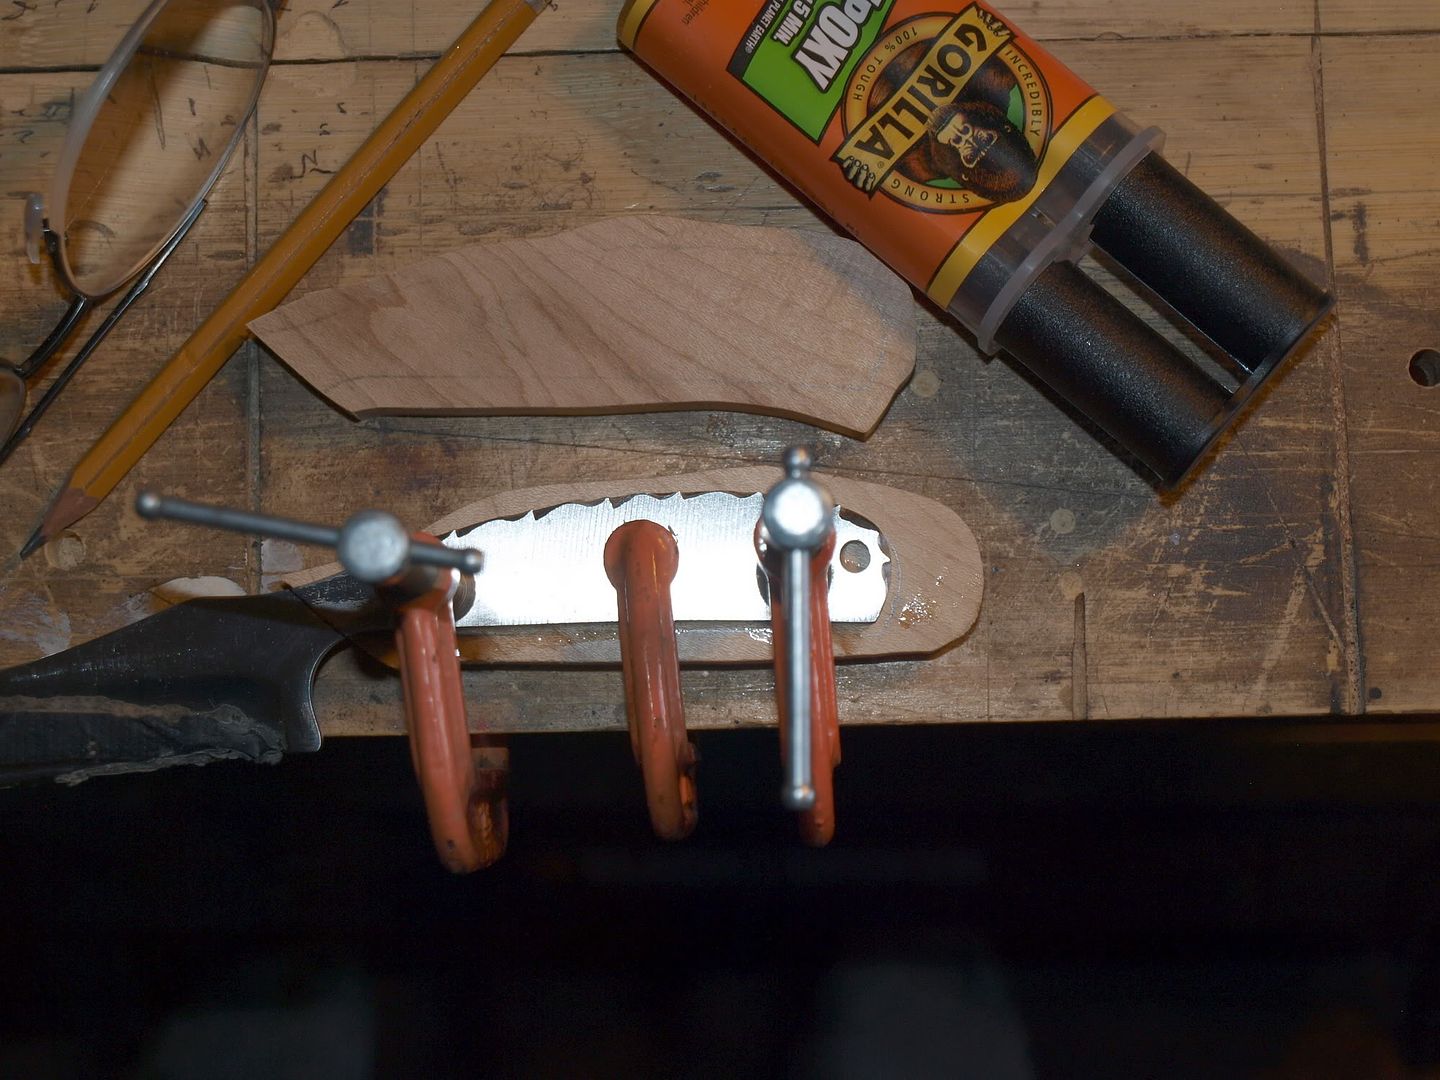 -------------------- /l ,[____], l---L-OlllllllO- ()_) ()_)--o-)_) BLACK SANDS MATTER! Very Happy CP Lifetime Member CP CORE TEAM Referral Code CE213 |
|
|
|
|
Jul 11 2012, 06:30 AM
Post
#39
|
|
|
russau Group: Members Posts: 2,841 Joined: 4-December 03 From: st.louis missouri Member No.: 43 |
frustrating for sure!
|
|
|
|
|
Jul 11 2012, 07:10 AM
Post
#40
|
|
|
Moderator Group: Members Posts: 4,459 Joined: 25-August 09 From: way on up thar Member No.: 6,983 |
QUOTE (russau @ Jul 11 2012, 06:30 AM) frustrating for sure! Not at all. This is new to me and I expected (actually hoped) to make some errors in construction. The materials I'm using for this first build are really inexpensive (under $20 invested) so I don't mind donating them to the learning curve if need be. If I'm not making mistakes.... I'm not learning. I should have most of the bugs in the process worked out by the time I'm ready to produce quality pieces.... that's the goal anyway. Hopefully anyone who's following this thread and thinking about trying it can learn from a few of my mistakes along the way. Definitely not frustrating though, just part of the learning process. -------------------- /l ,[____], l---L-OlllllllO- ()_) ()_)--o-)_) BLACK SANDS MATTER! Very Happy CP Lifetime Member CP CORE TEAM Referral Code CE213 |
|
|
|
|
Jul 11 2012, 06:40 PM
Post
#41
|
|
|
Moderator Group: Members Posts: 4,459 Joined: 25-August 09 From: way on up thar Member No.: 6,983 |
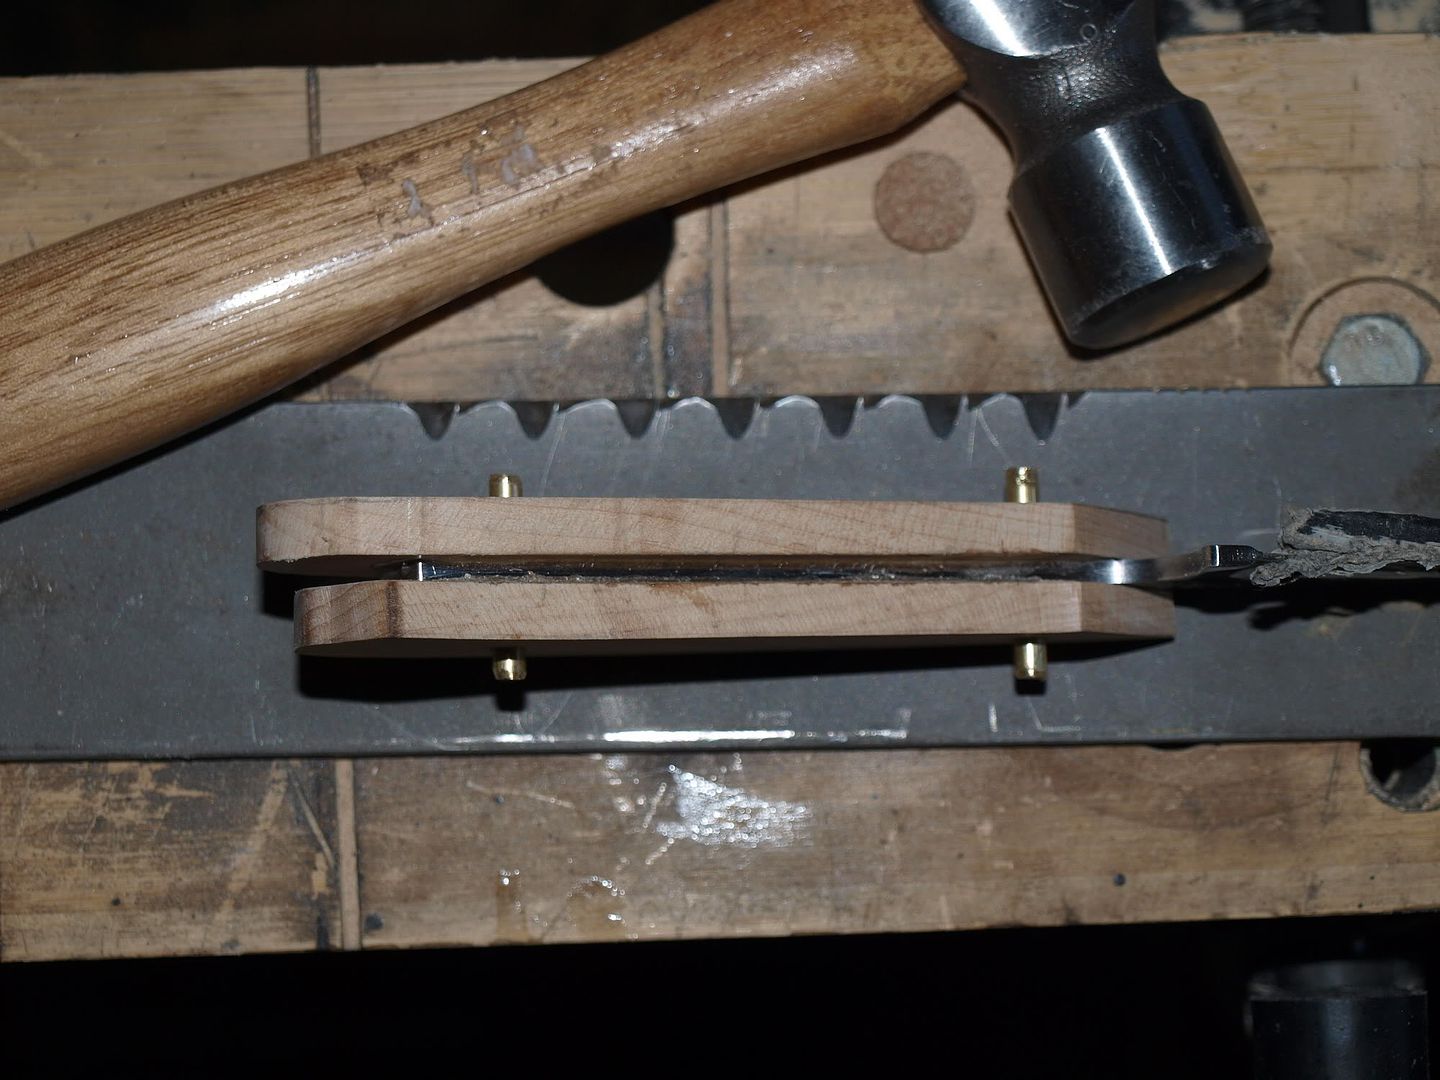
Alrighty then... I'm at the peening stage again. It's best to leave about 1/8" of extra brass rod on each side of the handle to peen down. You don't have to peen the entire 1/8" down to the handle. The idea is to keep tapping it on both sides until the brass rod expands inside the holes. This holds the handle scales to the tang TIGHT. I'll then sand down the excess until it is flush with the handle.... then I'll sand the rest of the wood down to the tang.
-------------------- /l ,[____], l---L-OlllllllO- ()_) ()_)--o-)_) BLACK SANDS MATTER! Very Happy CP Lifetime Member CP CORE TEAM Referral Code CE213 |
|
|
|
|
Jul 14 2012, 02:35 PM
Post
#42
|
|
 Master Mucker! Group: Admin Posts: 4,149 Joined: 7-October 03 From: Colorado Member No.: 3 |
This project has been fun to follow. I can see why you'd definately want to start off with something cheaper for the learning curve.
I'm wondering if maybe a very slight taper on the handle holes would help allow a tad bit more room for the peening process to help lock and hold the handle in place. Possibly even doing the first peening stage during the gluing but that would require both be done at the same time. Would maybe lessen the chances of handle bust outs? Look forward to seeing the end results of this one and the ones that are sure to follow. My grandad hand made a knife from an old file and added a antler handle in his younger days......when I find it in the storage boxes I'll post up a pic. Knife making looks like it could be really fun and creative for sure. Thanks for including us all on this one Swizz. -------------------- CP-Owner/Administrator
www.ColoradoProspector.com IF YOU USE IT, THE GROUND PRODUCED IT! MINERS MAKE "IT" HAPPEN!! |
|
|
|
|
Jul 14 2012, 04:47 PM
Post
#43
|
|
|
Moderator Group: Members Posts: 4,459 Joined: 25-August 09 From: way on up thar Member No.: 6,983 |
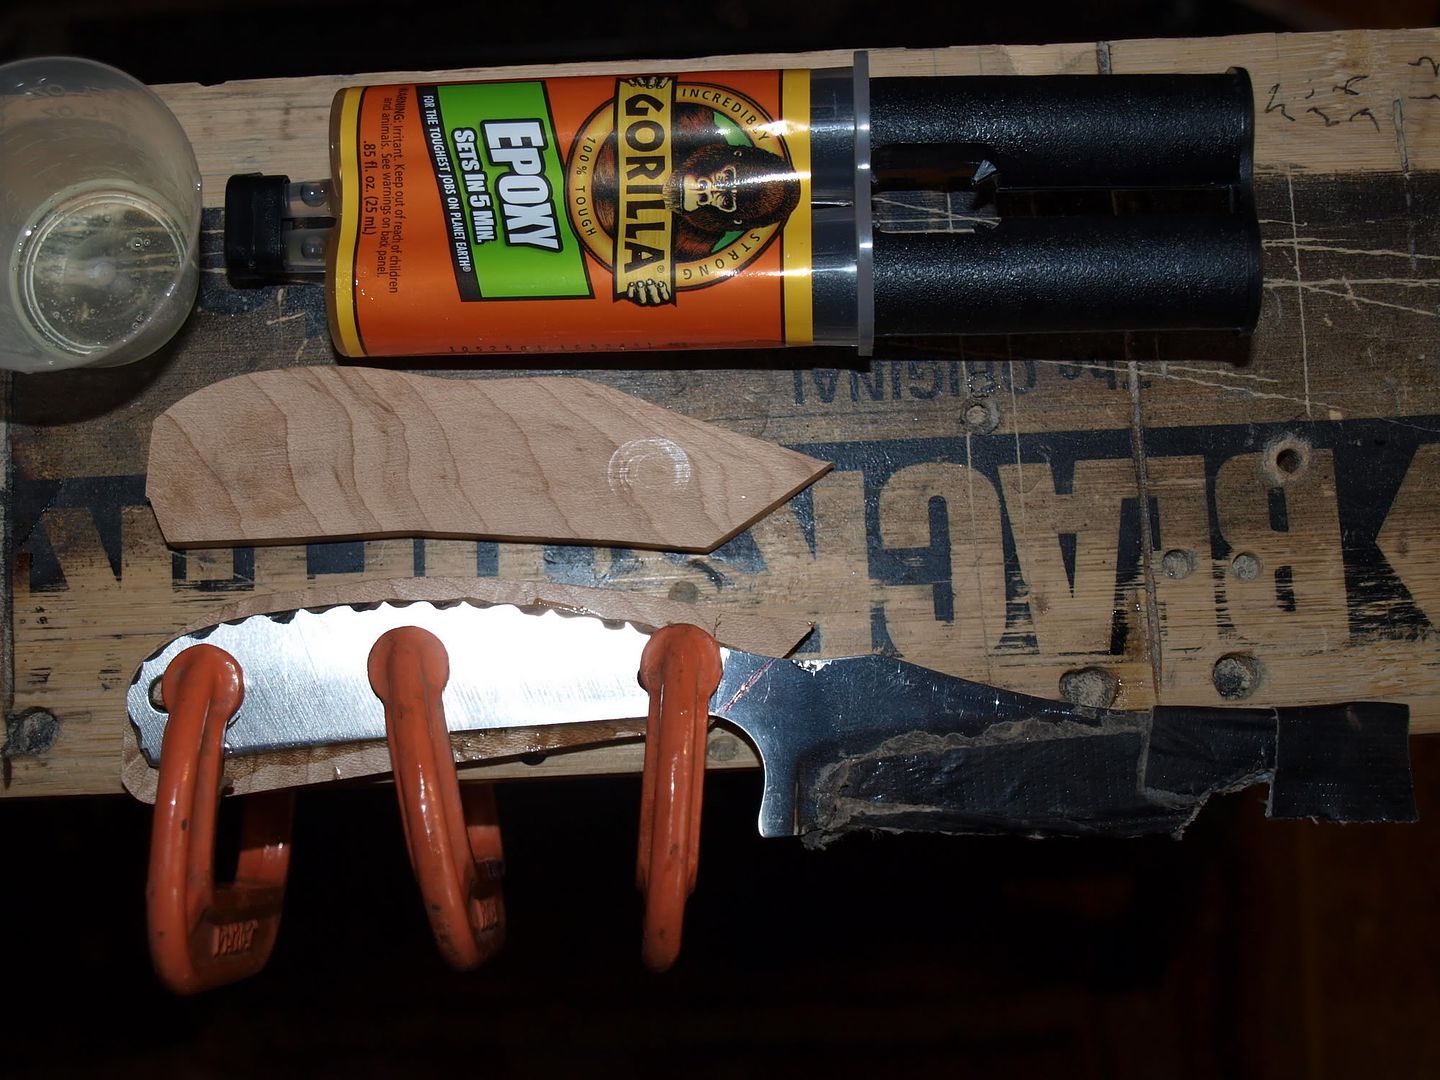
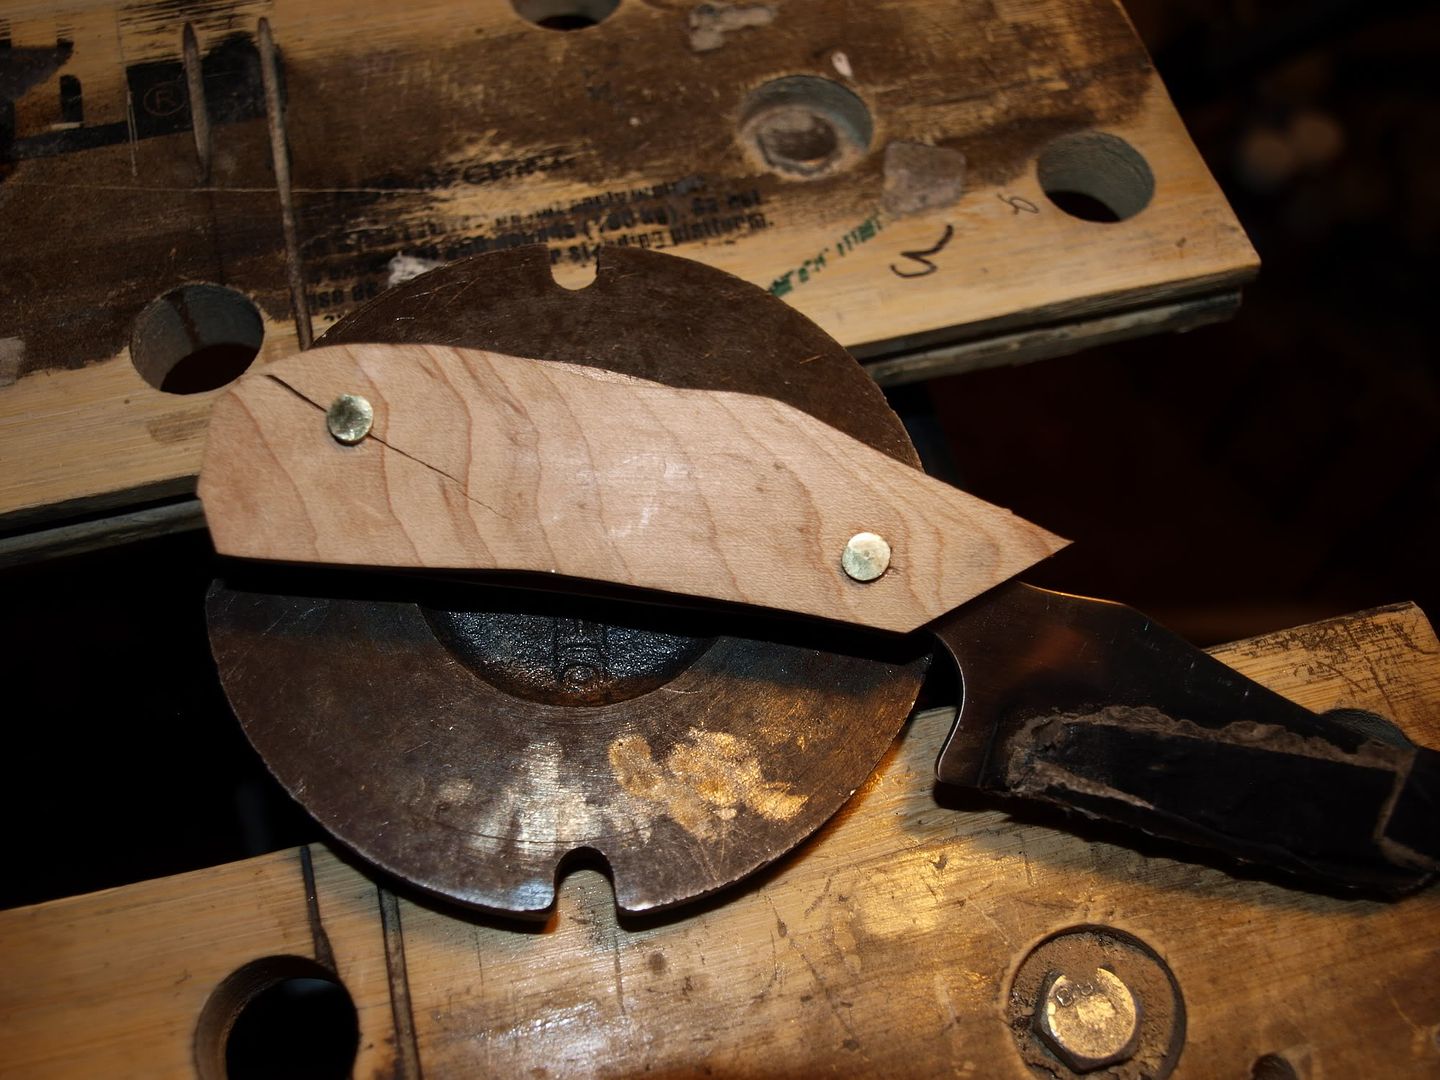
QUOTE (ColoradoProspector @ Jul 14 2012, 02:35 PM) I can see why you'd definately want to start off with something cheaper for the learning curve. Yup, that knife is toast. After being careful peening again.... I broke yet another handle. I'm no rookie to peeing either, the machete peened out well with no problems. So I got to thinkin'... then I put a straight-edge to that knife blank. Slightly crooked, like a snake! It was enough bad tolerance to create this havoc. All I can figure is it happened during the annealing process at the factory. It's 440C heat-treated to 56-58 RC hardness so there's no way I can straighten it. Still... really no big deal. I'm sure you guys know very well how it goes with stuff like that since you are lap doggs and bust projects that you've invested hours into occasionally. It pisses ya off, but ya move on quickly and put it behind. I still learned valuable lessons on this first attempt, and I learned detail file work. Lesson: Don't buy knife blanks from eBay. Buy them at KnifeKits.com. Very reputable and everything ya need. The knife below came with two pre-drilled bolsters and three stainless pins to peen them onto the blade. It cost $26.95. I'm not doing fancy file work this time. I just want to complete a quality knife. This blade is made from AUS8 steel (good stuff). I've attached the bolsters today. So far, success! I peened 3 stainless pins through it, then ground them down and smoothed the bolsters until the pins disappear. It will be buffed after handle installation. You can read the instructions pictured below to know how this is done. 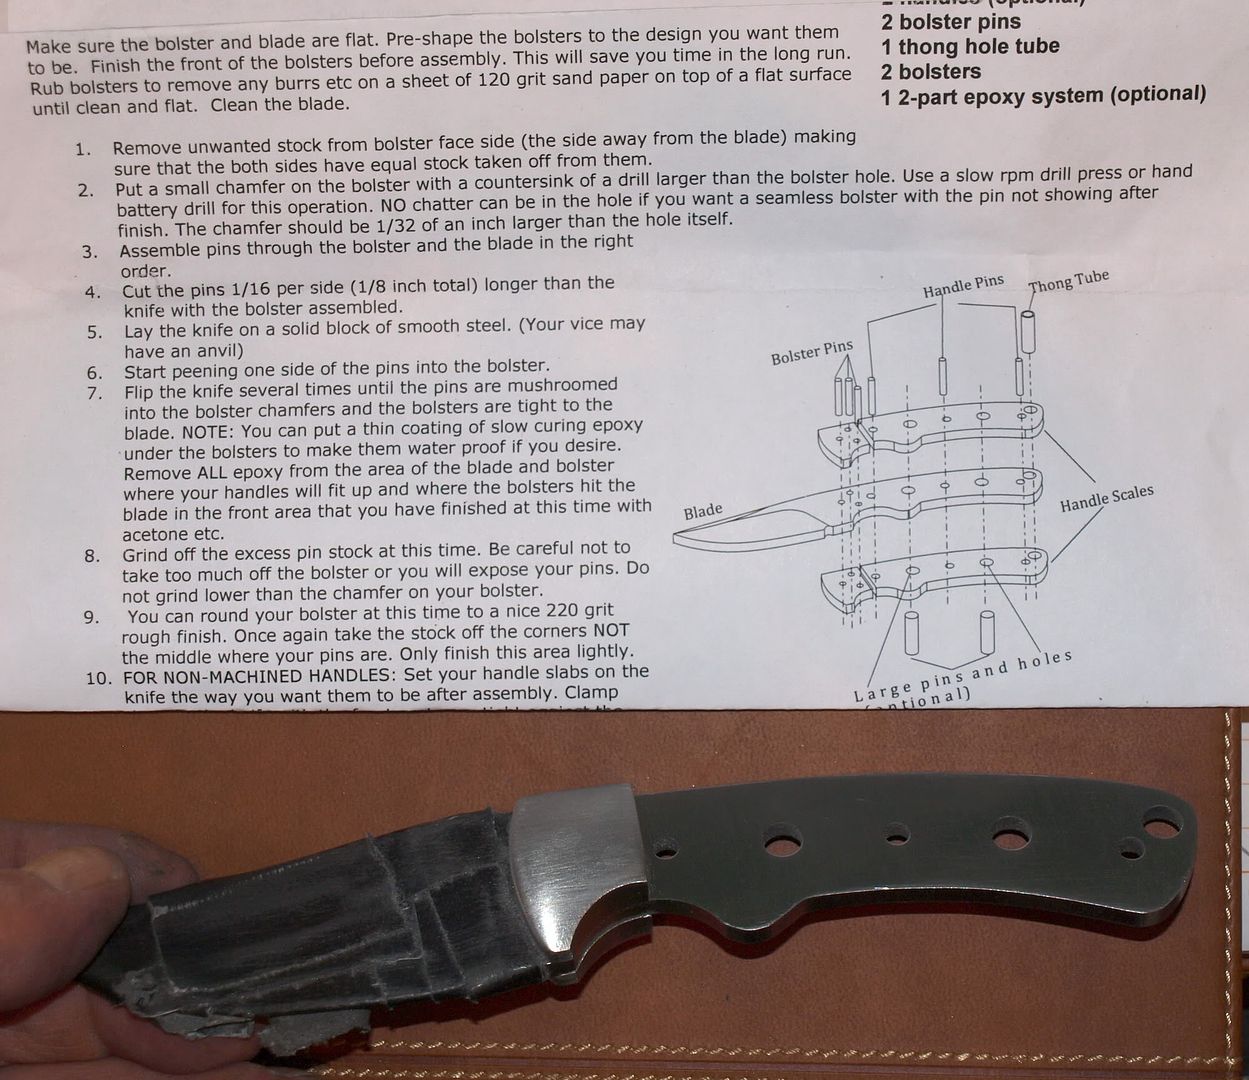 -------------------- /l ,[____], l---L-OlllllllO- ()_) ()_)--o-)_) BLACK SANDS MATTER! Very Happy CP Lifetime Member CP CORE TEAM Referral Code CE213 |
|
|
|
|
Jul 14 2012, 09:04 PM
Post
#44
|
|
|
Moderator Group: Members Posts: 4,459 Joined: 25-August 09 From: way on up thar Member No.: 6,983 |
"Necessity is the mother of invention".
I've rigged my belt sander to work as a vertical stationary sander. I clamped it into my portable table vise and mounted a feeder block perpendicular. Makes life much easier. 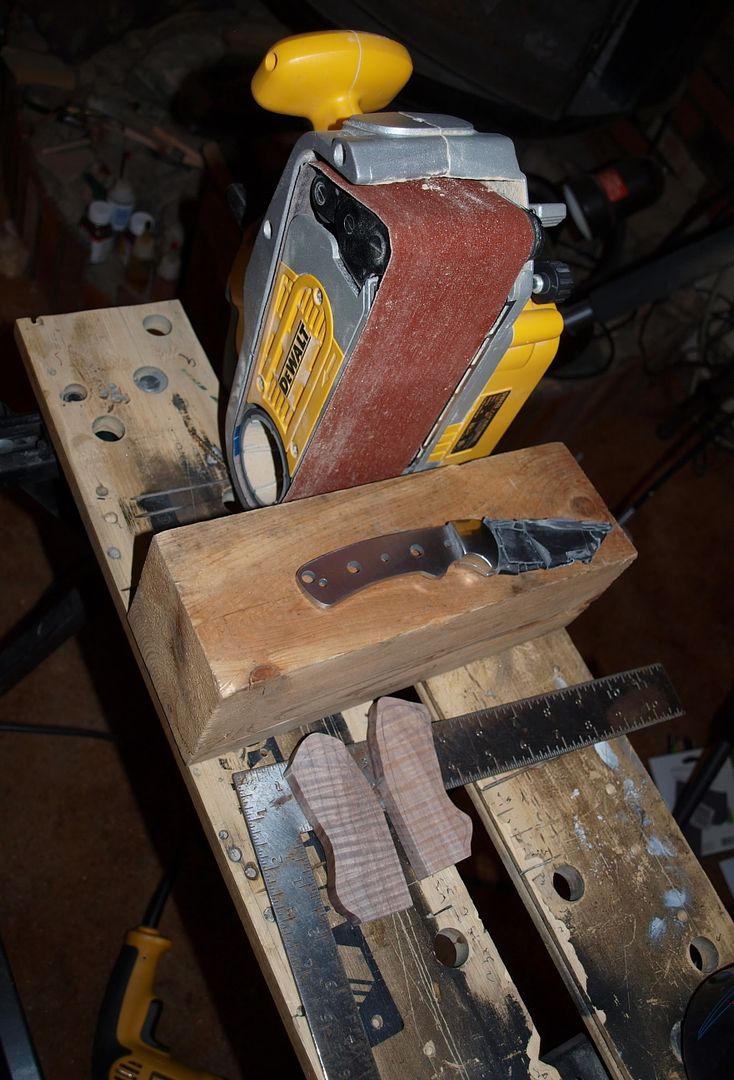
-------------------- /l ,[____], l---L-OlllllllO- ()_) ()_)--o-)_) BLACK SANDS MATTER! Very Happy CP Lifetime Member CP CORE TEAM Referral Code CE213 |
|
|
|
|
Jul 15 2012, 05:48 AM
Post
#45
|
|
|
russau Group: Members Posts: 2,841 Joined: 4-December 03 From: st.louis missouri Member No.: 43 |
this has been a very interesting thread on makeing a knife!
|
|
|
|
|
| Lo-Fi Version | Time is now: 23rd May 2024 - 08:49 AM |


