Making first miller table |


 Colorado Prospector - Gem and mineral prospecting and mining forums > Prospecting, Mineral Collecting and Treasure Hunting Forums > Equipment - Prospecting and Lapidary
Making first miller table |
 Nov 28 2012, 09:34 PM Nov 28 2012, 09:34 PM
Post
#1
|
|
|
Shovel Buster!  Group: Members Posts: 62 Joined: 31-March 12 From: Sopchoppy Fl Member No.: 42,369 |
I'm starting to put together material for a aluminum miller table. What i would like to do is glue the Alu together. I've talked with some of my airplane friends and they came up with methacrylate 7350 a Parsons product which is suppose to be self etching. Small amounts of this stuff is hard to come by because of short shelf life. I plan to use Jasco prep&prime(need input)on the glued surfaces regaurdless of what ever adhesive i use. 5200 may work and i've used a lot of it in a marine environment and also glued some of Jens favorite shoe soles(doesn't take much) back together with it.I'm just concerned with the Alu oxidizing and coming a part at the glue seam (not nice). I really don't want to put fasteners in the bed of the table if possible. Any in put good or bad i will appreciate. The metal is on the way and should be here next week. Ordered by phone from discountsteel.com (Fort Worth Tx) for a better price than on line. It beats spending a day driving to Tallahassee and not ending up with what i need. In put on bed surface also, bondo autmotive primer chaulk board paint ect. Later i'll need some help with the math on the spray bar but that can wait. I'm going to keep for anyone relatively neat notes and drawings on this if it turns out well.
Burrell 
|
 |
 
|
 |
|
Feb 26 2013, 05:51 PM
Post
#46
|
|
 Master Mucker! Group: Members Posts: 1,301 Joined: 17-February 12 From: Central CO Member No.: 41,357 |
I'm game for that... but I have to work on what Karen prioritizes. This will be my first full summer at the cabin, and ther is a lot of work and upgrades to be done to turn it into full time use. New batteries and a tracker, etc - but all of that is fuel for yet another thread. Starting the preliminaries in March. I will start that thread then.
-------------------- Caveman
Aulus Livius Maximus World Traveler, 7 Continent Walker LEVEL 3 LIFETIME MEMBER Referral Code: SE2104 |
|
|
|
|
Apr 8 2013, 07:44 PM
Post
#47
|
||
|
Shovel Buster! Group: Members Posts: 62 Joined: 31-March 12 From: Sopchoppy Fl Member No.: 42,369 |
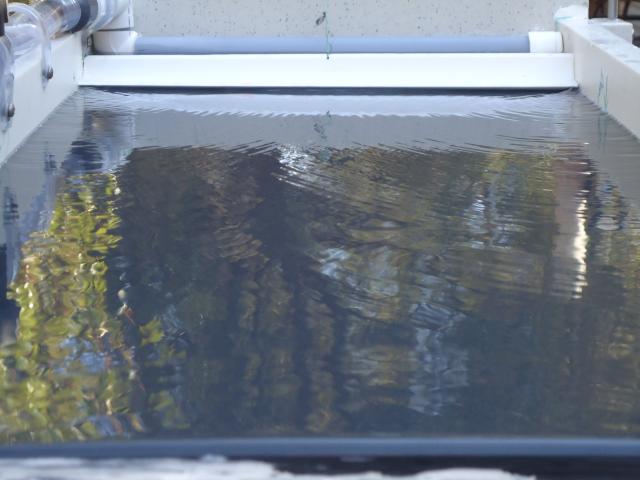
 I have worked with the table a couple of times since my last posting. I do have some pictures and will try to post them later. The water flow across table is to the point that i can stat to run concentrates(maybe 3 gals.) that have alread been panned several times. I did have some leaks at the seams and added some of my space shutle caulking and cured the leaks. Switched all thread to ss due to rusting which would have wallowed out ports on adjusting blocks. Added lock nuts to the top of all 4 legs for easy adjust ment in leveling. Next will be a tailing catch bucket. What I had planned was too high for the run off troff. I will run and rerun what i have and try to get pictures of what i actualy catch. May have to put something on the table for camersa to focus on. The first trip will be the middle of may and will have some real concentrates to work with. Maybe a pic will come with this post. If it does i did a way with section of pvc to smooth water . it would work but would have to have very little slop at ends. Do have one more pic less than 4.0 I have worked with the table a couple of times since my last posting. I do have some pictures and will try to post them later. The water flow across table is to the point that i can stat to run concentrates(maybe 3 gals.) that have alread been panned several times. I did have some leaks at the seams and added some of my space shutle caulking and cured the leaks. Switched all thread to ss due to rusting which would have wallowed out ports on adjusting blocks. Added lock nuts to the top of all 4 legs for easy adjust ment in leveling. Next will be a tailing catch bucket. What I had planned was too high for the run off troff. I will run and rerun what i have and try to get pictures of what i actualy catch. May have to put something on the table for camersa to focus on. The first trip will be the middle of may and will have some real concentrates to work with. Maybe a pic will come with this post. If it does i did a way with section of pvc to smooth water . it would work but would have to have very little slop at ends. Do have one more pic less than 4.0
Attached thumbnail(s)
|
|
|
|
|
|
|
Apr 8 2013, 08:09 PM
Post
#48
|
||
|
Shovel Buster! Group: Members Posts: 62 Joined: 31-March 12 From: Sopchoppy Fl Member No.: 42,369 |
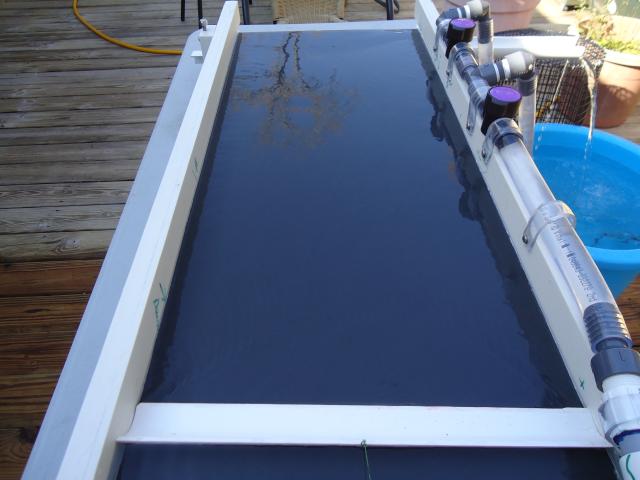
one more basicly the same thing but from the head of the table
Attached thumbnail(s)
|
|
|
|
|
|
|
Apr 10 2013, 04:11 PM
Post
#49
|
|
|
Master Mucker! Group: Members Posts: 1,301 Joined: 17-February 12 From: Central CO Member No.: 41,357 |
Looks great!
-------------------- Caveman
Aulus Livius Maximus World Traveler, 7 Continent Walker LEVEL 3 LIFETIME MEMBER Referral Code: SE2104 |
|
|
|
|
Apr 11 2013, 05:27 AM
Post
#50
|
|
|
russau Group: Members Posts: 2,841 Joined: 4-December 03 From: st.louis missouri Member No.: 43 |
on your first picture, why was there a cresent shaped wave comeing from the headend corners?? i assume the second picture just didnt show it?? "smooth as glass" is what i try to maintain on my water surface. im interested in your recovery rate with the cresent waves.it might not be any problem with the slower flow od the water but im just interested.
|
|
|
|
|
Apr 11 2013, 04:57 PM
Post
#51
|
|
|
Shovel Buster! Group: Members Posts: 62 Joined: 31-March 12 From: Sopchoppy Fl Member No.: 42,369 |
The fittings hold the bar 1/8 +- off of table. The cresent is water stacking up behind fittings and then trying to flatten out. I had glued th cap end and the cresent is more noticable there. The 90 is just friction snug but is rounded out the out side of the 90 as they come. I didn't getting a very square cut on the 90 for the part that actually sets on the table. I have everything to put another bar together with a cap cut down to +- 1/4. I've also thought about putting 1 round head screw in each fitting to hold the fittings off of table to loose the cresent. This i will try on the bar pictured first. Russ something else that you can't see is that at every imperfection (space shuttle caulking) going down the table at slate and rail seams is a tiny ripple running out from the rail. These are tiny but with less angle and slower water almost gone. I've got both 500 & 360 pumps. The scrap pvc that is tied with power pro is gone. In the picture that is a lot of what you are seeing. Water running around end cuts and not being square across table. It would work but you would have to have almost zero tolerance on the rail ends. The cresent is still there regardless with pvc fittings. I had to go back and look at what your looking at. I'll get some more pic but will have to be close in order to try and keep tham under 4.0
|
|
|
|
|
Apr 12 2013, 04:57 AM
Post
#52
|
|
|
russau Group: Members Posts: 2,841 Joined: 4-December 03 From: st.louis missouri Member No.: 43 |
regardless it should still work as is! are your spray holes pointed down? i had some issues with the direction of the spray bar holes and ended up pointing them straight up and lowered the water pressure. the water went up and flowed over the spray bar evenly and ended that issue of the ripples in the water for me.it ended up "as smooth as glass" and the smaller the finegold you run, the slower id run the water.and rerun them cons with lower water pressure and youll be suprised. as for a cleanup tool, youll find none better!and you cant beat the price!! nice job!!
|
|
|
|
|
Apr 18 2013, 10:10 PM
Post
#53
|
|
|
Shovel Buster! Group: Members Posts: 62 Joined: 31-March 12 From: Sopchoppy Fl Member No.: 42,369 |
Russ the water holes are turned down and some what towards the head of table. I've enlarged the holes several times and seems to help with every enlargment and will enlarge more to see what happens. The holes i drilled in this bar looks like a dotted snake, not straight. I can turn the bar in any direction except in a down slope or in the up position that squirts more than i want, bigger holes may do the trick. It will work as is now but want to fiddle with a little more. I'll run the cons i have in the next week or so and see how it does. I still have to finish the tails catch system and eventually make a auto feeder. I would like to make it out of 2 part resin and plywood. I haven't readabout the use of fiber glass anywhere unless i'v just missed it. It may not work well with fine gold. anyway have some time before i get to that.
|
|
|
|
|
Apr 19 2013, 06:00 AM
Post
#54
|
|
|
russau Group: Members Posts: 2,841 Joined: 4-December 03 From: st.louis missouri Member No.: 43 |
Burrel that should work just fine! on the feeder, id suggest makeing the bottom of it in a wide "V" shape to keep the cons slipping down into the slow water flow for a even distribution of cons. i think this would help controll the flow of cons into any device your wanting to use it on. it looks like a winner to me!
|
|
|
|
|
Jun 13 2013, 06:50 PM
Post
#55
|
|
|
Shovel Buster! Group: Members Posts: 62 Joined: 31-March 12 From: Sopchoppy Fl Member No.: 42,369 |
 Played with fresh cons on the table and was amazed at how it caught really tiny specks. Ran about 2 cups of quick panned -20. Don't anything to classify any smaller right now. Dumped several +20 flakes on the table and they just simply didn't move. Spray bar still needs some attention and will get to that after the yellow flies back off some here. Really bad this year. Planning another trip in mid July. |
|
|
|
|
Jun 14 2013, 06:56 AM
Post
#56
|
|
|
russau Group: Members Posts: 2,841 Joined: 4-December 03 From: st.louis missouri Member No.: 43 |
yep i really like my Miller table and i would like to make a staionary one for just in my garage. but untill i sell/throw away some stuff, i wont have any room. i getting to the point that im not able to get out to do much anymore because of my back. no more lifting of anything heavy! you have built a nice table! enjoy it!
|
|
|
|
|
Apr 14 2014, 11:50 PM
Post
#57
|
|
|
Shovel Buster! Group: Members Posts: 62 Joined: 31-March 12 From: Sopchoppy Fl Member No.: 42,369 |
Russ i can kinda under stant your back problems, due to my on problems . Been a while on this threat but thank you for nugging me toward ABS. I got the spray bar tuned in close with bigger holes and smaller pump. Some ripples still but hard to see. I have a auto feeder drawn up with 3 discharge ports for my sized table. With the ABS i ran with GG's fluid bed spects and still have the abs to do the auto feeder. Gluing was not as neat as i would have liked it to be but once it all set up i don't thank it can be pulled apart. Drilled some bad holes in abs but glued plugs back in hole and started over and ended up with very tight tolarance. I want to make the Douglas Creek trip and will know by early to mid June if i can pull it off. My wife may ride out or i may pick her up airport Laramie. The ABS is some fun stuff to work with
|
|
|
|
 |
| Lo-Fi Version | Time is now: 21st July 2025 - 04:14 PM |