Help - Search - Members - Calendar
Full Version: Lortone LU 6X Lapidary
Colorado Prospector - Gem and mineral prospecting and mining forums > Prospecting, Mineral Collecting and Treasure Hunting Forums > Equipment - Prospecting and Lapidary
swizz
This machine kinda just fell into my 'lap' recently. groucho.gif
Lortone LU6X, combo unit.... older model I believe
I have many questions as I know little about lapidary.
It has a small trim saw and two vertical wheels. The large wheel is dual purpose... the side has a leather or leather-like pad for polishing, flap-lap style (except the leather disc/pad is vertical).
The wheels are worn and may or may not need replacement.
What kinda projects can I expect to tackle with this unit? Thanks.
Denise
Sweet score Swizz! There are many things you can do with that unit. Seems its set up to trim slabs for your shapes, then your ready to grind. thumbsupsmileyanim.gif Your going to have a blast with it!

With a good imagination, the possibilities are endless.
happy112.gif
swizz
Thanks Denise,
There is still much for me to learn before experimenting with this machine.
I was able to go to the Lortone site and download a pdf LU6X Operation Manual and Parts List.
There are two components missing from this setup, not sure how critical they are: 1. Hood to reduce saw spray ($43), 2. Vise assembly ($36)
Ultimately, I'd like to run this setup indoors... is this a possibility? I'm sure that the hood would be an essential part for this.
Denise
I would have to check out the setup with the hood and vise. I more see the saw as a trimmer and not a slabber, and using it as a trimmer you wouldnt need the hood or the vise. You would have to rig some sort of splash guard in the front center, that way you can still get your hands in there to trim the slab for the shape you are wanting, and not get wet. I would definately think it could be used inside, its good practice to clean the unit entirely after every use anyways. happy088.gif Best way to see how messy it can get, is to test it out. Then you can see where the splash guards you make will need to go.
Just my opinion, some may do it alot different though.

The wheel on the left (rough) looks like it is silicone carbide, which means it will change shape and wear out quicker in time. Notice how much shorter the left one looks compared to the right wheel? I wouldnt recommend working anything harder than quartz on that one. You should be able to buy replacement wheel, and use diamond carbide instead if you desire.
swizz
I agree regarding silicone carbide vs diamond.
I also think the blade size and such will be more effective for trim rather than slabbing so I'll forget about the vise for now.
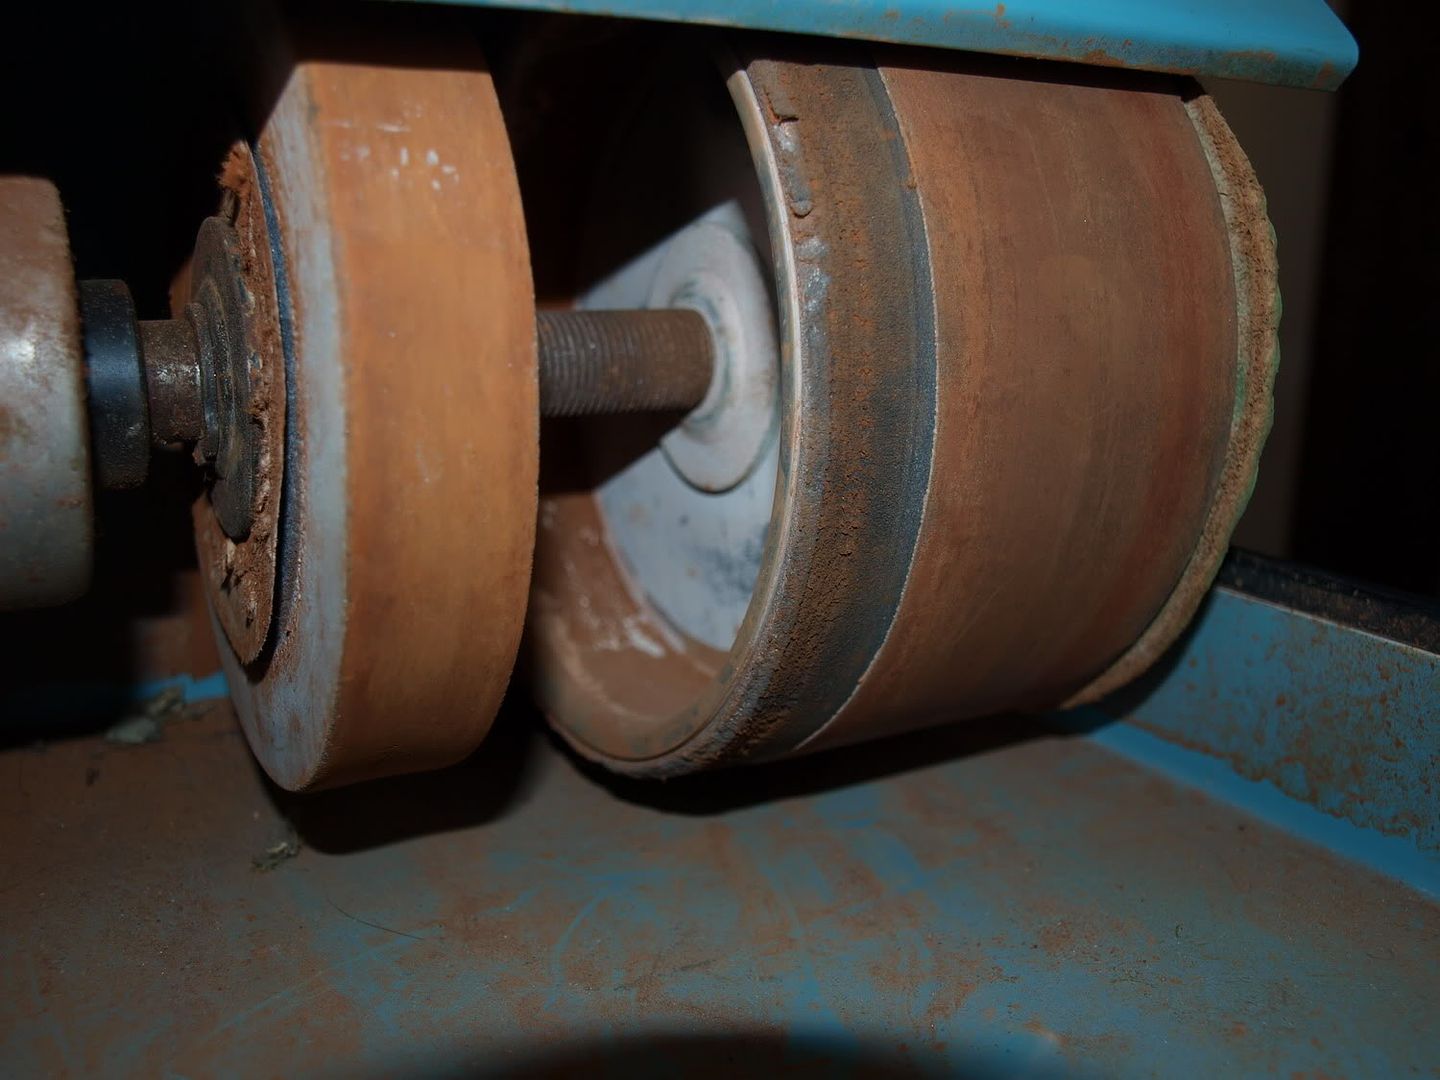
Regarding those two wheels: the left wheel (grinding wheel) will probably need replacement soon. The large wheel is a foam padded "sanding drum" which has a finer grit than the grinding wheel. Looks like the sanding belt on the drum would be easy enough to replace if necessary.

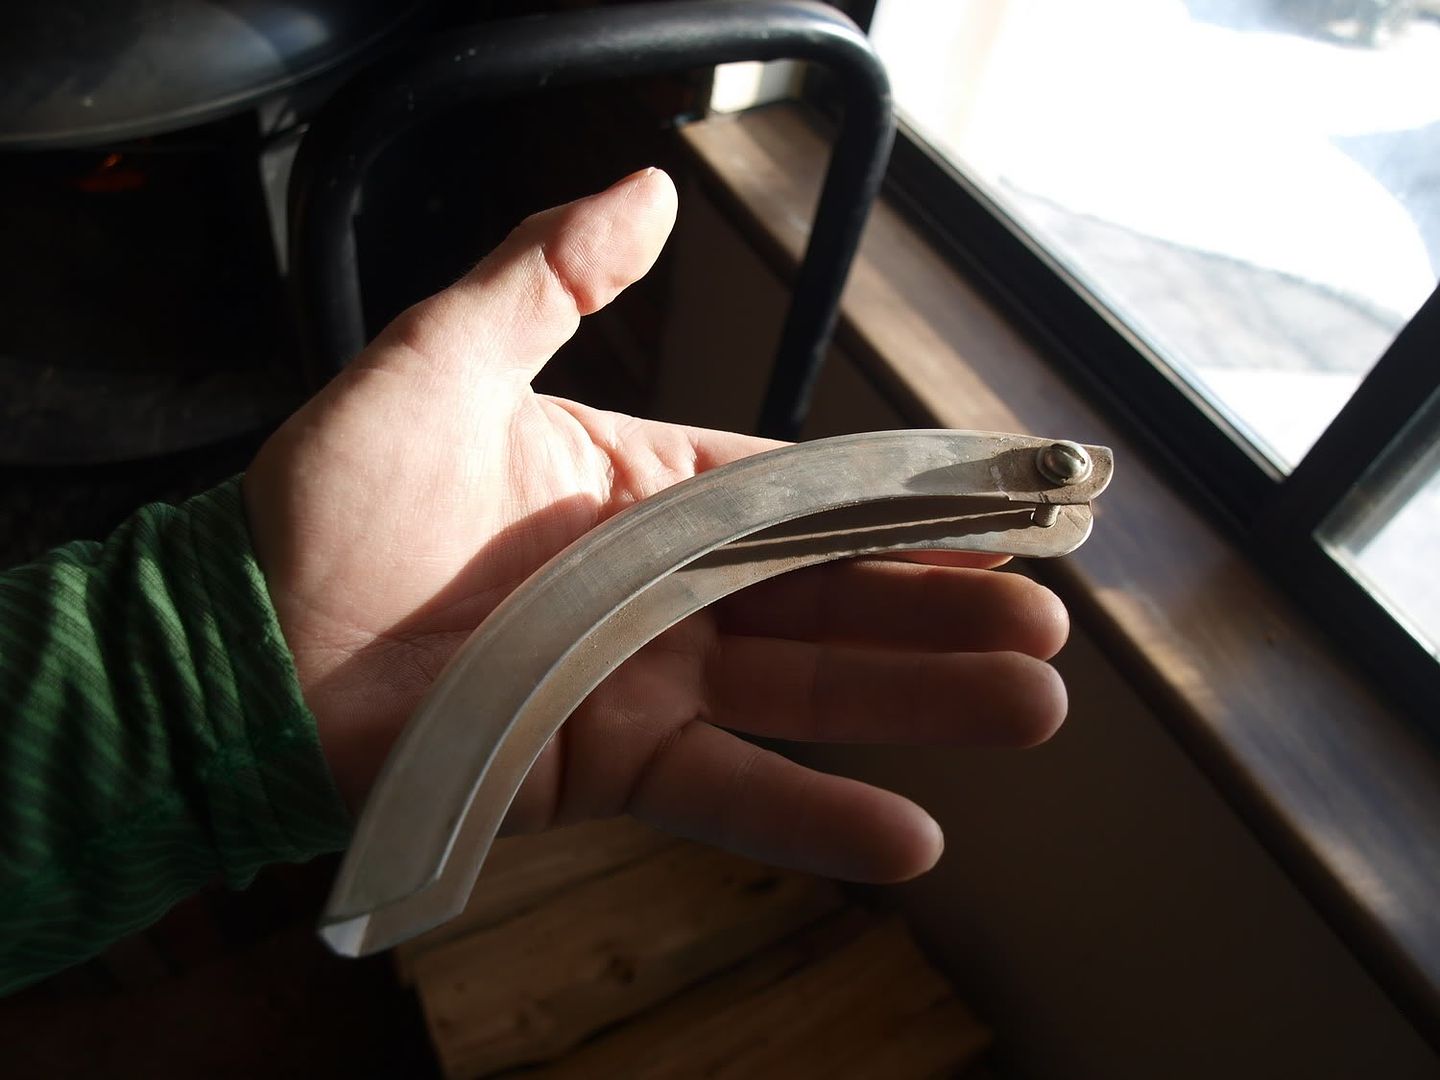
Here is a pic of the blade guard that came with it. This may be sufficient to thwart splashback with the trim saw.... or it just might be in the way if I'm hand-feeding.


This is a better pic of the grinding wheel and sanding drum
Denise
The splash guard your showing will help when hand feeding, it just drops over the top of the blade when attached.

The left wheel does look to be silicone carbide. The belt on the right one looks too small for the wheel though?
Leather polishing pads like what you have on the end wheel, work great wet with some polishing grit added! happy088.gif
swizz
QUOTE (Mrs.CP @ Mar 11 2011, 12:37 PM) *
The splash guard your showing will help when hand feeding, it just drops over the top of the blade when attached.

The left wheel does look to be silicone carbide. The belt on the right one looks too small for the wheel though?
Leather polishing pads like what you have on the end wheel, work great wet with some polishing grit added! happy088.gif

Yeah, that sanding belt looks a little narrow for the drum. These things will be easy enough to replace or upgrade. The Operating Manual suggests use of a recirc cooling system for grinding/sanding operations. The unit has two rubber fittings, one above each wheel designed for vinyl tubing insertion (which would feed coolant to the top of each wheel). There is also a drain hole on the sidewall of the cooling trough below the wheels (which now has a rubber plug in it). It shouldn't be too hard to fabricate a recirc cooling system with these features but any advice or plans would be great.
anyone.gif
CP
Cool unit Swizz. Yep shouldn't be hard to replace wheels and belts as needed and or upgrade to diamond carbide for rough in the future. I'm wondering if that belt has slipped over to the right and actually would normally ride with more of a gap between the prepolish and polish?

For the coolant system and tray the plug maybe used to hold water in the tray during saw blade opertaion? That is if the trays share water between the sections.
Then for shaping the rough grind and working to polish I'd bet the idea was to let the tray drain constantly and keep fresh clean water drips feeding.....that would keep cross contaminants to a minumum from one stage to the next where recircing during that time would be frustrating with all the rough material grindings getting mixed into a coolant feed such as a bubbler in the tray.
Ours uses the bubblers and keeps the water in the tray but also has the rough side seperated from the polish side so there is no cross contaminants from rough to finishing.

Gravity feed drippers should work for the fresh feed set up, possibly something similar to the drip bottle set up on the drip pan dremel set up maybe?

On the saw blade side you may want to add a plastic splash gaurd on the front of the table as well as use the blade cover you have....that will keep some more of the splashing down from the blade for using indoors. Old tupperware lids do well for this or similar, we just used a square shaped lid cut in half with a small tab left and bent over to clip it on the table front.

CP
swizz
QUOTE (ColoradoProspector @ Mar 14 2011, 10:27 AM) *
For the coolant system and tray the plug maybe used to hold water in the tray during saw blade opertaion? That is if the trays share water between the sections.

Yes, the coolant reservoirs are separated by a metal partition wall. The wall also has a rubber plug and I can combine the two reservoirs if desired by removing the plug. I know that different types of blades and wheels sometimes require different types of coolant so this is probably the reasoning behind that design.
I like the Tupperware lid idea!!
Thanks Dan!
This is a "lo-fi" version of our main content. To view the full version with more information, formatting and images, please click here.
Invision Power Board © 2001-2024 Invision Power Services, Inc.