
Knife Making |


 Colorado Prospector - Gem and mineral prospecting and mining forums > Miners Crafts, Goods & Classified ads > Prospector's Crafts & Creations
  |
Knife Making |
 Aug 18 2012, 09:07 PM Aug 18 2012, 09:07 PM
Post
#101
|
|
 Moderator  Group: Members Posts: 4,459 Joined: 25-August 09 From: way on up thar Member No.: 6,983 |
HRC 58-60 on this one.
-------------------- /l ,[____], l---L-OlllllllO- ()_) ()_)--o-)_) BLACK SANDS MATTER! Very Happy CP Lifetime Member CP CORE TEAM Referral Code CE213 |
 |
 
|
|
Aug 19 2012, 05:24 AM
Post
#102
|
|
|
russau Group: Members Posts: 2,841 Joined: 4-December 03 From: st.louis missouri Member No.: 43 |
thanks!
|
|
|
|
|
Sep 5 2012, 05:08 PM
Post
#103
|
|
|
Moderator Group: Members Posts: 4,459 Joined: 25-August 09 From: way on up thar Member No.: 6,983 |
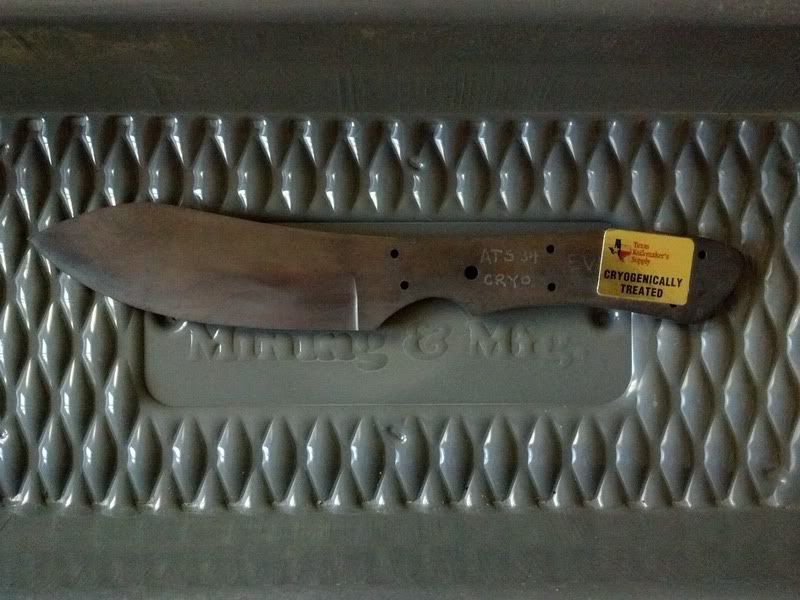
yaay.... back from heat treat.
-------------------- /l ,[____], l---L-OlllllllO- ()_) ()_)--o-)_) BLACK SANDS MATTER! Very Happy CP Lifetime Member CP CORE TEAM Referral Code CE213 |
|
|
|
|
Sep 9 2012, 01:31 PM
Post
#104
|
|
|
Moderator Group: Members Posts: 4,459 Joined: 25-August 09 From: way on up thar Member No.: 6,983 |
I've sanded the heat-treated Nessmuk blade to a mirror finish and am now working on the handle scales. After that I'll create a secondary bevel, or cutting edge. I'll post pics when it's completed.
Meanwhile, I was bored between knife builds while the Nessy was gone to heat-treatment so I tore apart a Gerber that I never liked and gave it a facelift. I used some more of that scrap mahogany flooring again for handle scales w/black spacer material. I also took a hand file and scalloped the spine for grip. I sanded off the black factory paint, rounded the front bolsters, removed the belt clip, and lowered the side profile and handle width little. I have two of these so it's like before & after pics. 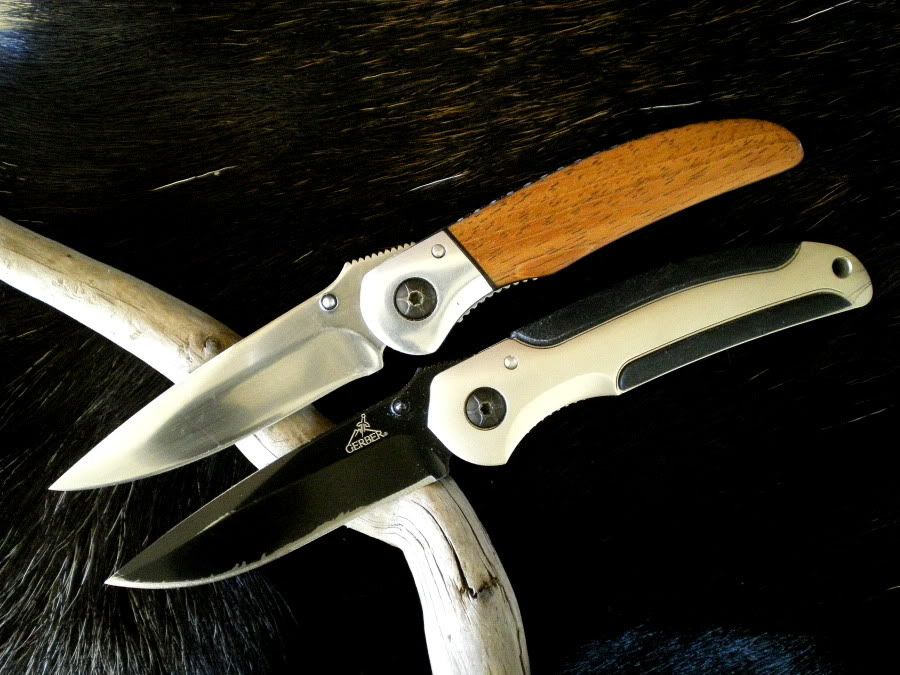 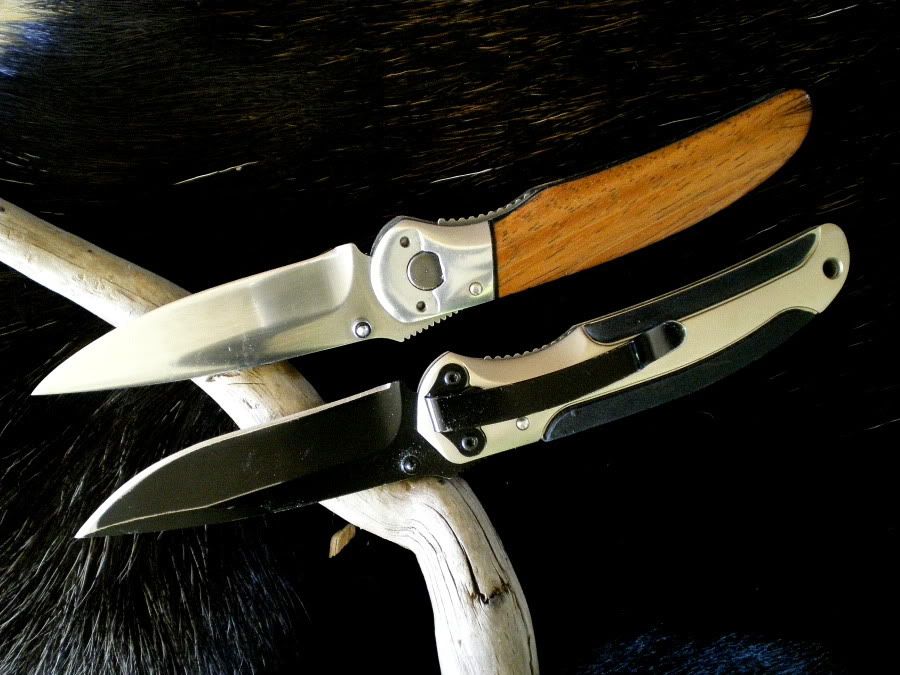 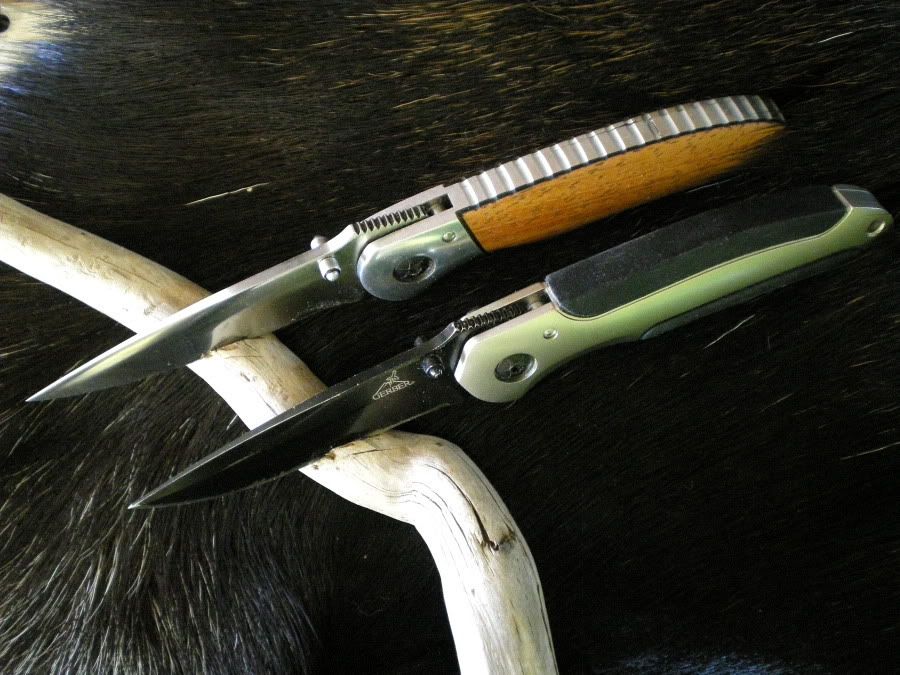
-------------------- /l ,[____], l---L-OlllllllO- ()_) ()_)--o-)_) BLACK SANDS MATTER! Very Happy CP Lifetime Member CP CORE TEAM Referral Code CE213 |
|
|
|
|
Sep 10 2012, 04:54 AM
Post
#105
|
|
|
russau Group: Members Posts: 2,841 Joined: 4-December 03 From: st.louis missouri Member No.: 43 |
and they just keep on comeing! really nice work!
|
|
|
|
|
Sep 10 2012, 09:43 AM
Post
#106
|
|
 Master Mucker! Group: Admin Posts: 7,187 Joined: 7-October 03 From: Colorado Member No.: 4 |
QUOTE (swizz @ Sep 9 2012, 01:31 PM)  I've sanded the heat-treated Nessmuk blade to a mirror finish and am now working on the handle scales. After that I'll create a secondary bevel, or cutting edge. I'll post pics when it's completed. Meanwhile, I was bored between knife builds while the Nessy was gone to heat-treatment so I tore apart a Gerber that I never liked and gave it a facelift. I used some more of that scrap mahogany flooring again for handle scales w/black spacer material. I also took a hand file and scalloped the spine for grip. I sanded off the black factory paint, rounded the front bolsters, removed the belt clip, and lowered the side profile and handle width little. I have two of these so it's like before & after pics. Nice modifications Chris, it looks great now!  The Nessy knife you made is coming along great, cant wait to see the finished piece. The Nessy knife you made is coming along great, cant wait to see the finished piece.
-------------------- Education is the key to the future,
and participation opens the door to opportunity. Discover your prospecting independence & success! ColoradoProspector.com Owner/Webmaster Core team member ♥  |
|
|
|
|
Sep 21 2012, 09:05 AM
Post
#107
|
|
|
Moderator Group: Members Posts: 4,459 Joined: 25-August 09 From: way on up thar Member No.: 6,983 |
Nessmuk update...
I'm in the finish stages now, still doing everything by hand. The handle scales are attached and finished but I'm not showing them until completion.  In this pic I am hand-sanding the blade to a mirror finish starting with #80 grit and working my way down to #1500 to remove all scratches. If you look toward the ricasso I have added a choil. A choil is the indentation near the rear of the cutting edge. This is to create a clean termination of the cutting edge at the rear of the blade. 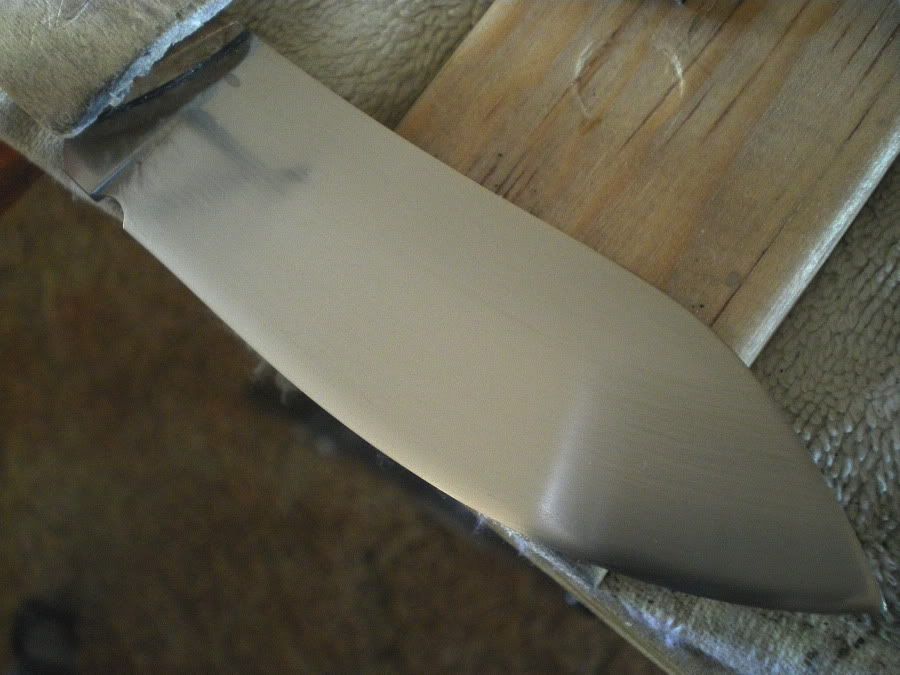
-------------------- /l ,[____], l---L-OlllllllO- ()_) ()_)--o-)_) BLACK SANDS MATTER! Very Happy CP Lifetime Member CP CORE TEAM Referral Code CE213 |
|
|
|
|
Sep 21 2012, 11:34 AM
Post
#108
|
|
|
russau Group: Members Posts: 2,841 Joined: 4-December 03 From: st.louis missouri Member No.: 43 |
HUMMMMM? your handmade knifes make my $9.50 pocket knife look.................well,can i say,not nearly as impressive!
|
|
|
|
|
Sep 22 2012, 06:34 AM
Post
#109
|
|
|
Master Mucker! Group: Admin Posts: 7,187 Joined: 7-October 03 From: Colorado Member No.: 4 |
Top notch work tends to do that Russ. It's coming along great!!
-------------------- Education is the key to the future,
and participation opens the door to opportunity. Discover your prospecting independence & success! ColoradoProspector.com Owner/Webmaster Core team member ♥ |
|
|
|
|
Sep 23 2012, 09:27 AM
Post
#110
|
|
|
Moderator Group: Members Posts: 4,459 Joined: 25-August 09 From: way on up thar Member No.: 6,983 |
Not really "top notch"... I'm not an accomplished maker yet and have been doing the old "Texas two-step" (one step forward, two steps back) more times than I care to admit, but definitely appreciate the compliments!
I'm nearing the finish line (I hope). I've begun the sharpening process. I've opted to have a satin finish on this blade as per recommendations from the pros. The blade is now sanded to #400 grit (rather than #1500 which I originally planned) because "mirror finish" is primarily used for "presentation" knives and I want this one to be a workhorse. I like the satin finish. The blade is now taped while I sharpen to protect my finish work. 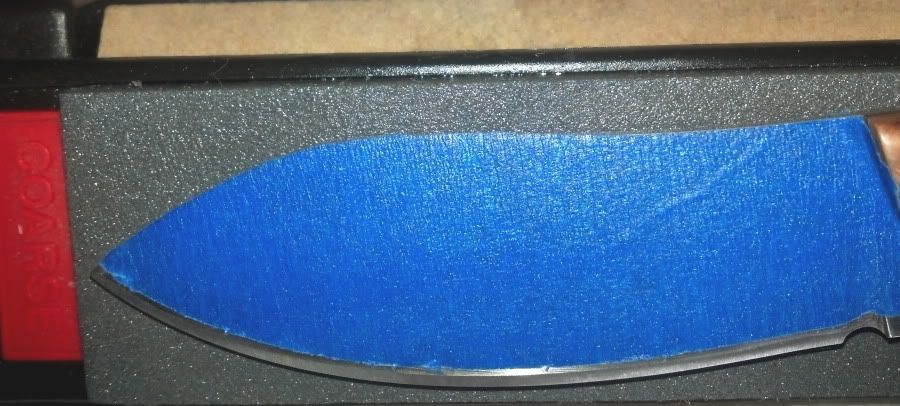
-------------------- /l ,[____], l---L-OlllllllO- ()_) ()_)--o-)_) BLACK SANDS MATTER! Very Happy CP Lifetime Member CP CORE TEAM Referral Code CE213 |
|
|
|
|
Sep 23 2012, 03:57 PM
Post
#111
|
|
|
russau Group: Members Posts: 2,841 Joined: 4-December 03 From: st.louis missouri Member No.: 43 |
Chris they all look "accomplished" to me!
|
|
|
|
|
Sep 24 2012, 09:14 AM
Post
#112
|
|
|
Moderator Group: Members Posts: 4,459 Joined: 25-August 09 From: way on up thar Member No.: 6,983 |
Not sure if I mentioned this but my Dad's birthday is on Halloween. I plan on sending this to him for his birthday gift. He turns 90 but still has plenty of fire left.... still actively working on our U.P. home, hunting camp, and cottage along with many other projects and gardens. Safe to assume he will put this knife to work!
Knife is now completed and has a razor-sharp edge. I will be ready to ship it in time.  Two things I wish I could complete before sending it to him: 1. Wish I knew how to make a sheath, I will eventually. I have ZERO sheath-making skills or knowledge so I am now making a display base for it instead. Would like to present both sheath and base with the knife but not possible. 2. Maker's mark. I have created my maker's mark artwork (jpg format) but I think it would be a push to expect to have an etching service create my stencil and apply it to the blade in time. Here's a picture of the base I am making from a nice piece of scrap Maple. The knife will be positioned on a small piece of driftwood from Lake Superior that my Mom sent me a while back. 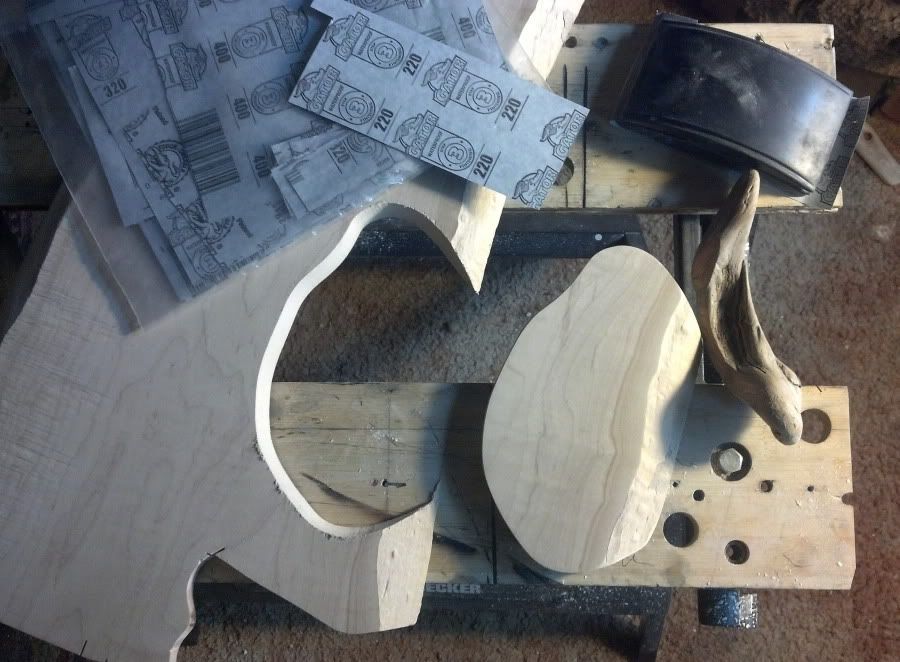
-------------------- /l ,[____], l---L-OlllllllO- ()_) ()_)--o-)_) BLACK SANDS MATTER! Very Happy CP Lifetime Member CP CORE TEAM Referral Code CE213 |
|
|
|
|
Sep 26 2012, 06:29 AM
Post
#113
|
|
|
Master Mucker! Group: Admin Posts: 7,187 Joined: 7-October 03 From: Colorado Member No.: 4 |
Your dad is going to love it Chris!!
-------------------- Education is the key to the future,
and participation opens the door to opportunity. Discover your prospecting independence & success! ColoradoProspector.com Owner/Webmaster Core team member ♥ |
|
|
|
|
Sep 26 2012, 09:34 AM
Post
#114
|
|
|
Moderator Group: Members Posts: 4,459 Joined: 25-August 09 From: way on up thar Member No.: 6,983 |
Thanks Denise! I think so too. He better or I'm cutting him out of the will. oh wait... that should be the other way around.
Meanwhile, while I'm finishing the base for the Nessmuk (I'll picture that base and knife later)... I have purchased another billet of good steel for Woody's knife. Woody, I need your input as to what style of knife you'd have most use for. 1. Nessmuk? A good all-around blade 2. Drop Point Hunter? You may already have enough of these. 3. Skinner? Can never have enough of these 4. Bowie? sorry, I don't have those skills yet  Just let me know bud, I'm itching to get started on it. 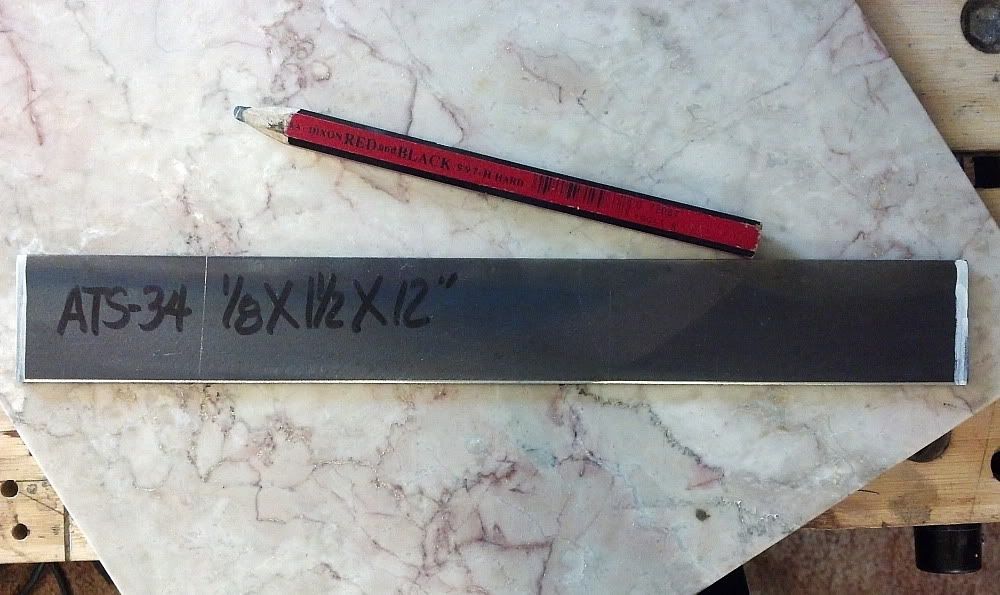
-------------------- /l ,[____], l---L-OlllllllO- ()_) ()_)--o-)_) BLACK SANDS MATTER! Very Happy CP Lifetime Member CP CORE TEAM Referral Code CE213 |
|
|
|
|
Sep 26 2012, 12:02 PM
Post
#115
|
|
|
russau Group: Members Posts: 2,841 Joined: 4-December 03 From: st.louis missouri Member No.: 43 |
just a suggestion for Woodys knife, make it into a throwing knife so he can point out where the gold is! :)
|
|
|
|
|
| Lo-Fi Version | Time is now: 24th April 2024 - 05:32 PM |


