Advice with crack/fracture repair |


 Colorado Prospector - Gem and mineral prospecting and mining forums > Prospecting, Mineral Collecting and Treasure Hunting Forums > Gem and Mineral Specimen Finds or Processes
  |
Advice with crack/fracture repair |
 Oct 1 2010, 07:46 AM Oct 1 2010, 07:46 AM
Post
#1
|
|
 Shovel Buster!  Group: Members Posts: 106 Joined: 22-July 10 From: Whitehall, Pennsylvania Member No.: 7,317 |
Just attended 2nd class of a "Beginning Cabochon" course I am taking and I am learning a lot
 . I was working on the CabKing 280 wheel doming my 30-40mm oval jasper cab and class was ending so dried off stone and checked a small inclusion I was keeping my eye on and it is now a thin fracture line . I was working on the CabKing 280 wheel doming my 30-40mm oval jasper cab and class was ending so dried off stone and checked a small inclusion I was keeping my eye on and it is now a thin fracture line  . It starts at the edge and runs almost parallel to the edge of the stone 2-3mm in from the edge before ending at the edge an inch away from where it starts. It looks like that piece could completely crack off the stone if I continue to work it and the cab still needs some doming before moving on to 600 etc. I told the instructor and asked her if a 2 part epoxy could be used and then continue shaping/polishing etc and she said I could try that next week or I could pick another slab next week and start over. Starting over is no big deal because I know I can get back to where I am in one class. I have already decided that I am going start a new cab next week. . It starts at the edge and runs almost parallel to the edge of the stone 2-3mm in from the edge before ending at the edge an inch away from where it starts. It looks like that piece could completely crack off the stone if I continue to work it and the cab still needs some doming before moving on to 600 etc. I told the instructor and asked her if a 2 part epoxy could be used and then continue shaping/polishing etc and she said I could try that next week or I could pick another slab next week and start over. Starting over is no big deal because I know I can get back to where I am in one class. I have already decided that I am going start a new cab next week.I might make a smaller piece from this cracked cab, maybe a guitar pick!  I have 2 questions: 1. If I choose to make a guitar pick and trim it down to guitar pick size (cutting off the fractured portion), I need to thin the piece since it is thin for a cabochon but too thick to be a guitar pick even for me. I like thicker picks 2-3mm range but the cab is now 5mm. Do I thin it on a flat lap or some other method? 2. I probably will not attempt to repair the fracture but want to know the best ways to repair cracks and fractures because I am sure I will encounter them in the future. I have not worked with stone prior to last week but think a few methods of repair could work. I would think that heating a stone opens a fracture and would also further liquify an epoxy upon contact and allow it to fully seep in. Is heating a stone to repair it this way a good idea? What type of epoxy is good for use on stone? Another method is to fully submerge the piece in heated liquid plastic to let it fill a crack or fracture. These are just theories based on working with other materials so I do not know how well they would work on stone. Any advice, tips, experiences?  Thanks! |
 |
 
|
|
Oct 1 2010, 11:25 AM
Post
#2
|
|
 Master Mucker! Group: Admin Posts: 4,149 Joined: 7-October 03 From: Colorado Member No.: 3 |
Hi GuitarC,
Rats, a fracture dag bloomit! That will happen and it's always best to try to identify those as soon as possible and to cut around/eliminate those from the cutting of the final piece. Still though, you will find at times, small inclusions will often have a fracture or seam associated with them and the vibrations from the rough grinding stage can cause that fracture to run a bit further even. Best thing to do is still try to work that out of the stone and yes even changing shapes to do so, you'll be much happier with the end results, fractures when finished will just urk any cutter.  Then you'll walk around the shop doing one of these numbers. Then you'll walk around the shop doing one of these numbers.   Thinning out the stones overall thickness once it's already been cut in the slab is quite difficult to keep any consistency but you maybe able to do it on either the drums/cab machine or a flat lap. The trick will be to keep the surface your grinding flat for that consistency across the piece. Give it a shot and let us know how it turns out. For mending or stabilizing cracked stones (common practice with gold in quartz matrix), there is a product called opticon which is a popular choice to use. The instructions discuss oven baking to warm the stone and help mend or fill surface cracks, however......For most cutters who use it to actually stablize a matrix stone the oven is not used at all. Instead the process is more about thinning the opticon (2 part epoxy) once mixed with about 50% acetone. Once mixed up with the two part epoxy and acetone, submerge the stone in the mixture and leave it soak for approximately 1 week. This thinned out mixture can soak into all the cracks of the stone over that period and then you need to let it cure for the same time frame once it's removed from the mixture. Use a container with lid so not to let the acetone evaporate during the soak time and disposable containers are best for this. Some cutters step this process up a notch to shorten the time it takes too, for that they'll use a vacum system to help the opticon mixture penetrate the voids/cracks faster by removing the oxygen/pressure within the stone allowing the epoxy/acetone to saturate the entire piece in a much shorter time frame. Heating the stone could also help this process but.....heating or cooling to rapidly will ruin just about any stone through the heat or cooling. Some stones are very sensitive to temp changes or to much heat like opals. Get them too hot and you'll have no more color flash. Hope this helps some and have lots of fun in the next class too. CP -------------------- CP-Owner/Administrator
www.ColoradoProspector.com IF YOU USE IT, THE GROUND PRODUCED IT! MINERS MAKE "IT" HAPPEN!! |
|
|
|
|
Oct 1 2010, 02:39 PM
Post
#3
|
|
|
Shovel Buster! Group: Members Posts: 106 Joined: 22-July 10 From: Whitehall, Pennsylvania Member No.: 7,317 |
Thanks for the great information CP!
Since the back of the hairline fractured cab is already flat, I thought it would not be too difficult to use a flat lap (80 or 100 grit) and take off around 2mm from the backside. One thing about the cab as it is right now is that I was working on making it more domed, specifically the top because it was a flat spot. This negative for making it a cab would now be a positive for making a guitar pick, especially a stubby size.  I'll have to see how it goes. My main focus is going to be catching up by picking out a new slab next week and starting over. |
|
|
|
|
Oct 5 2010, 11:52 AM
Post
#4
|
|
|
Shovel Buster! Group: Members Posts: 60 Joined: 4-October 10 From: Sweden Member No.: 7,387 |
For fractures that don't run to deep a cyanoacrylate based glue can help, prefered with high viscosity.
It helps the stone to hold together while you can cut away the shallow fracture. (and the glue) For deeper cracks I agree with CP on opticon. -------------------- Geologists are gneiss, tuff and a little wacke.
|
|
|
|
|
Oct 5 2010, 02:53 PM
Post
#5
|
|
|
Shovel Buster! Group: Members Posts: 106 Joined: 22-July 10 From: Whitehall, Pennsylvania Member No.: 7,317 |
Thanks Voltaire
 |
|
|
|
|
Oct 8 2010, 12:55 PM
Post
#6
|
||
|
Shovel Buster! Group: Members Posts: 106 Joined: 22-July 10 From: Whitehall, Pennsylvania Member No.: 7,317 |
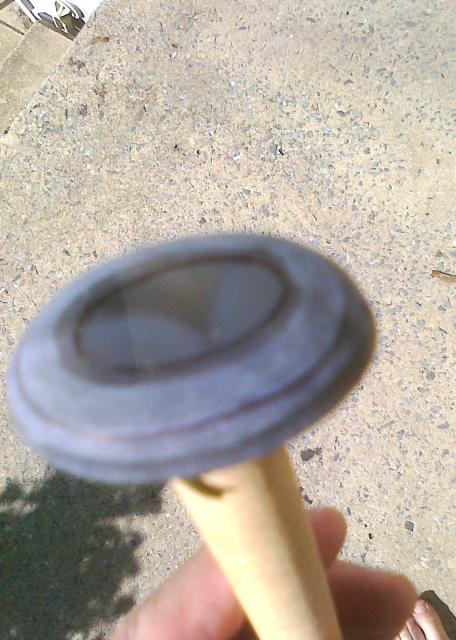
Had my 3rd Beginning Cab class yesterday and I was able to do what I planned this week. I got a new rough slab since the cab I worked on the first 2 classes has a decent sized fracture that I did not want to mess with now. It's a piece of brazilian agate that's thicker than my first cab and has some nice colorings of blue, gray and green. I drew out my shape then trimmed it on a trim saw and used a 100 grit wheel and with about 30 minutes of grinding so far, things moved much quicker since I know a little more the 2nd time around. I put a chamfer on after putting on a good angle for the bezel to grab and then dopped it and grinded between the girdle and my drawn guidelines to create a few terraces using a 100 grit wheel. It's nothing pretty yet and my Palm Pre camera does not show details up close but the basic shape and hazed color can at least be seen.
|
|
|
|
|
|
|
Oct 8 2010, 02:08 PM
Post
#7
|
|
|
Shovel Buster! Group: Members Posts: 60 Joined: 4-October 10 From: Sweden Member No.: 7,387 |
GC,
Looks good!! Quick tip: When tacking pictures use the "macro" setting on the camera, often displayed as a (yellow) flower symbol. -------------------- Geologists are gneiss, tuff and a little wacke.
|
|
|
|
|
Oct 8 2010, 02:58 PM
Post
#8
|
|
|
Shovel Buster! Group: Members Posts: 106 Joined: 22-July 10 From: Whitehall, Pennsylvania Member No.: 7,317 |
Thanks Voltaire!
I am familiar with the "macro" setting but other than flash controls on the Palm Pre camera, the camera has no other adjustment capabilities that can be made prior to taking a photo. Despite not having zoom, macro or any lense adjustment capabilities, it's camera and video are very fast and user friendly. I can take photos and send them via email or text messages within seconds. I can even shoot a video and trim it and text or email it in less than a minute. Palm Pre Camera Voltaire do you know of an application for the Palm Pre that adds more camera features? It might be out there since the Pre does have some great apps.
|
|
|
|
|
Oct 9 2010, 02:43 AM
Post
#9
|
|
|
Shovel Buster! Group: Members Posts: 60 Joined: 4-October 10 From: Sweden Member No.: 7,387 |
No I'm afraid I'm not even familiar with that camera, for taking my pics I just use my cell phone.
-------------------- Geologists are gneiss, tuff and a little wacke.
|
|
|
|
|
Oct 9 2010, 09:54 AM
Post
#10
|
|
 Master Mucker! Group: Admin Posts: 7,187 Joined: 7-October 03 From: Colorado Member No.: 4 |
Your doing great GuitarC! Keep up the good work, and satisfaction will come in no time.
Did you dop with wax, or just use superglue? Hi Voltaire, and welcome to the CP forums. 
-------------------- Education is the key to the future,
and participation opens the door to opportunity. Discover your prospecting independence & success! ColoradoProspector.com Owner/Webmaster Core team member ♥  |
|
|
|
|
Oct 9 2010, 11:36 AM
Post
#11
|
|
|
Shovel Buster! Group: Members Posts: 106 Joined: 22-July 10 From: Whitehall, Pennsylvania Member No.: 7,317 |
Thanks Mrs. CP!
I did dop with wax. The one negative about there being 8 students in this class is sometimes having to wait for a saw, grinder or to dop. I had to wait for 10 minutes til I was able to heat my stone and dop it.  However, I used this time wisely and went through the slab drawers and found some good material for future projects
|
|
|
|
|
| Lo-Fi Version | Time is now: 19th April 2024 - 11:55 AM |