Printable Version of Topic
Click here to view this topic in its original format
Colorado Prospector - Gem and mineral prospecting and mining forums _ Gem and Mineral Specimen Finds or Processes _ Scott's Rock Shop
Posted by: ScottKS Mar 30 2007, 11:22 PM
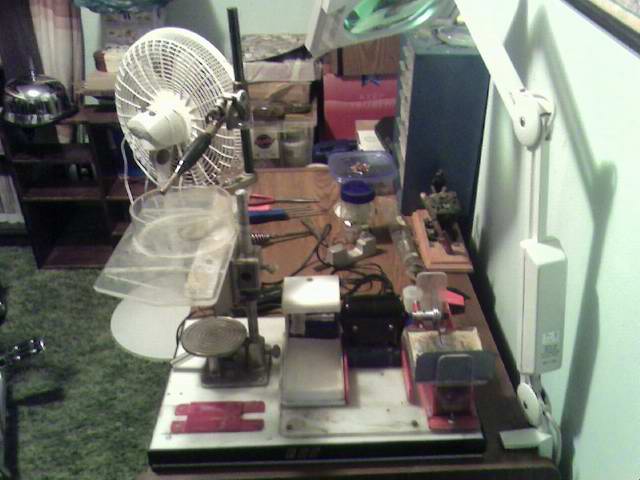
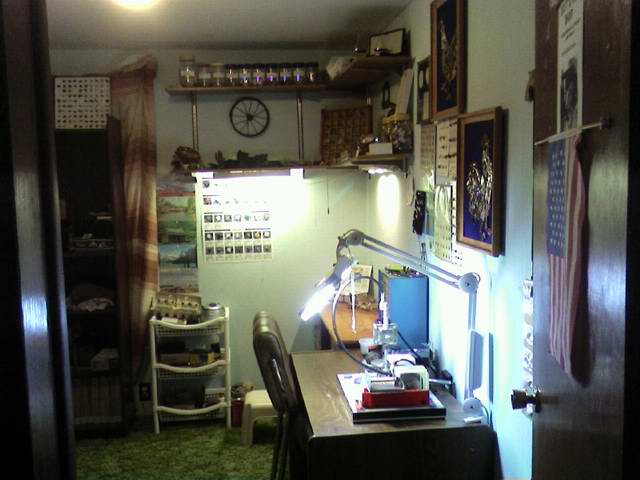
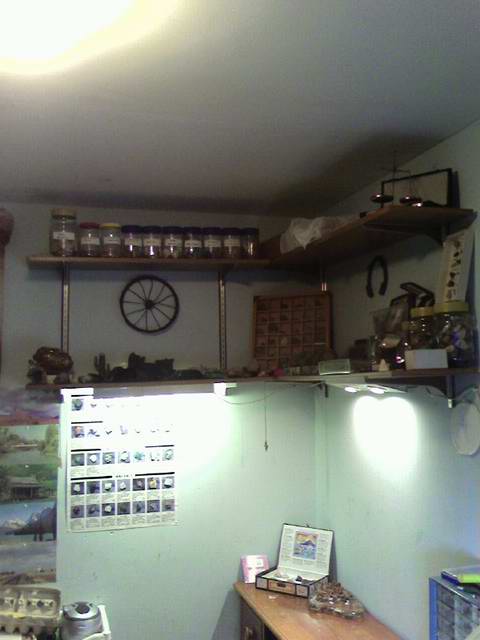
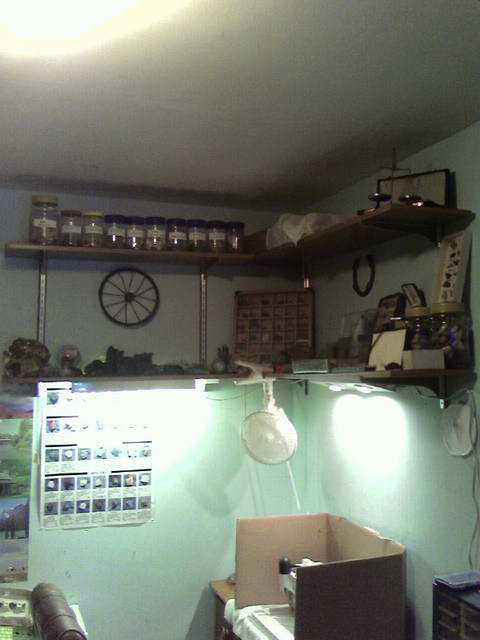
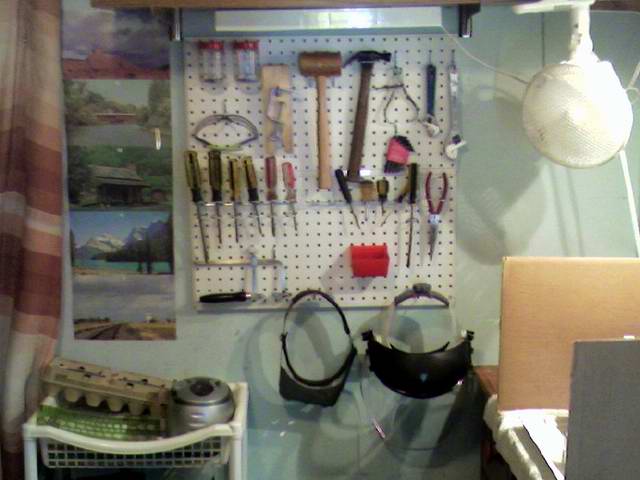
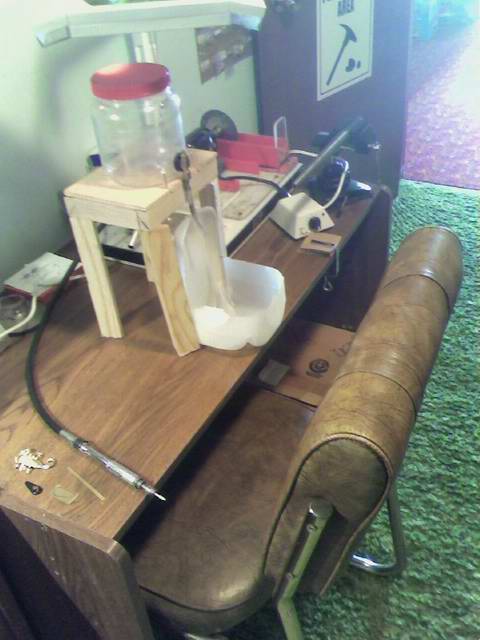
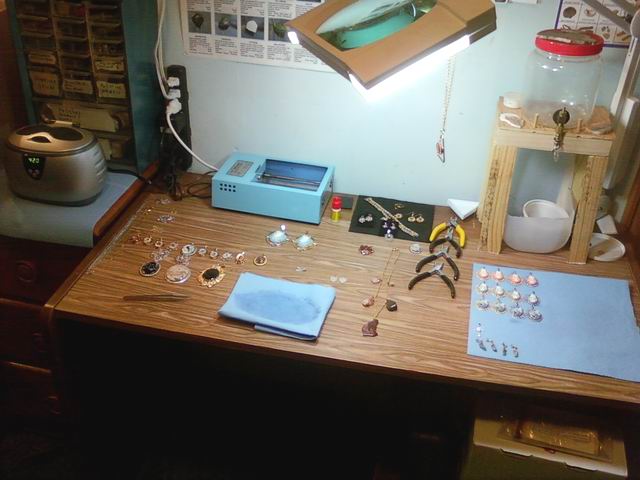
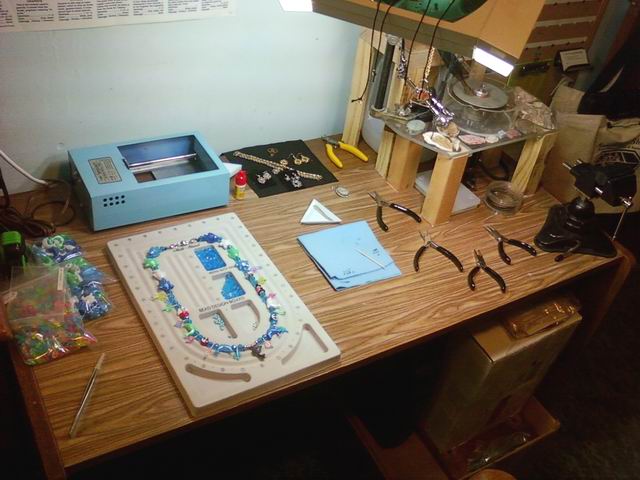
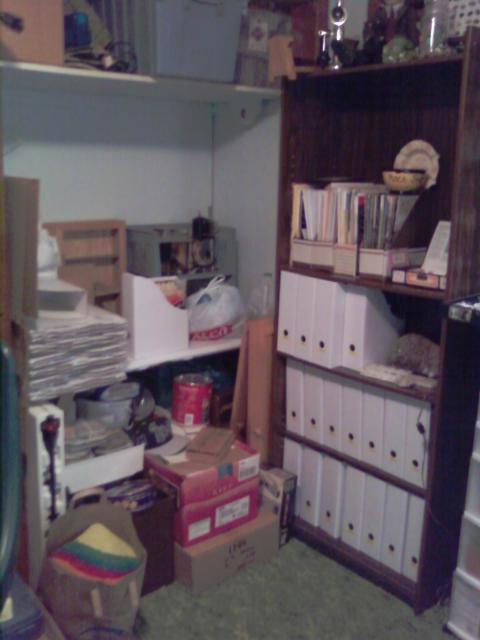
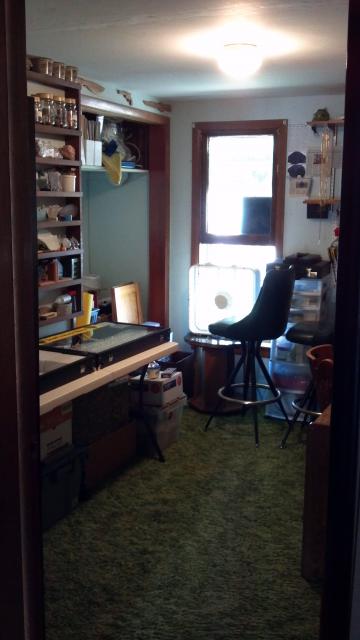
Here is some pictures of my rock shop in progress.....these pics are the before  am still decideing if i want to set it all back up because everything in the boxes in that cornor use to be on those shelfs on the wall....as u can see dad has his lil chopper still in there and that is a hazard
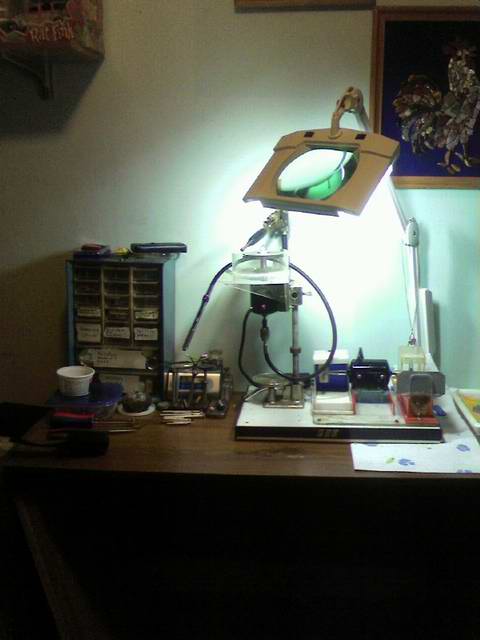
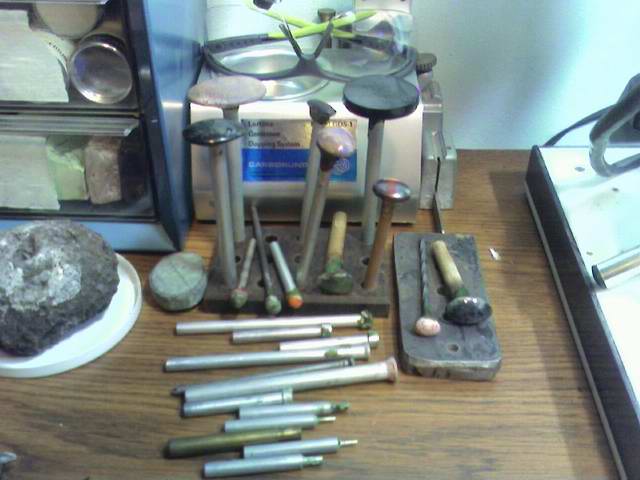
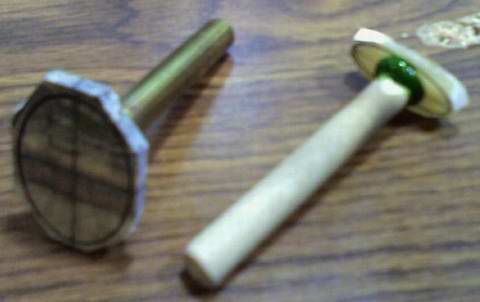
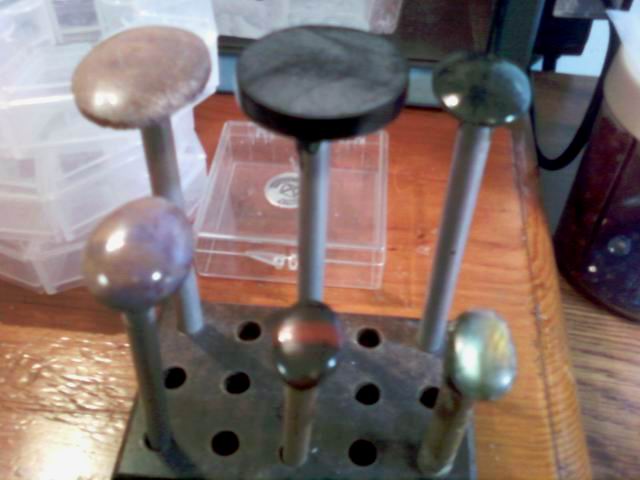
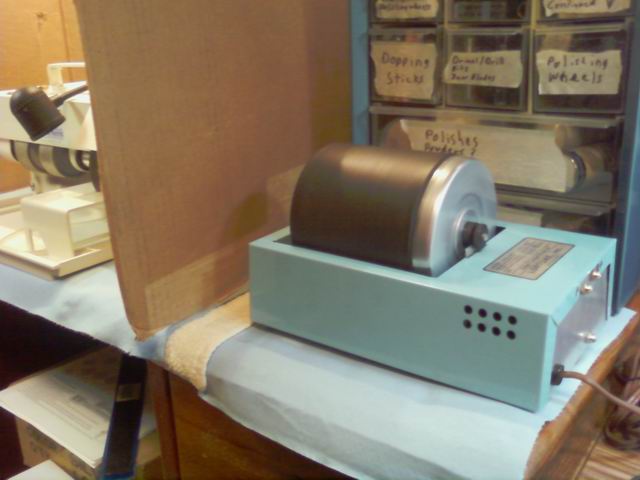
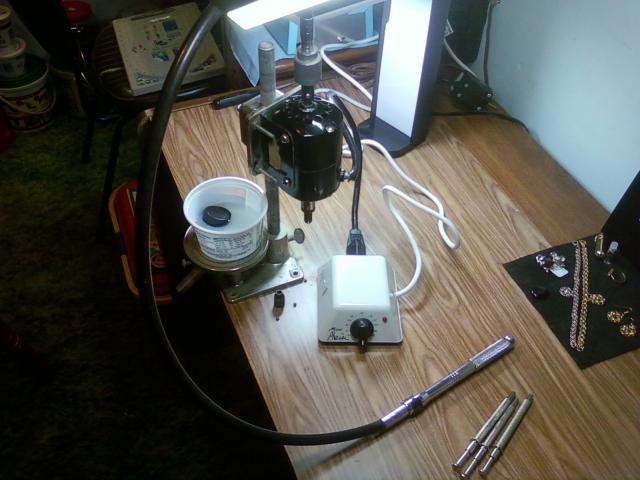
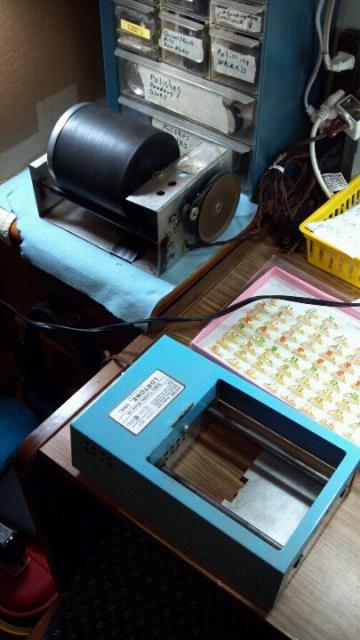
  hopefully we will get that out this weekend so i will have more room to play with....the last pic is a pic of my lapidary or (PDQ as it says on the front....not sure yet what that stands for but it is a lil table top lapidary) right now it is setup for faceting (without the disk in the platform) and drilling right below that on the left side and a lil polishing wheel on the left and then the trim saw on the right on the motor. This is just the begining........there will be more

Posted by: ScottKS Mar 30 2007, 11:24 PM
The Lapidary or PDQ
Posted by: ScottKS Mar 31 2007, 06:32 PM
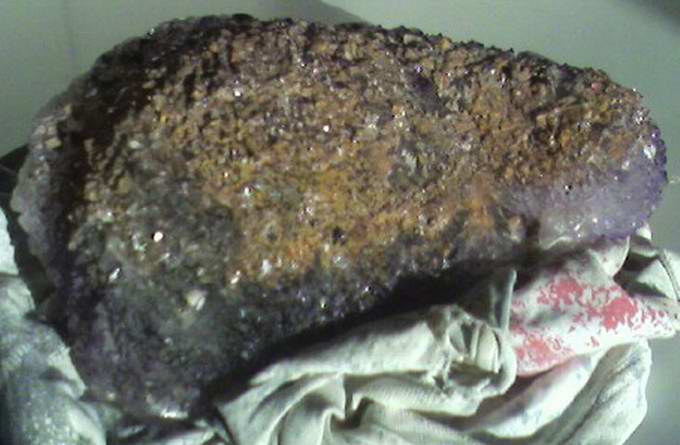
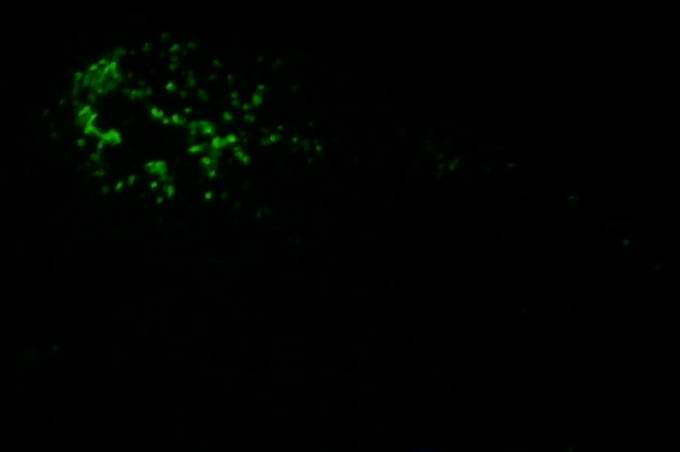
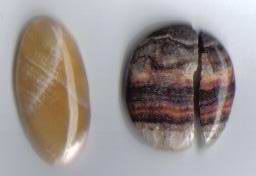
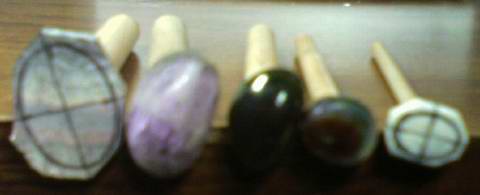
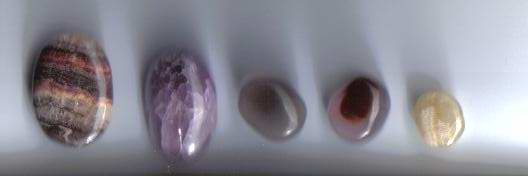
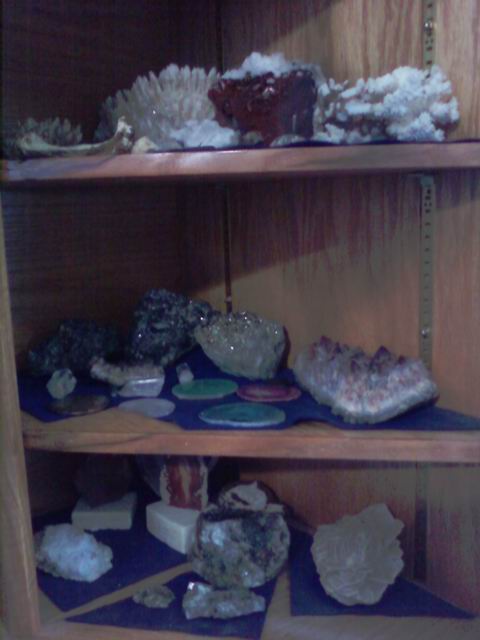
Here is my collection of Floresent Rocks.....the first 3 are the befores and the last 4 are under the UV light..........sorry if the pictures are hard to see......with it being dark the camera don't seem to capture it very well........this first pic is big Florite i think.
Posted by: ScottKS Mar 31 2007, 06:34 PM
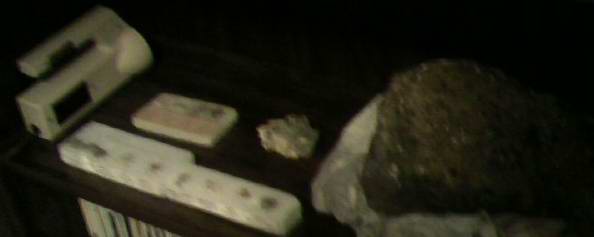
the rest.......that big white rock is Calcite....it's black under the UV light so i'm not posting that one.
Posted by: ScottKS Mar 31 2007, 06:35 PM
The cabnet
Posted by: ScottKS Mar 31 2007, 06:36 PM
Ok now for the dark ones.........this is the florite in the dark
Posted by: ScottKS Mar 31 2007, 06:43 PM
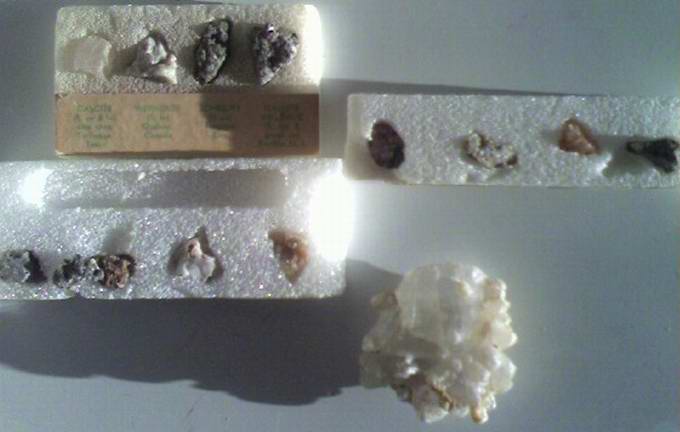
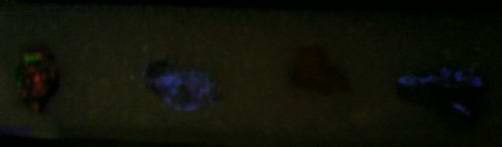
Willemite & Calcite/Franklin, N. J./Fl. Green & or Red, Hydrozincite/Goodsprings, Nev./Fl. Blue, Halite/Salton Sea, CA/Fl. Red and Scheelite/Shadow Mts., CA/Fl. Blue, Cream, Yellow.
Posted by: ScottKS Mar 31 2007, 06:54 PM
Calcite/Tres Hermanos Mts. N. Mex/Fl. Red, Scheelite/Gabbs, Nev./Fl. Blue-Cream-Yellow, Opalite/Barstow, CA/Fl. Green, Aragonite/Crestmore CA/Fl. White-Cream (sorry didn't show up)

Posted by: ScottKS Mar 31 2007, 06:59 PM
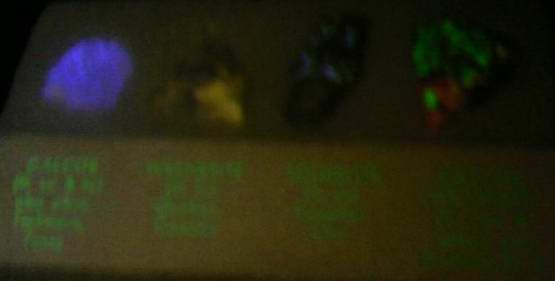
OK last one.......Calcite (fl. sw & lw) also phos. Terlinqua, Texas.......Wernerite (fl. lw) Quebec, Canada......Scheelite (fl. sw) Tungsten Ore........Calcite Willemite (fl. red & green sw) Franklin, N.J.
Posted by: ScottKS Mar 31 2007, 10:19 PM
Lapidary Update
Posted by: ScottKS Mar 31 2007, 10:22 PM
Look i just got started and i already have cabs to do lol.........these are cabs that Granny or Granps started and didn't finish so i guess it's up to me to finish them BUT i still need more equipment...this lil lapidary will just be too much to get cabs done...i need a 4 wheeler like Dan and Denise has  ..........i am getting a good start though I THINK lmao
Posted by: ScottKS Apr 5 2007, 03:20 PM
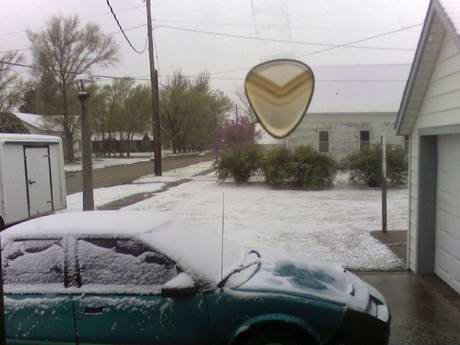
Here is some pics of my winnings from the contest..........THANKS SO MUCH DAN AND DENISE THEY ARE AWSOME.............this first pic is of the cabs.....sorry if the pic is hard to see and the second is of the guitar pick.........you see what we got today DANG SNOW.....EEERRRRR
Posted by: ScottKS Apr 5 2007, 03:23 PM
ERR
Posted by: jim Apr 6 2007, 08:17 AM
wow scott. looks like your set to go.now i want to see some cabs by scotty.
Posted by: ScottKS Jul 22 2007, 11:08 AM
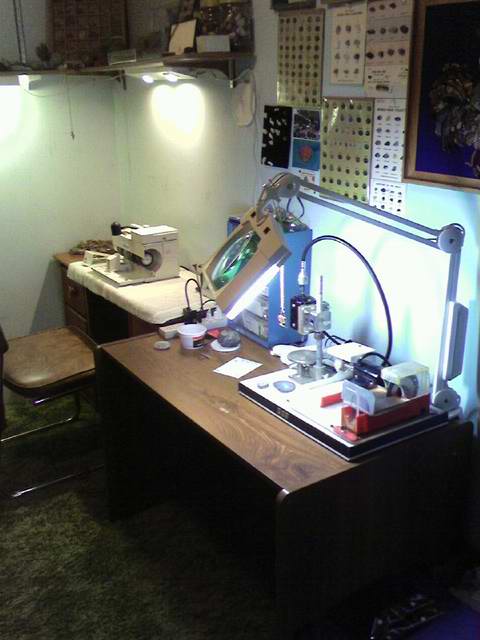
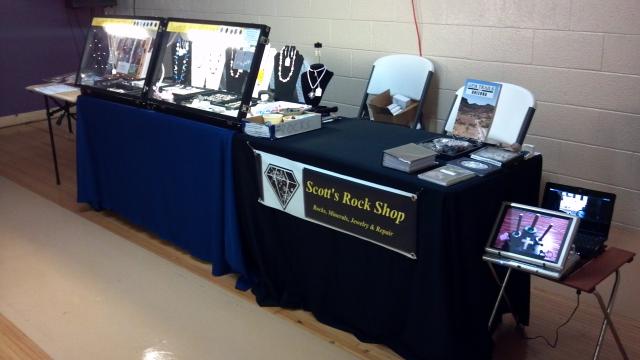
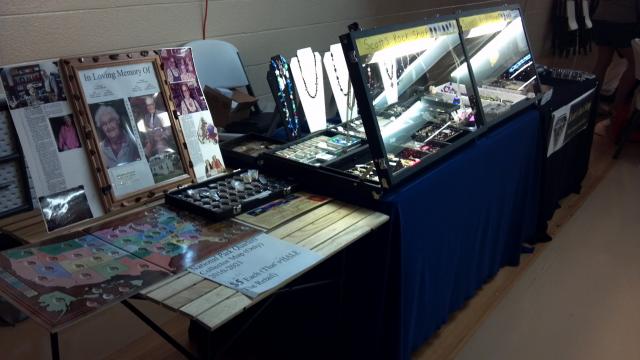
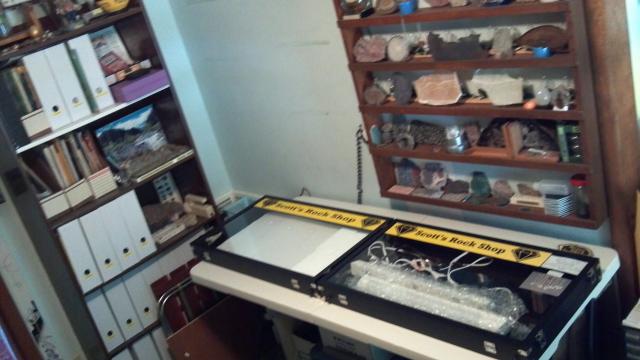
Here is some updated pictures of my rock shop.......this is how it use to be setup...only thing new is the long desk used to be on the other wall........only thing missing is my cabing machine.......here is a link on one i'm looking forward getting
http://www.4facets.com/diamondpacific_BigFoot.html
Posted by: ScottKS Jul 22 2007, 11:09 AM
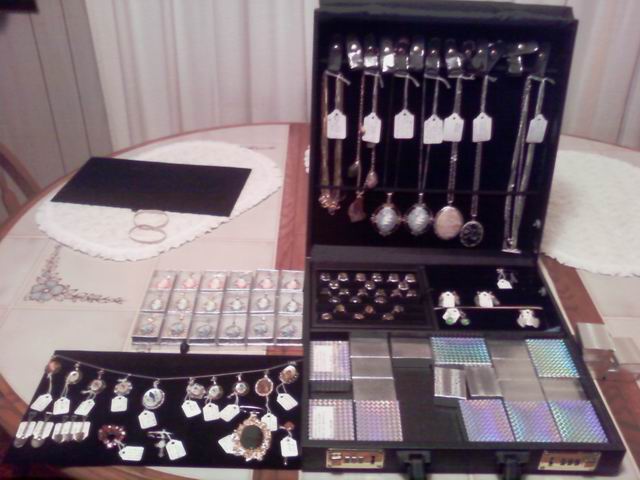
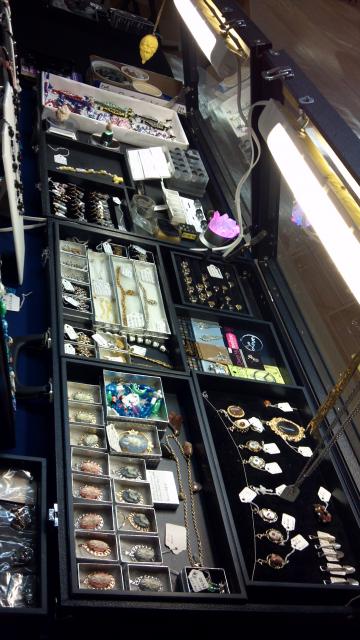
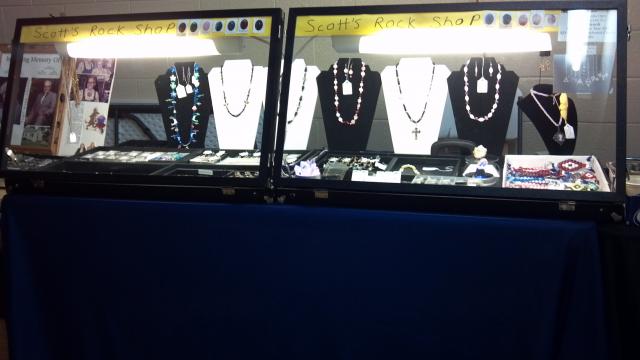
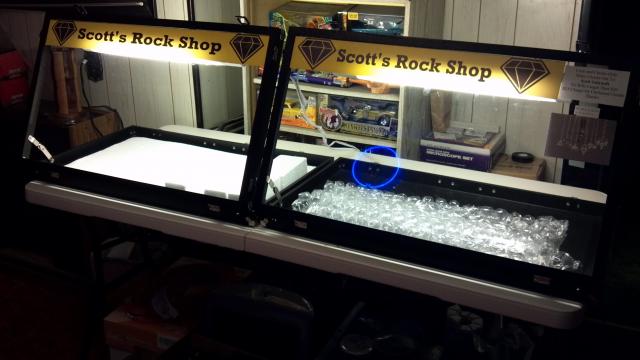
Displays
Posted by: ScottKS Jul 31 2007, 04:28 PM
Here is a cool site to see what cabs and gemstones are going for
http://www.multicolour.com/single.html
Here is a gemstone for ya........it got Dan's eyes a buggin lmao 
http://www.multicolour.com/detail/?/details/single/tourmaline/witm101aa/
Get out your check books people lmao
Posted by: ScottKS Aug 3 2007, 03:04 PM
Rock Shop Update........with the new addition
Posted by: ScottKS Aug 3 2007, 03:12 PM
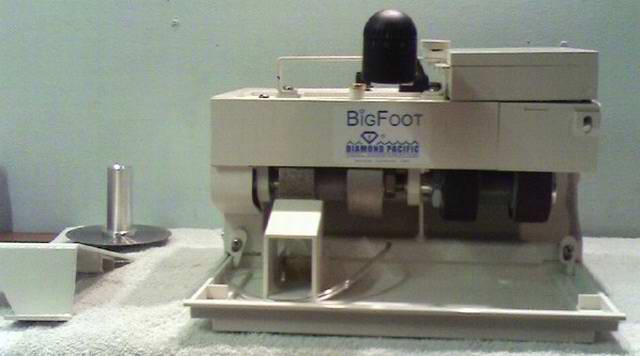
Here is my Big Foot made by Diamond Pacific........this thing is way smaller then i expected.....the wheels on this thing is only 2 3/8" dia. by 1" width belt......TINY but there was no way i was going to spend 2 to 3 times more for the bigger ones The Trim saw and polishing pad are 4".....how does those fit in such a small area......on the right the hood goes out....i took out the wing nut cause it's easyer to adjust that way. They don't make expandable wheels for this thing yet  they better hurry before i need new wheels because i really don't want to spend the $$ for whole new wheels.....EXPENSIVE.....
Posted by: ScottKS Aug 3 2007, 03:27 PM
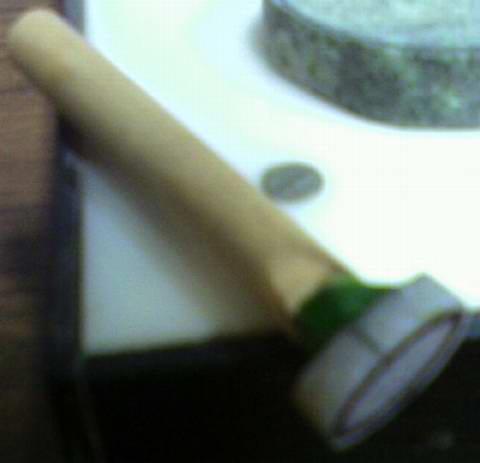
OK here we go.....1st Cab......this attempt is starting out 20mm x 10mm....will see what the final size will be lol  as you can see i cut it really close to the edge......i'm goin to relevel one end and redo the marks........the saw made a big mess and uneven cuts because of my shakeyness and it took awhile to cut it all but rock saws don't work fast, they take awhile to make the cut.....this lil slab was over a 1/4" thick and that really pushed the saw.....i really need to find atleast a 8" saw and only use the 4" for slabs under 1/4"........oh well it takes practice.....all i'm hopeing is i didn't already ware out the saw blade BUT all in all i'm starting to
  this machine.....what can you expect for the price
  Supporting it is the dop....next pic will be it all ready to go for the domeing process

Posted by: ScottKS Aug 6 2007, 05:10 PM
Here it is dopped and ready to go.........as of right now though i'm more or less done with this cab...only thing left is the 14,000 mesh for the pad that i forgot about lol
Posted by: ScottKS Aug 6 2007, 05:30 PM
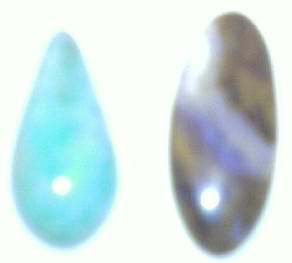
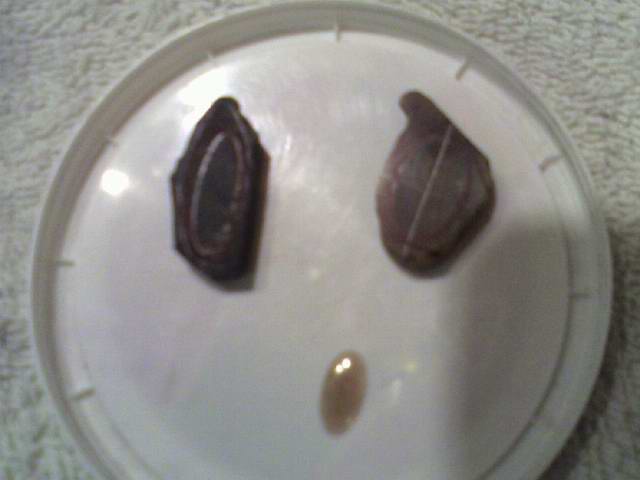
Here it is finished.....more or less  also here is my next two projects....the one i just finished was kinda a smokey color (not smokey quartz) when i started with it and it really lightened up (see threw) and it looks like sea monkeys in it lmao....the next two are agate (brown right one) and i think the black one might be Green Onyx (black left one)...why?? well it's black away but when you put it up to the light the edges lighten up and look more green...idk but i know the brown one is agate cuz it has the bands.
Posted by: ScottKS Aug 18 2007, 10:44 PM
Here is my next two projects dopped and ready for cabbin.
Posted by: ScottKS Aug 18 2007, 10:48 PM
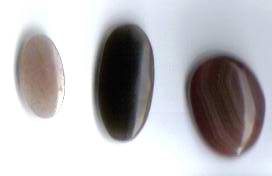
Here is all 3 projects DONE...........i might go back and shave the one end on the agate because it looks more like a jelly bean right now the black one is see threw and it looks kinda green to me so.......idk.....could be green onyx
Posted by: Mrs.CP Aug 19 2007, 11:05 AM
Fantastic work Scott!! 
I think the dark one thats green may be Jade?
Keep up the good work, and thanks for sharing the pics with us.

Posted by: ScottKS Aug 20 2007, 05:05 PM
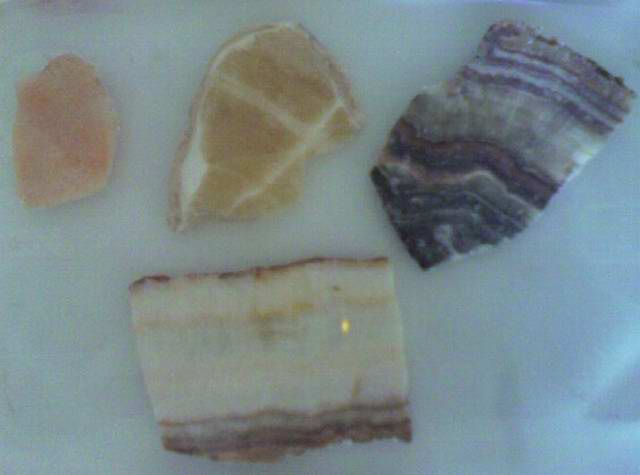
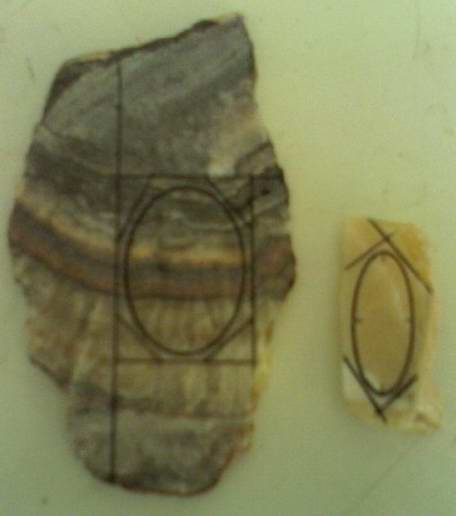
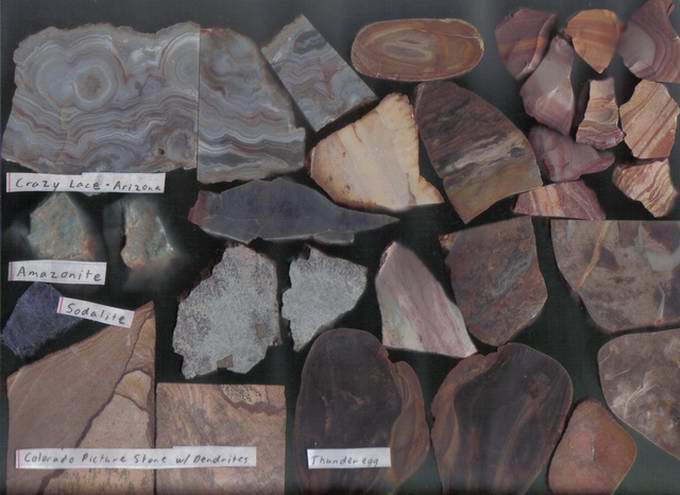
Here is a sample of the slabs i have........#1 think this is more Banded Onyx like #4.........#2 Marked Honey Onyx from Texas.........#3 Agate of some sort and #4 is marked Banded Onyx from Arizona.
Posted by: ScottKS Aug 20 2007, 05:09 PM
From the pic above i have decided to start my next two projects.......sorry if the pic isn't the best.........look at the above pic #2 and #3.........one on the right is the Honey Onyx and one on the left is the Agate.
Posted by: ScottKS Aug 21 2007, 06:34 PM
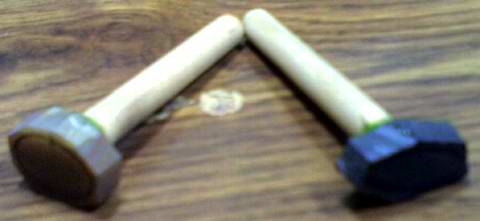
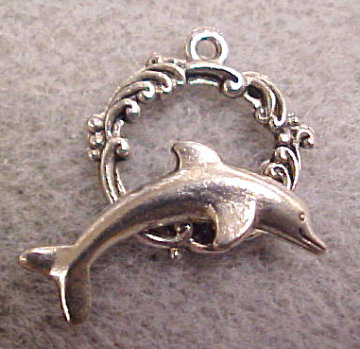
Update......here is a update......why?....Denise brought something to my attention about the horse shoe......it's upside down and with it like that all my luck will run out ......just hope i'm not too late......
Posted by: ScottKS Aug 23 2007, 06:14 PM
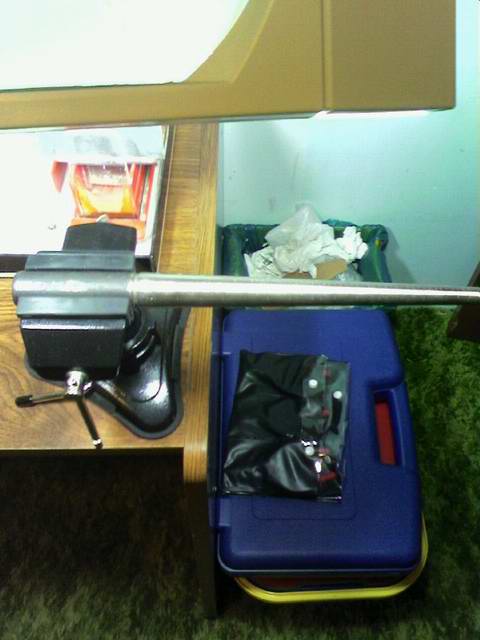
Here is a pic of the Vacuum Base Vise i just got today.......has the ring mandrel in the jaws......all ready to stretch, straighten or make rings 
Posted by: ScottKS Aug 23 2007, 06:16 PM
Next two projects ready to be cabbed
Posted by: ScottKS Aug 28 2007, 07:15 PM
I SEE YOU............BOO........lmao hehehe ........here is my new toy for the day

Posted by: ScottKS Aug 30 2007, 06:45 PM
Here is some new stuff i got today
Top left is various agate and to the right of that is Pet Wood.
Row two black and white is Dendritic Agate and next to that Royalite.
Row third stating with the green one (doesn't look green but it is lol) Serpentine, lil agate triangle, the black one i'm not sure, and Malachite Crysocolla Mix.
Last Row Turritella, Thunder Eggs, Onyx Marble and Leopard Skin Jasper.

Posted by: ScottKS Aug 31 2007, 09:18 PM
Well i got projects #4 & #5 done.......i have some good news and some bad news.....the good news is the Honey Onyx came out really well and did better then expected.....BUT now the bad.....the Agate was a problem cab to start with....the 80 grit really ate it up...expecally the quartz part so i drop the shape two sizes and i finished it and it looked ok but there was some fractures and a crack and when i tryed to get what was left of the dopping wax off look what happened  ....Oh well i guess that's what practice makes perfect is for.
Posted by: ScottKS Sep 8 2007, 04:56 PM
Here is what i got for my rock shop today.......should come in handy......ty Wal-Mart......
Posted by: fourcornersrocks Sep 9 2007, 12:08 AM
Nice shop setup, I learned a lot reading your thread. I plan on getting organized soon, my shop consists of a 90$ tile saw and an inland 3 in one unit sitting on a large tupperware container! I am now inspired to get organized! Nice material, I especially like the royalite.
________________________________________Dude
Posted by: ScottKS Sep 27 2007, 06:23 PM
Here is my next projects #6-#10.......#1 2nd attempt on Banded Agate 15x20mm oval ......#2 Amethyst 12.74x20.34mm oval......#3 Kansas Pop Rock 11.64x16.50mm oval........#4 Fire Agate 9.86x11.97mm oval.........and #5 Honey Onyx 8x10mm oval. 4 and 5 i'm about the dop, could fly off ......will just have to see what happens..... #'s 2,3 and 4 are cabs that granny or grandps started but didn't finish. I also will be tryin the M5 polish that is on the way right now....hope i will get it by tomarrow
P.S. all the exact measurements are as of right now.....will see what the finish sizes will be.....the other 2 are the patern measurements.
Posted by: jim Sep 28 2007, 06:14 AM
cool scott,
i'm glad to see that at least someone has the time to do some cabbing.it looks like you are going along just fine.the only thing is that i don't see anything that your ol buddy in mississippi sent you.
Posted by: ScottKS Sep 29 2007, 07:18 PM
Ok here is the projects #6-#10 all done......all in all guess it could of been worse
Banded Agate: Final measurement 13.86mmx19.42mm....Well this one didn't break on me..Whew thank god....it turned out ok but the shine is still kinda dull, maybe that's just because the colors..
Amethyst: Final measurement 12.18mmx19.20mm...This one is good and looks cool BUT it started with fractures and still have some of them but didn't break on me ...the white strip at the bottom going up and down is the big one...still looks like it has the M5 polish still stuck in it
Kansas Pop Rock: Final measurement 9.88mmx12.40mm....This one also came out good...probably the best one out the rest.
Fire Agate: Final measurement 10.17mmx11.74mm....This one seemed to be the most problemed....well to start off the bottom is still uneven, started that way...will need to be flattened...as you can see in the measurements it's almost round and don't ask me how it got from 9.86 to start with and got up to 10.17 ...also lost most of the green fire that was in it...but you can't see that in the start pic lol.
Honey Onyx: Final measurement 8.22mmx9.79mm....Now this one didn't turn out that good at all...even more troublesome then the fire agate...as you can see it's also almost round....the sides had a hard time getting even not as good as the last one but will work i guess....but it's still within the 8x10mm.....hummmm.
All in all it really could of been worse.....as far as how well did the M5 polish work....well it was kind of a mess....had problems getting started..so i stoped and took off the canvas wheel and spread some M5 on it because the stone just wasn't getting it on....don't really see that much difference but i do see some but sure does beat spending alot of $$$$ for the diamond compound syringe i guess Cabbing is fun and will always enjoy doing it threw thick and thin.
Posted by: fourcornersrocks Sep 30 2007, 10:00 PM
Scott, nice work! What kind of stone is the pop-rock, I have heard of a type of pyrite called pop-rocks, but that sure doesn't look like pyrite. Keep up the good work!
Posted by: ScottKS Oct 1 2007, 02:21 PM
These sites should answer your ?
http://www.luckygemstones.com/pop-rocks.htm
http://www.bojistones.com/boji-stones/information.html
Posted by: fourcornersrocks Oct 1 2007, 08:48 PM
Scott,
I hate to say this but I am still confused, mybe it is the way the photos came out, the pop-rock looks translucent. The ones I have are definently pyrite, I did not think it could be clear, but I wouldn't be suprised if I was wrong about that. Nice thread by the way, very helpful and you do great work. Thank you for the links as well, the boji stone stuff cracks me up!
...Dude
Posted by: ScottKS Oct 2 2007, 03:18 PM
Here is a pic of all the Pop Rocks i have........as you can see looks like i have mostly males and males are harder to find.......that one half looks to be a female....and all the lil ones to the right was polished in the tumbler....you can't really see it in the pic but all them tumbled ones are see threw and do look exactly like the cab i did........i could be wrong about the cab though...it wasn't marked....i took a guess but with the research i just did i'm sure that's what it is...only other rock guess that i can think of that it could be is Apache tear maybe??
http://en.wikipedia.org/wiki/Apache_tears
http://en.wikipedia.org/wiki/Boji_stone
Ok sorry after reading that last article i kinda understand now..... .......so i guess i should have been calling them Boji Stones (maybe)........i just have always called them Pop Rocks.....but "Kansas Pop Rocks" have the exact same mineral make-up or offer the seemingly magnetic properties as true Boji® Stones offer.....soooo i'm not too far off.........here before winter i'm hopeing to go to where they are found...my aunt lives in Scott City and i use to spend some time at the Smoky Hill Chalk Cliffs...can also find fossils there too like sharks teeth....so i know that mound is in that area somewhere.
Here is some sites of the Chalk Cliffs
http://www.washburn.edu/cas/art/cyoho/archive/KStravel/bigrocks/pyramids.html
http://www.naturalkansas.org/monument.htm
http://www.kansastravel.org/monumentrocks.htm
Posted by: fourcornersrocks Oct 4 2007, 10:56 PM
Scott, thanks for all the great pictures and links, I learned a lot.
...Dude
Posted by: ScottKS Nov 30 2007, 08:45 PM
Here is a lil collection i got today....some are marked......still have to mark the rest
Posted by: ColoradoProspector Dec 1 2007, 09:53 AM
Cool batch of rough material Scott......now get ta' cabbin'!!
Posted by: ScottKS Dec 3 2007, 08:08 PM
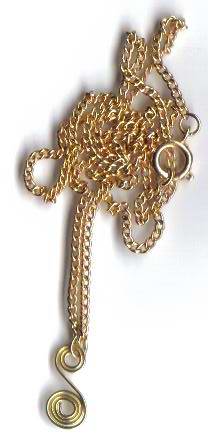
Now it's time to touch basics on wirewrapping.......here is my 1st wirewrap.......this is a basic spiral S............ .........here is some cool wirewrapping sites to help you get started........this first one will teach you how to do these spirals.
http://www.beaducation.com/?p=classes (FREE: Perfecting the Wire Spiral)
I also got this Small Home Business Package to get me started
http://wire-sculpture.com/
Posted by: ScottKS Dec 8 2007, 06:50 PM
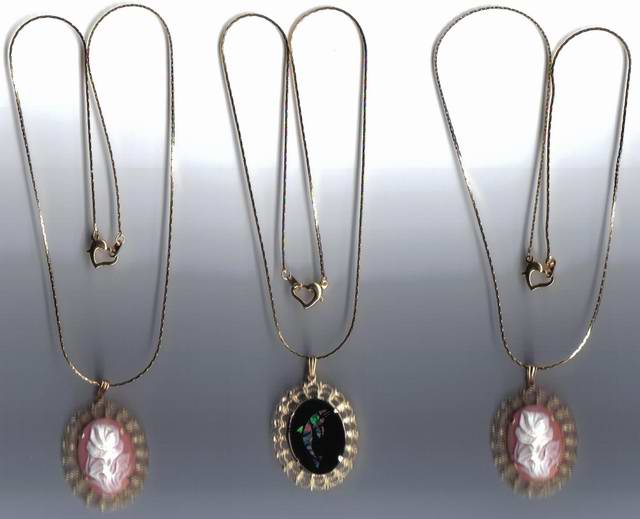
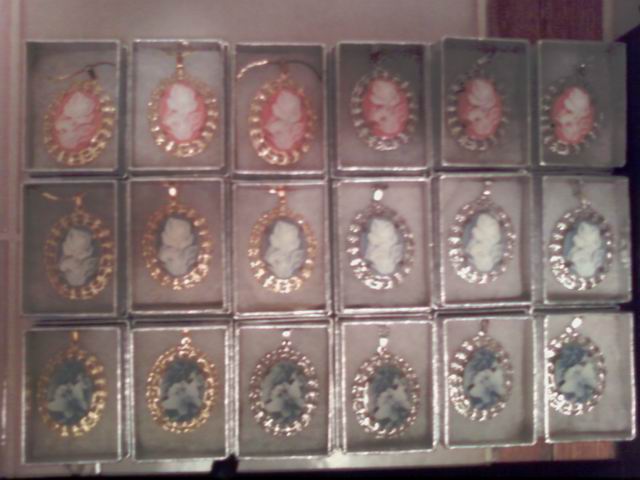
Here is a project i just got done with.....xmas gifts....i got the Cameo's and the settings and set the stones.
Here is sites with better pics of the stones
http://wire-sculpture.com/items/B3_1.php
http://wire-sculpture.com/items/B5_56.php
Settings
http://wire-sculpture.com/items/N14_3.php
Posted by: jim Dec 9 2007, 08:26 AM
Very nice work Scott. Is that a piece of opal that I see? hehe
Posted by: ScottKS Jan 7 2008, 03:51 PM
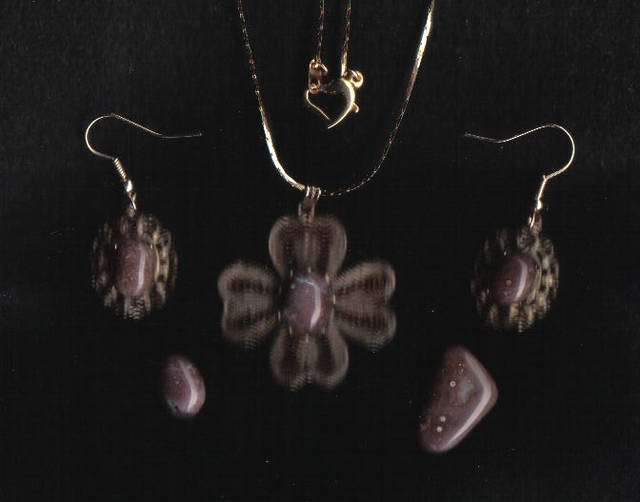
Here is my last Xmas Jewelry gift project for the year Turned out nice.......sorry the spirals didn't turn out well but you should of seen the first attempts to scan it lol.....the black background made it turn up better......the stones anyways 
P.S. Have tried to post this since the 22nd but because of the server problems i couldn't post it 
Posted by: ScottKS Jan 14 2008, 03:55 PM
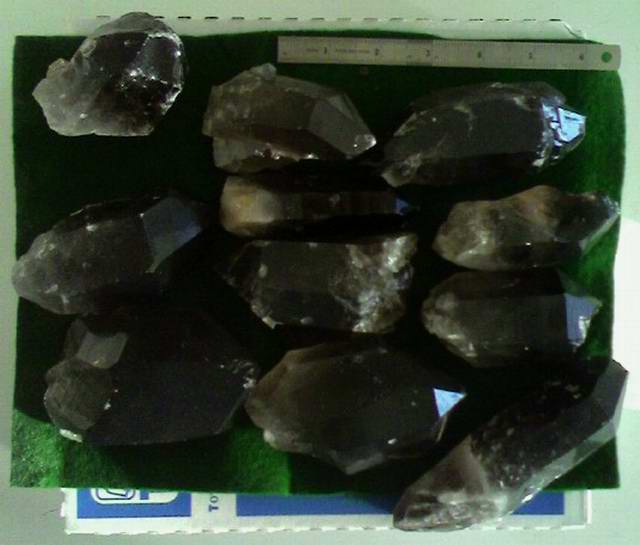
The D's are showing off there Smokey Quartz so i guess i should show off mine..... .....now if anyone asks where did i find these.....i will say i got them from the Spears Rock Shop.......these i got at the sale.....one of very few i got from the sell itself. The ruler is 6 inches..to give a size amount.
Posted by: ColoradoProspector Jan 14 2008, 10:49 PM
Cool Scott......ya' got some nice smokeys there.
Good work on the jewelry too.
Posted by: ScottKS Jan 27 2008, 03:20 PM
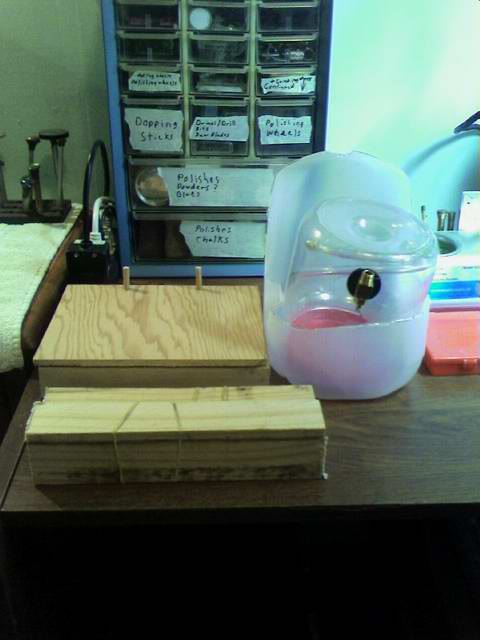
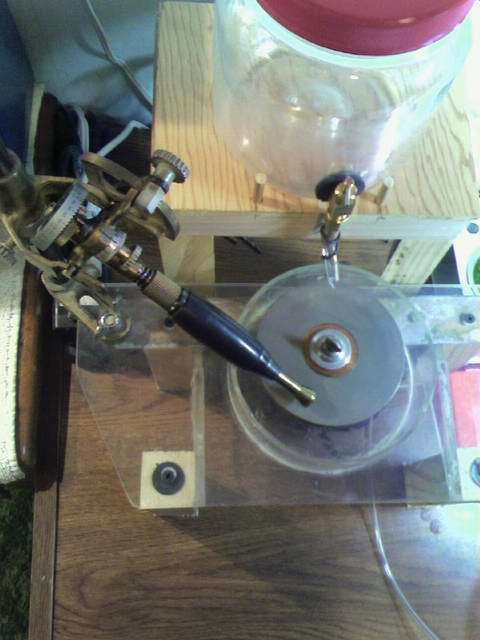
It's FINALLY done......here is the Overhead Water System i have been working on.....this first pic is it in it's compact size.......
Posted by: ScottKS Jan 27 2008, 03:22 PM
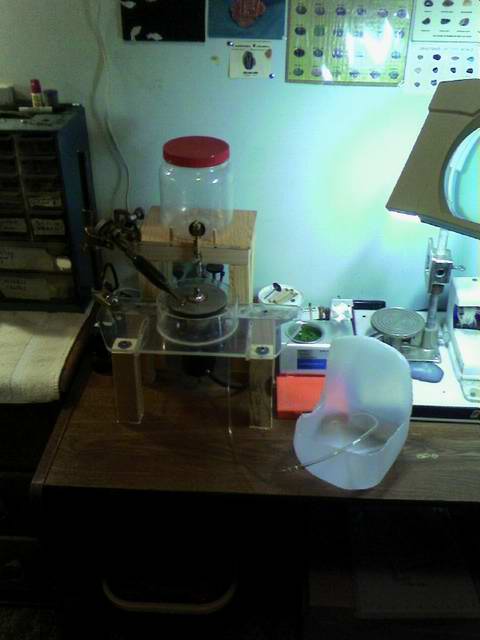
This 2nd pic it is all setup......now my next project is to get the faceting machine all done and then it will be complete....

Posted by: ScottKS Feb 3 2008, 12:39 PM
Ok here is my faceting machine more or less all done.....just need to get a few details worked out.......pic one of three.....here is a pic of the overhead water system and the faceting machine....
Posted by: ScottKS Feb 3 2008, 12:40 PM
This one is a side view of the two.......one tiny detail for this pic is i need to cover the collar....it's open to the motor so need to find a rubber collar to seal it off.

Posted by: ScottKS Feb 3 2008, 12:42 PM
This last pic is a top view.....i also need to get a varible speed controler for this......also need a new set of laps.... will probably crap when i find out how much that will cost me .....i might be missing some details that i need to work out but you really won't be able to really tell in pics.
Posted by: ScottKS Feb 10 2008, 03:02 PM
Here is my first real wire wrapping project......the D's inspired me to make it....You D's are the greatest... 
http://www.coloradoprospector.com/forums/index.php?showtopic=1502&st=45&#entry13866
Posted by: ScottKS Mar 10 2008, 07:07 PM
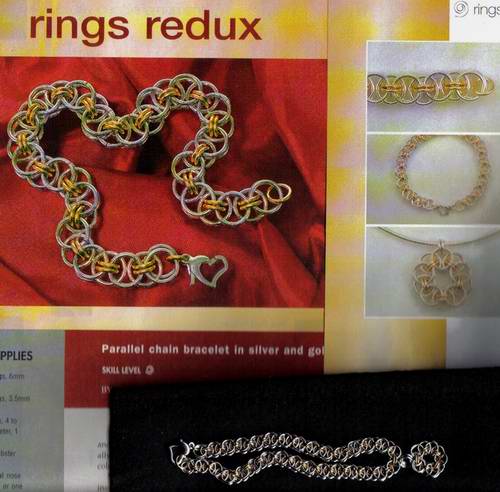
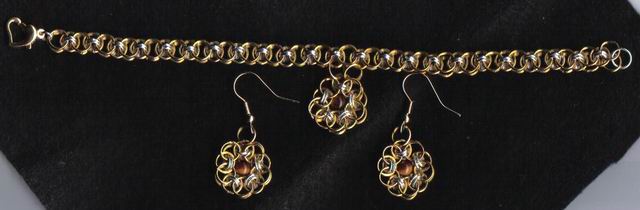
I saw this project in the holidays Step by Step Jewelry and have been wanting to do it....i even got all the jumprings from Hobby Lobby not too long after i got the book......well i finally got around and did it.....i started on it yesturday and spent a good part of the day doing it......i finally got it finished just alil while ago...WOW what a brain teaser .....think i'm going to be cross eyed for awhile lol.....well i made this bracelet 8" long..alil longer then the book said and it's kinda saggy on me ...oh well i can shorten it lol....then i decided to make the pendent....it is small more like the size of a charm and took some work as well.....my pliers kept slipping and probably made nicks in every jumpring on the whole project ........oh well it was very challengeing but i got it
Posted by: faaus Mar 10 2008, 09:06 PM
Scott,
You're showing some real talent and imagination!
Congratulations!
faaus
Posted by: ScottKS Mar 11 2008, 07:55 PM
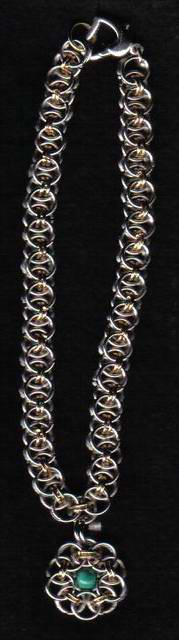
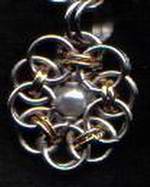
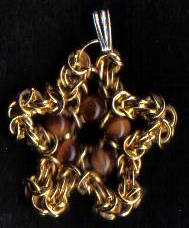
TY faaus........here is a closeup pic of the project........thought it might be really hard to see or people might think it's part of the mag....The project took 109...6mm Silver jumprings and 71...4mm Gold jumprings to make the 8" bracelet.......i'm also trying to decide if i want to add that Malachite bead in the center of the circle pendent....will either try and string wire threw it or just glue it ....what does everyone think about adding that to the project?
Posted by: ScottKS Mar 29 2008, 10:34 AM
Welp the Malachite bead didn't work out.......tried to glue the jump ring into the half drilled hole but it just didn't stay so i found this pearl fully drilled bead at grandma's and wired it into the pendent.
Posted by: faaus Mar 31 2008, 10:39 AM
Neat looking piece Scott!
I think the pearl was a great addition.
faaus
Posted by: ScottKS May 11 2008, 03:14 PM
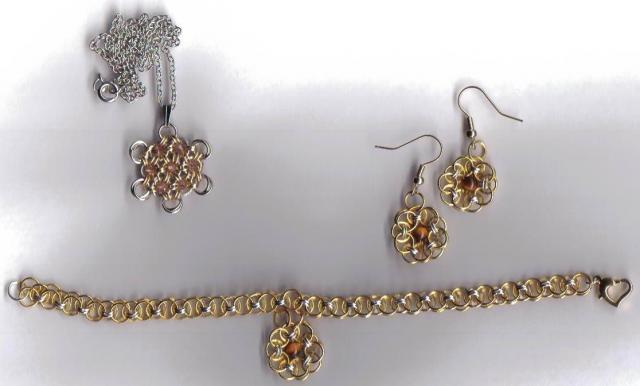
Here is my latest project i worked on Wed. and Thur. nights....took about 5 hours to make....it is called Starfish Pendent....the outside is Byzantine Chain made out of 4mm gold plated jumprings and the tigereye beads in the center is also 4mm.....i got the step by step project from a book i got....here is a link to who makes it.
http://www.davidchain.com/wk_starfish_P.html
Posted by: ScottKS May 20 2008, 07:57 PM
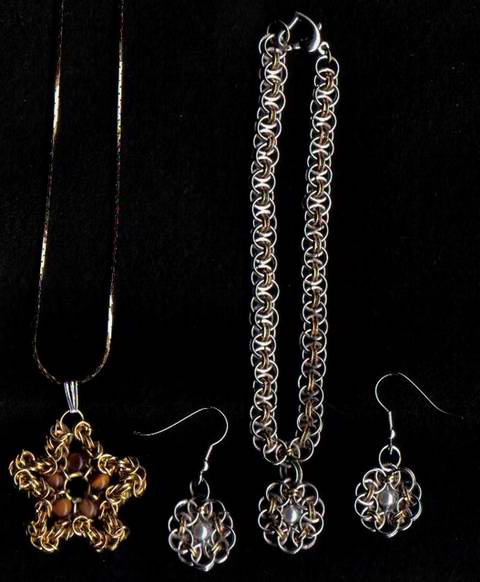
Just got done with the ear rings...took about 2 hours to make the ear rings.......here is the whole set.........hey the star is waveing
Posted by: ScottKS Jun 3 2008, 02:21 PM
Well Denise just told me that this post got lost in test land .....sigh so here it is again.....these are Stem Glass Charms for like wine glasses or any glass with a stem or handle.......i finished them May 15 but couldn't post them until i gave mom hers at the outting because this was a mother's day gift. I still need to make my set and i made grandma a set too.

Posted by: ScottKS Jun 10 2008, 06:47 PM
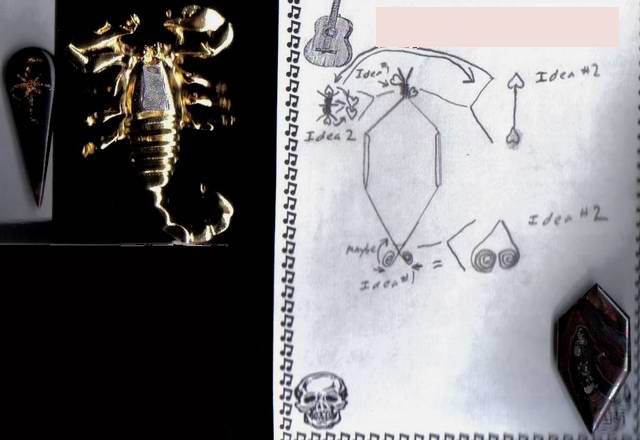
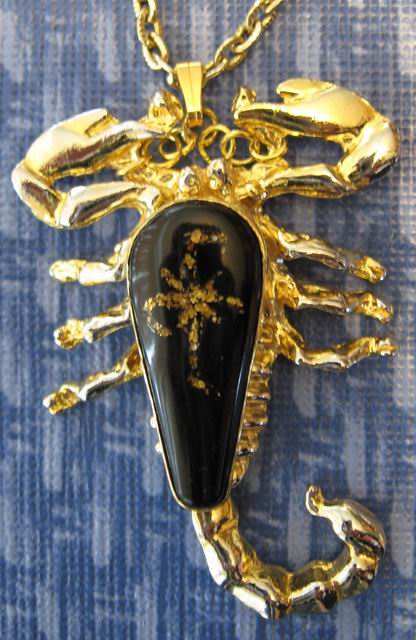
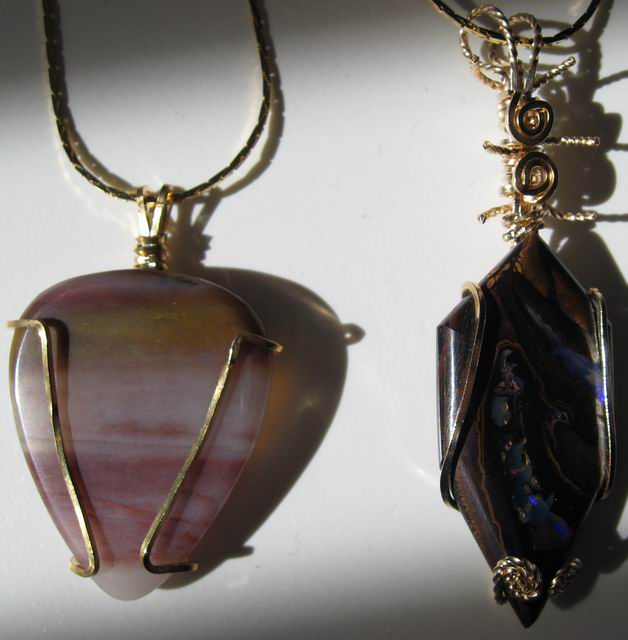
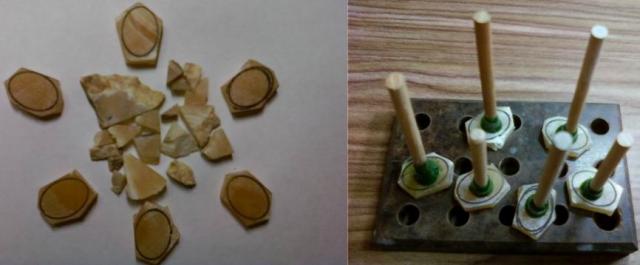
Here is my next 2 projects.......the first one i will be adding that gold inlay cab i won at the ranch at Fairplay to that scorpion....will have to trim the cab...as you can see in the pic it's alil too big for the scorpion and will have to make a setting for the cab..i took off the setting that was on the scorpion it sat where that lil patch of gray is at on the scorpion's head......the next project is the cab mom won at the ranch...she told me i have to make a wire wrap for it so here is my idea for that project......hope to get these projects done before the big move......hope i can do it
Posted by: ScottKS Jun 29 2008, 03:06 PM
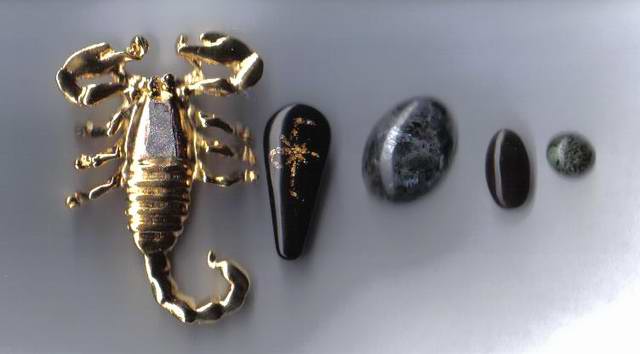
Ok i just got done doing some cabbing........it's about time huh ....here is the before shot...kinda hard to see but i will make up for that in the after shot ....the first cab is the cab i won at the ranch I cut the tip down so it will fit better on the scorpion.

Posted by: ScottKS Jun 29 2008, 03:13 PM
Here is the after shot...as you can see that' lil pink looking cab to the end on the right side from above post isn't in this pic...that's because it flew off the dop so will have to redop it and try it again but i think it also took a chip off of the cab itself so it will be smaller in size..sigh....oh well the rest turned out good the scorpion cab i think i did a good job but i think the M5 polish left a hairlike haze on it and i tried to take it out but it wouldn't come out....oh well it gives hair on the scorpion's back lol.....the black looking one isn't black in the light..it's really cool..it has kind of a cat's eye band shadow look and it's deep purple and when held up to the light it's totally black or gray clear...really cool and the bigger cab kind of has some mica or abalony shell fire bits to it...it's cool too....it was good to cab again...i think i will try and do more cabs it's not as bad as i make it lol.
P.S. the last three was cabs that Granps or Granny started but didn't finish..they was still on the dops so i finished them.... ....if you look at post Mar 31 2007, 10:22 PM in this thread(1st page)...that is all the cabs that Granps or Granny started but didn't finish....these last 3 cabs are in that pic still on the dop and that lil pink one is in that pic too.
Posted by: Mrs.CP Jul 2 2008, 03:27 PM
Your lapidary work is looking good Scott! Keep up the good work.
<----- Waves back to the star /)
Posted by: ScottKS Jul 10 2008, 05:41 PM
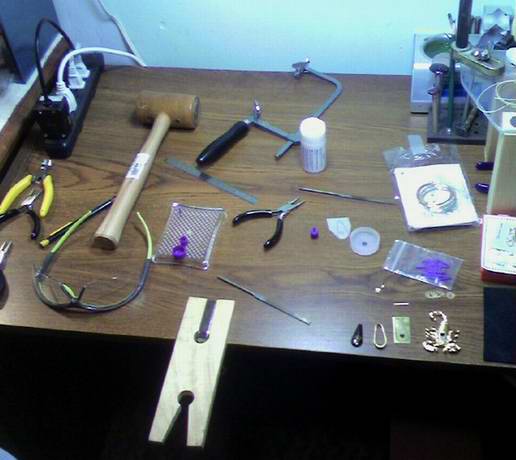
Welp i just got done setting up the station to drill some holes in the Scorpion's back so i can add the stone with the setting.....if you look really hard in the bottom left corner you can see that i have started on the setting for the stone itself them were made with a sheet of brass....the strip of brass there is for the bezel to set the stone in the base and the lil sheet there with a trace mark of the stone is the base itself......after drilling two holes on the Scorpion then i need to drill one small hole in the setting for a total of 3 holes....will see how it turns out
Posted by: ScottKS Jul 13 2008, 05:58 PM
Just got done cutting and sizeing the bezel....it's the ring right beside the stone at the bottom right of the pic.......i used the Thing-A-Ma-Jig (that clear peg board with the purple pegs) to size the bezel and then used the saw to trim it down to size......now i need to start soldering....first i need to solder the bezel ring shut and then solder it to the base.
P.S. The drilling turned out ok....will see how it works out after it is all inline with the scorpion's back...after the bezel is complete.
Posted by: ScottKS Aug 3 2008, 06:08 PM
Here is my next project....Blue Agate from Washington..someone at work used to live in Washington and we talked rocks and he gave me this rock so i could make some cabs for him and also for me too....here is one link to the Blue Agate site and also here is a video of me cutting the slabs .......Sorry the camera moved on me and i didn't notice that...see what happens when i hit a fracture lol but it's ok....
http://www.myspace.com/scottgalyardt Click on the play button in the clip window called Cutting Blue Agate Slabs on the right side of the screen...you might have to scroll down just a tad.
http://www.blueagates.com/
Posted by: ScottKS Aug 10 2008, 07:03 PM
Here is the next two steps i just got done with today in makeing the Blue Agate Cabs.
Cutting Blue Agate Slabs Into Cab Shapes (watch as i hit another fracture )
http://vids.myspace.com/index.cfm?fuseaction=vids.individual&videoID=40491662
Dopping Blue Agate Slab Cabs
http://vids.myspace.com/index.cfm?fuseaction=vids.individual&VideoID=40493532
Posted by: Mrs.CP Aug 12 2008, 07:33 AM
Cool Scott. Video of you in action in the Rock shop......hehe
Blue agates are very pretty! Cant wait to see your finished pieces.
Thanks for sharing the videos with us!
Posted by: ScottKS Aug 19 2008, 06:33 PM
Welp Sunday i got to cabbin.........Here is the process of makeing Cabochons....in this video i'm makeing Blue Agate cabs......this is the final process of this blue agate project....this video is only one cab...being the free forming cab because the original video is about a hour long with all 5 cabs ....the ending pic is all the cabs done and 3 are in settings.
This was a fun project with not too many disappointments but there was some fractures in makeing the slabs but i got past it all......whew
http://vids.myspace.com/index.cfm?fuseaction=vids.individual&VideoID=41134378
Posted by: ScottKS Oct 1 2008, 03:33 PM
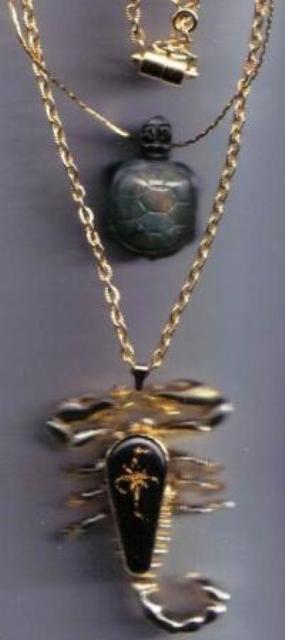
Just got my Scorpion Project all polished and it's all done.......i also got mom's projects done the 4th of September because they was her b-day gifts and she was suppose to send me a picture because my scanner couldn't capture the detail very well..... ....oh well when i get to Colorado i'll post a pic.......i want to thank the D's for giveing me the opportunity to win the cab for this project.....it had it's problems...like soldering... .....but it's done and it turned out ok......i added that turtle pendent to a chain and added that chain to the chain of the Scorpion.....turned out nice
Posted by: ColoradoProspector Oct 1 2008, 04:48 PM
Looks really cool Scott, but the pic is a wee bit fuzzy.
Nice work. Looking forward to see the pics ya' post later too. Glad you were successful with that gold inlay cabochon and you are very welcome.
CP
Posted by: ScottKS Oct 2 2008, 04:05 PM
Sigh.....yes i know......that's why i'm not posting the scanned pic of mom's projects.....you should see the pic ........i'll post a pic of all my won cab projects....all 3 of them
Posted by: ScottKS Oct 21 2008, 05:44 PM
Ok here is all 3 of the projects ........Thanks to the D's for giveing me a chance to win all 3 of the stones 
Posted by: ScottKS Feb 21 2009, 08:11 PM
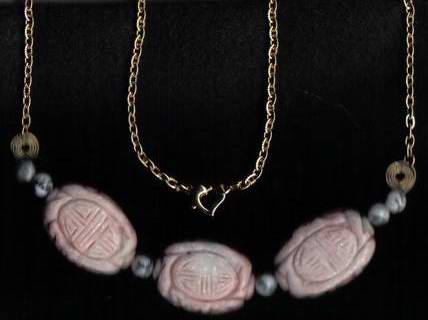
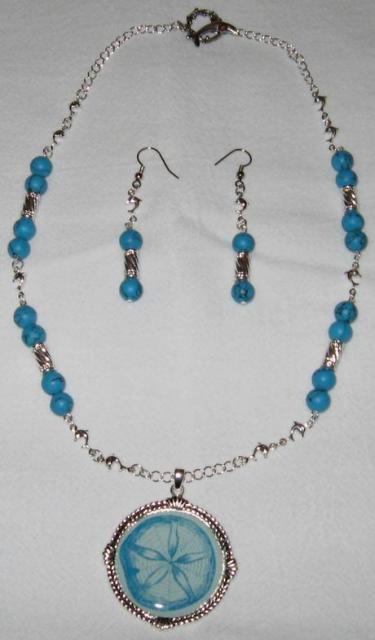
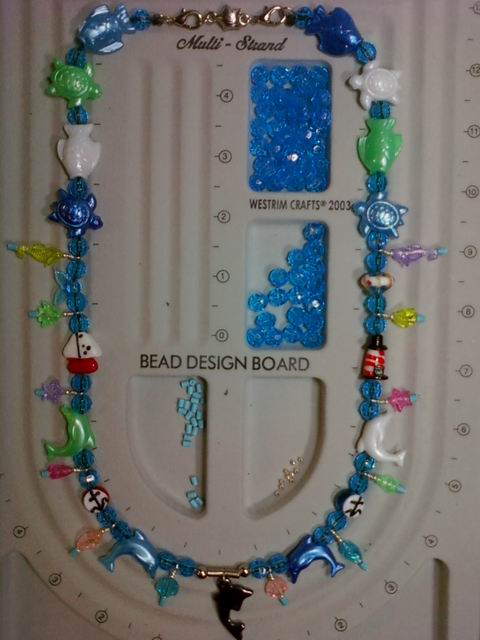
Here is my lastest projects and this one is for mom.......we got all the findings and beads.......mom designed it the way she wanted it and i helped her do that and i put it all together.....here is a pic of the necklace and earrings.....and a closeup pic of the toggle clasp (seeings you can't really see it with the project and i hope everyone can see the silver dolphin links)  ......hehehe
|
Posted by: ScottKS Jul 18 2009, 05:21 PM
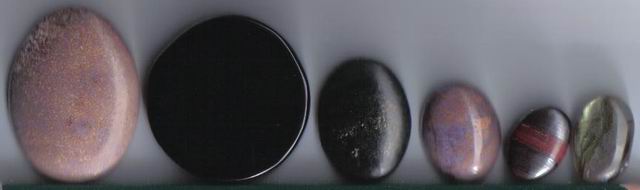
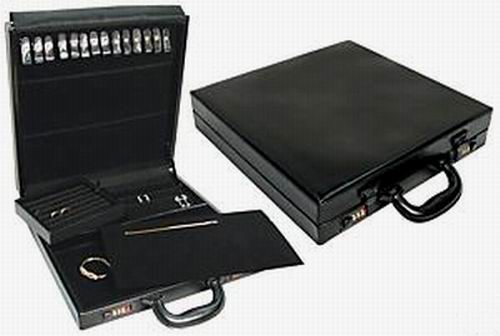
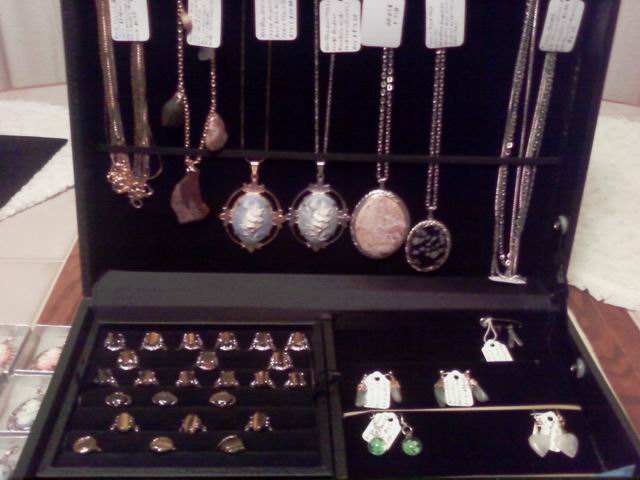
Welp i finally did some cabs today....it's about dang time huh...lol....well the heat here lately hasn't helped any and seeings i don't have a AC in the rock shop i just really haven't wanted too but today was much cooler so i decided to do it. Here is pics of the before and after...these are cabs that either Granny or Gramps started but didn't finish  . Now to identify them...i'm not sure what the purpleish or black ones are....that one big black one is black but while cabbing it i saw bands on the sides only and was kinda wondering if maybe it might be blue tigereye but the top is pitch black with no bands so idk . Now the last two i think i know.....lol.......iron tigereye and the last one is abilony i'm pretty sure .....all in all it was good to get back into the groove of things .....mostly here lately i have been trying to get my jewelry stock up to start selling...i have been ordering things like the case below to display and travel jewelry....i also made another jumpring braclet and matching earrings just like the pearl one but gold instead of silver and tigereye instead of pearls (still need to wire in the beads lol)
Posted by: ScottKS Oct 1 2009, 10:10 PM
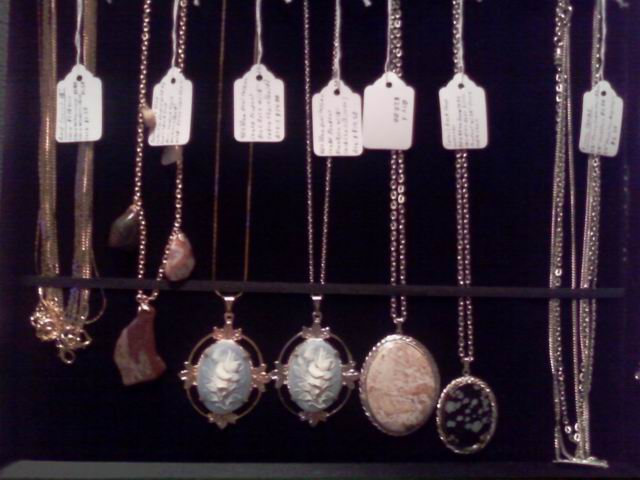
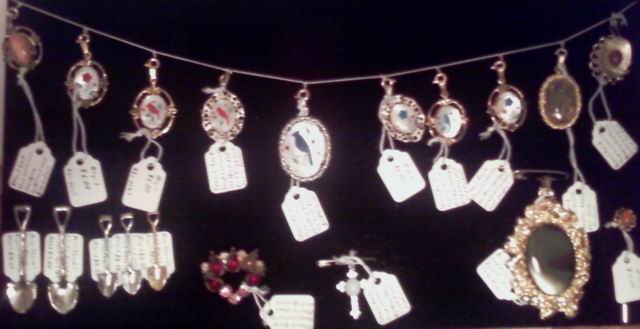
Wow it's been awhile....so what's new.....Well i have been trying to fill that jewelry case....i have items mostly from Spear's Rock Shop Collection for sale....i made some more of them Rose Pendants and made some new ones too....only thing left to do is measure sizes and price the tigereye rings...then list everything on my sheet....lol  .....then i'm in the money
  ....ya right...lol
Here is a picture of all the jewelry being cleaned.....my cleaning station 
Posted by: ScottKS Oct 1 2009, 10:21 PM
Here is my latest project.....I call it Dolphin Sea Life Necklace with Hematite Dolphin Pendant.........Yes mother this one is yours (Late Birthday and some of X-mas Gift)...lol....i will make some more to sell.
Posted by: ScottKS Nov 1 2009, 11:22 AM
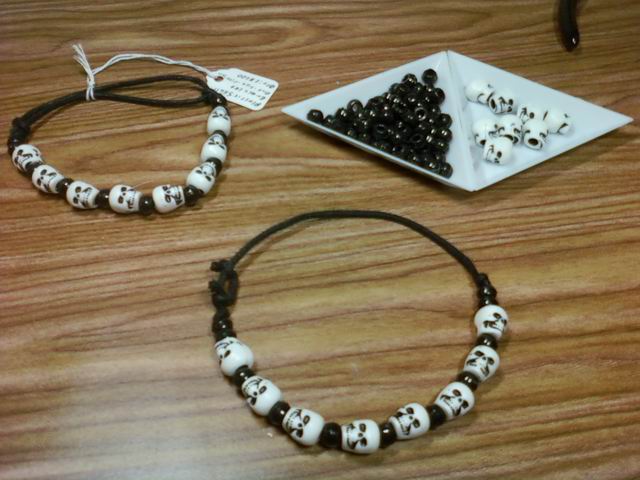
Hope everyone had a Happy Halloween ....here is a project i made a couple of weeks ago for Halloween to sell...one is mine...the other one is to sell and it didn't but good thing about skulls is they don't have to sell only for Halloween...they can sell all year long...i made them because i didn't know what to do with the cord from the Sea Life projects so i made some one size fits all Plastic Skulls Bracelets....i will probably make more because i have alot more plastic skulls left and have more Sea Life Necklaces to make.
Also the 22nd i made my first sales...made $32 ...sold to family and friends at a get together at grandparents...sold the Snowflake Obsidian Pendant Necklace, The Green Flower Earrings, One Blue Butterfly Cameo Silver Pendant Necklace and One Silver Tigereye Ring...I will try and get most if not all of these back in stock someday 
Posted by: ScottKS Nov 15 2009, 11:35 PM
So what's new in Scott's Rock Shop so far this month?
I got this watch repair kit setup.....have already paid for it for the most part...took out a link on one watch and replaced two batteries in a watch of dad's...dad told me that one time he had to take one to a jeweler because Wally World wouldn't replace it...dad's is screw off not pop off so i had to use the tool at the very top...so maybe that's another reason Wal Mart couldn't replace it...that and it was a Fossil and this one i repaired was too...it costed him like $13 to change just one battery....i replaced two and it didn't cost him anything except for the batteries of course...lol...so i really think in the long run i will pay for this over and over.....(seeings it only cost me like $6...lol) The stuff to the right is cotter pins and spring bars (for the band part of a watch) them cost me way more $40 and when i got it the cotter pins was a mess...had to redo it all and put the pins back in the right compartments.....that took a couple days....sigh .....but you know you have to spend money to make it and better spend it while i still have it seeings it won't last long....lol
Links: seeings the picture didn't turn out very good....lol
http://cgi.ebay.com/16-WATCH-BAND-STRAP-REMOVER-CASE-OPENER-REPAIR-KIT-TOOL_W0QQitemZ220377721133QQcmdZViewItemQQptZLH_DefaultDomain_0?hash=item334f89292d
(Same price i paid...got for $6 because i had ebay bucks)
http://cgi.ebay.com/ws/eBayISAPI.dll?ViewItem&item=350270556864
http://cgi.ebay.com/ws/eBayISAPI.dll?ViewItem&item=230393807945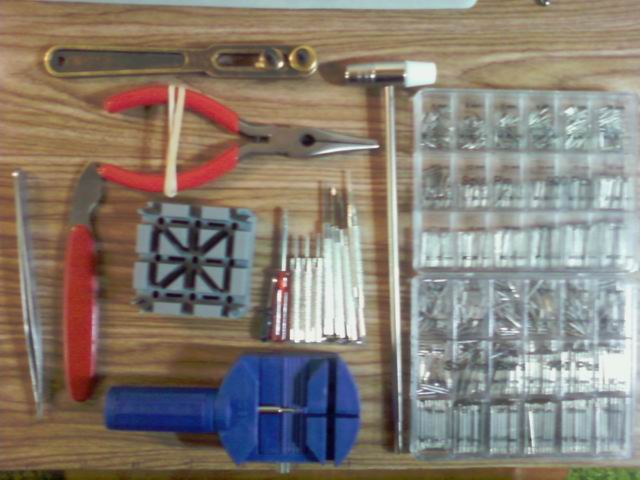
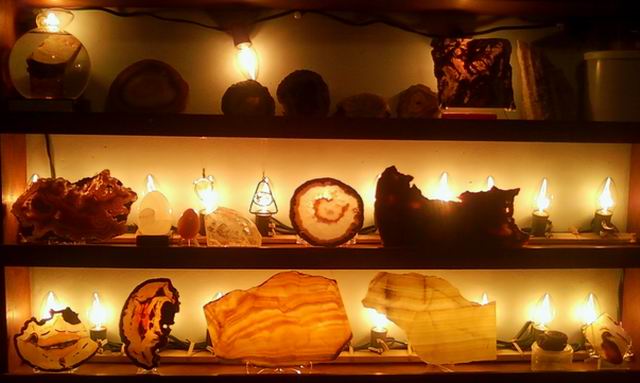
I added these shelfs right by the arcade to display rocks...i'm wanting to add lights to the center shelfs and display slabs....sun catchers us rockhounds call them...lol. I got these shelfs from grandma and she got them from her mom (granny...Spear's Rock Shop) These selfs are still work in progress so there will be more pics of it someday...lol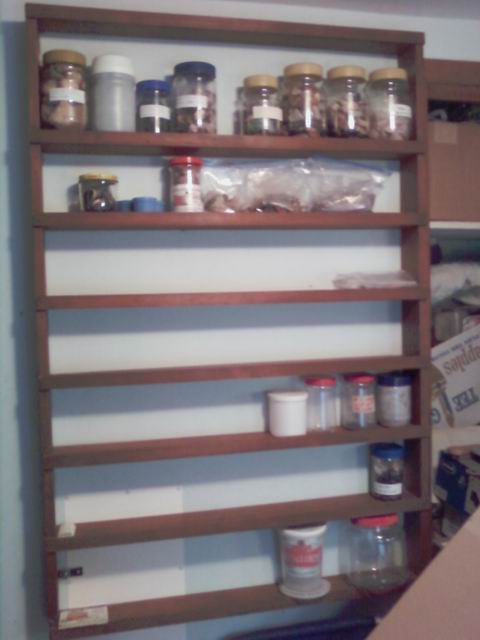
Here is some more Sea Life Necklaces i made (2 more)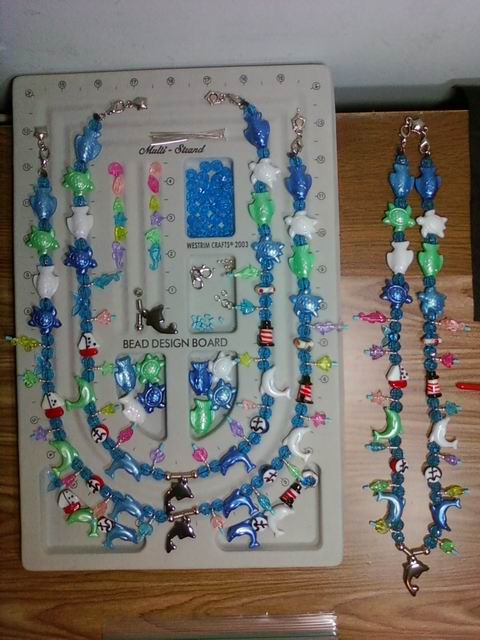
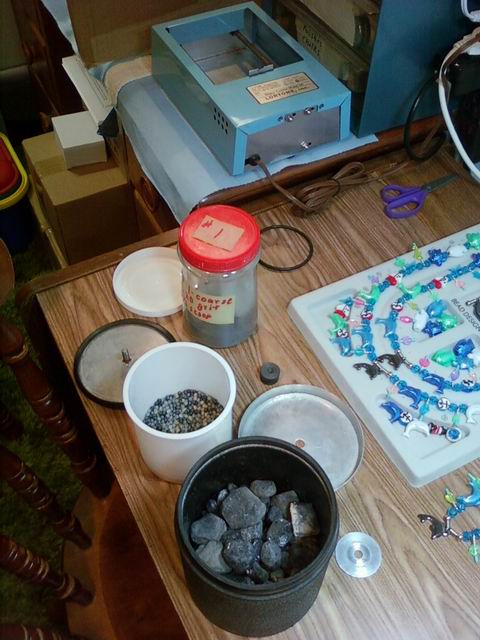
Ok last but not least  .....I started a batch of rocks today (WOW..it's about time) if my records are right the last time i did a batch was 10/21/2003
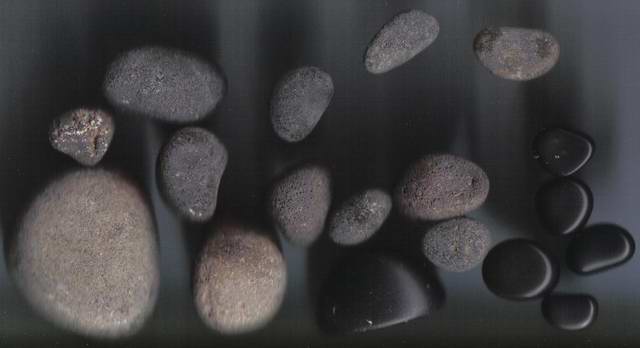
  Yes you heard right...just over 6...i said it 6 years ago.....Wow...mostly i think the reason it's been so long is because it takes a constant month of being around the tumbler...you just can't leave it's side and it's hard to determine if your going to be around for a month with no vacation trips. 4 weeks on the first 4 grits and this is the first load that i get to try the NEW M-5 Fast Deep Shine Polish...so 5 weeks with this last step. All of these rocks are Apache Tears/Obsidian from the Burro Creek AZ trip last year (just think a year ago i was just heading back from there) wow how time flys. What makes this load different...not only the M-5 polish but i'm going to grab one rock after each grit so people can see the step process
  I can't wait to see the results.....Isn't Rockhounding FUN
Posted by: russau Nov 16 2009, 06:12 AM
its plainly shown that the only limits you have are the limits of your imagination! nice work!
Posted by: ScottKS Nov 30 2009, 02:04 AM
Hope everyone had a good Thanksgiving......Soooo what's new in Scott's Rock Shop to finish out the month of November?? Well alot so brace yourself lol
Made some matching earrings for mom's necklace and gave her the gift...i took off the Hematite Dolphin Pendant and added a dolphin that i got mom in Wisconsin (will post a pic when mom sends me one...lol)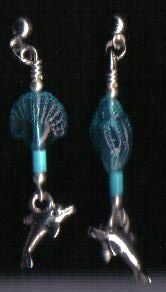
I got my string of lights put in and also got the Kingsley North package so i can display the Sun Catchers and i also displayed other rocks (still work in progress.....need more miniature easels because as you can see i have more slabs to display (on bottom self)) ...There's the Mallard Duck (2nd pic...bottom self and to the right) that was also posted in this thread http://www.coloradoprospector.com/forums/index.php?showtopic=1737&st=0&start=0 Mar 11 2007, 06:10 PM.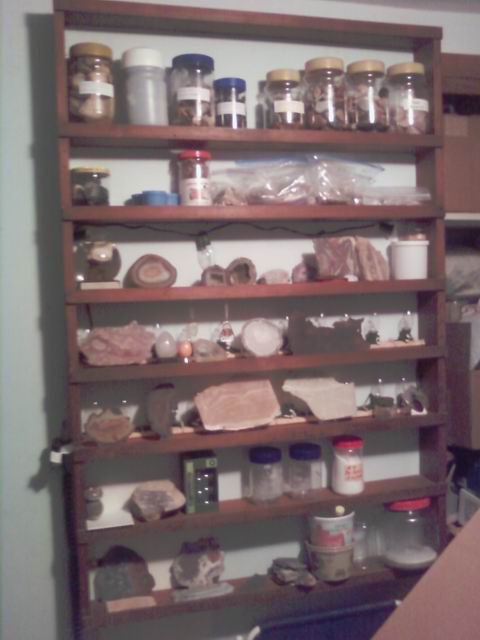
Here's the rest of the Kingsley North package....Portable Folding Flip Lamp....Extra Tumbler Barrel and Stainless Steel Shot for jewelry and coins (will try it with coins and see what happens ) and a Inland Dopstation.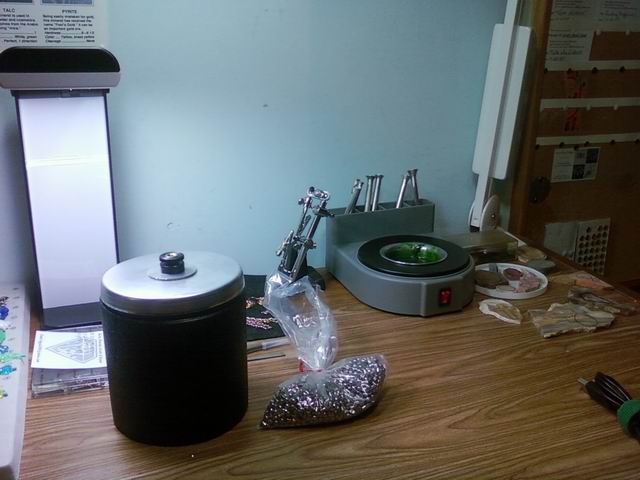
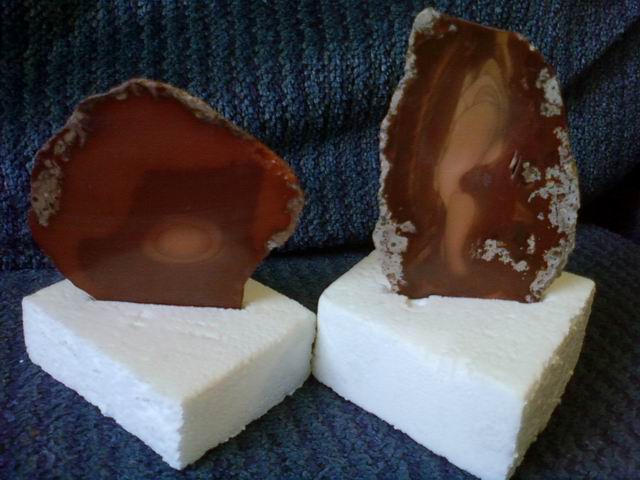
I went to my aunt's house for Thanksgiving Day....Took pics of some cool rocks that came from Spear's Rock Shop (Front and back of what's called "A Donkey" and "A Lady"...lol...do you see it??) and sold some more jewelry...Big Agate Necklace and Rose Quartz Heart Earrings 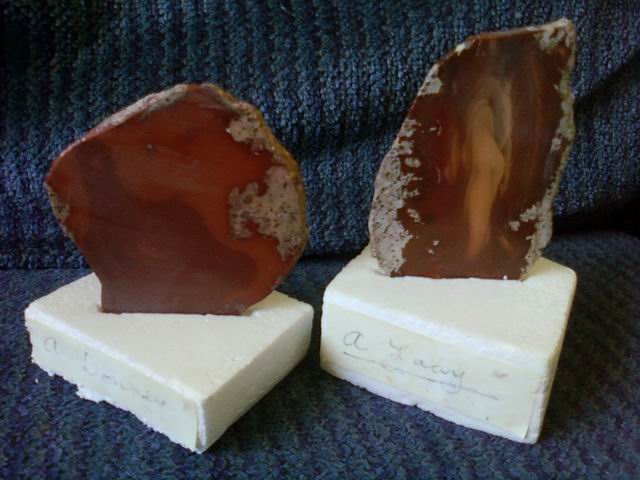
Took a pic of rock cleaning station for the tumbler....On grit #3 right now....will post a pic when finished 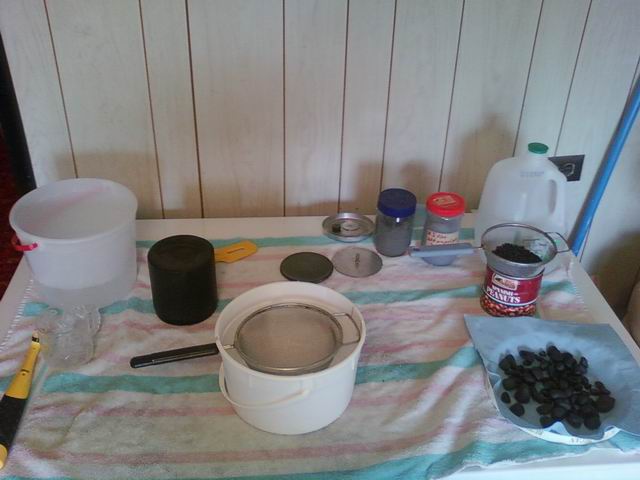
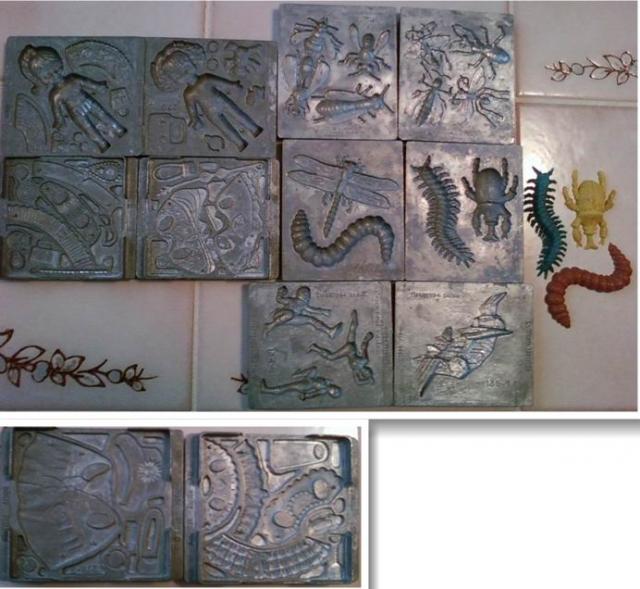
And finally i thought i would post this......Does anyone remember Creepy Crawlers??(In the early 90's)....lol...Well when i was younger i made them....i still have my plates and oven (I'll post them sometime)....i got these plates for it...these are older tho...1964 (didn't know they been around that long)....but will work with my oven.....i'm going to buy more.....What does this have to do with jewelry and my rock shop you ask?? lol......well i'm gong to try and make jewelry out of them....like insert wire within the rubbery creature. Someday i'm going to get my Casting Station and use these molds to make silver and other metal casts of these for like pendants and charms but not until i get the station that costs around $2,500 but until then i'm just going to get goop and make rubbery ones for jewelry.....hahaha!!!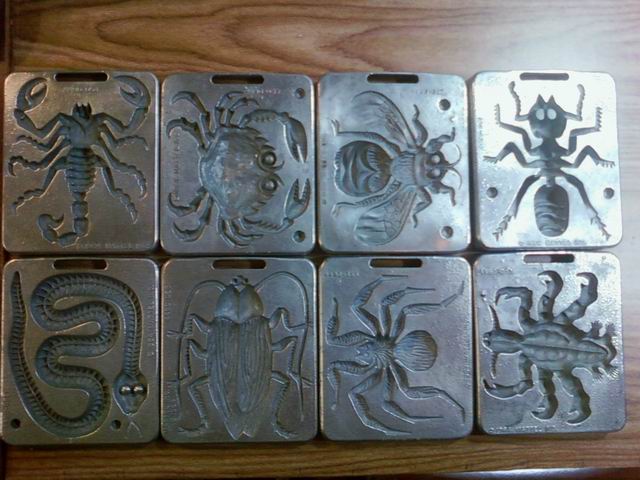
Posted by: amethystguy Nov 30 2009, 02:41 AM
rock shop looks cozy..I didn't see any benitoite in your flourescent collection... 
Posted by: ScottKS Dec 6 2009, 11:42 PM
Here is my Creepy Crawler Station....lol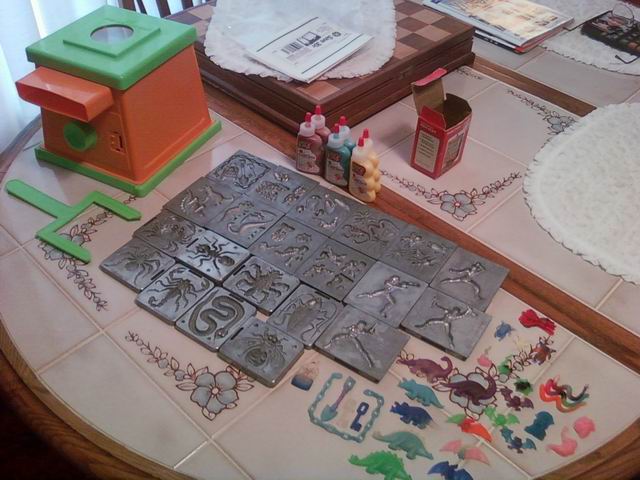
All Molds and Creepy Crawlers made in the past (younger days...lol) also is new goop i just got Sat. at Toys R Us 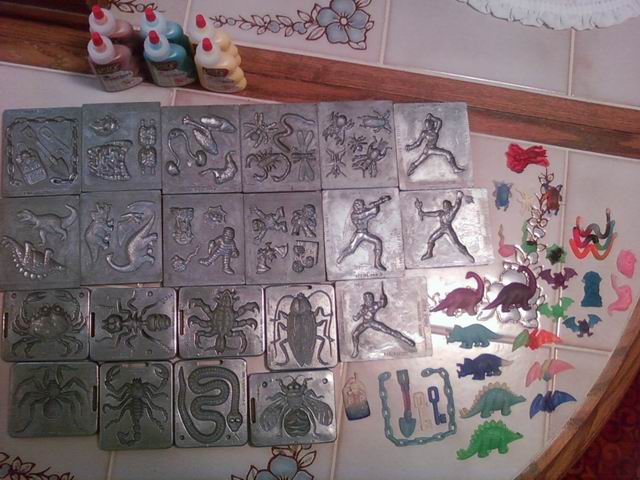
Creepy Crawlers made so far with new Goop and Molds (1964 Molds so older then the rest but new to me...lol)
Had problems with the yellow showing with the older style molds....the shovel and the yellow in that group is much brighter....maybe the older molds are thicker and burnt them to make them look more brown....idk lol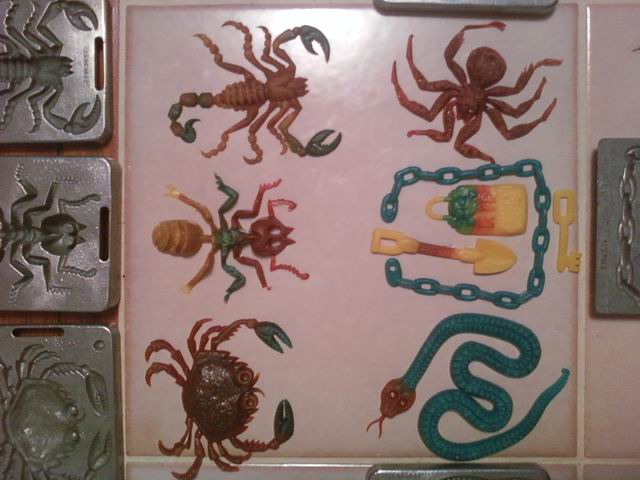
Posted by: ScottKS Dec 8 2009, 01:35 AM
New molds.....these are abit newer then the other ones....1966 lol (2 years) I cleaned these up....should see the before....lol
Before (2 pics)
http://cgi.ebay.com/ws/eBayISAPI.dll?ViewItem&item=120498572729&ssPageName=STRK:MEWNX:IT
After lol much better....lol Love that Shrunkin Head (first mold on the bottom row..lol)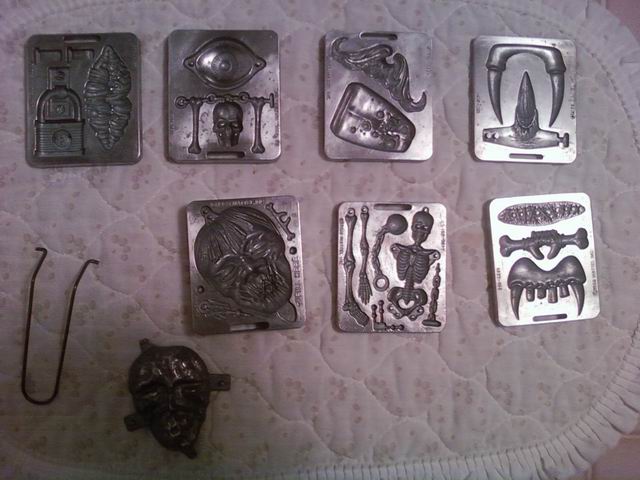
Oh i about forgot....told Dan i was going to post the Casting Station (still need to get..lol)...that is mostly the reason why i'm getting all these molds...lol
http://www.kingsleynorth.com/skshop/search_results2.php?action=search&keys=Casting+Kits&catID=
Posted by: ScottKS Jan 5 2010, 12:44 AM
Hope everyone had good holidays and lets make this new year good too (lets find lots of gold and rocks this year lol)....I'm hopeing this year is better then last year .......Sooooooo......What's New In Scott's Rock Shop.....it's been about a month since the last post
Made more Creepy Crawlers...These was something i added to the gifts for Christmas (String and card ones only...the rest i kept...lol) The shovel is on one side of the string and then the creepy crawler on the other end...The string is elastic and you put the shovel end on your finger and fling the creepy crawler to scare people lol....I think my brother did a good job of doing that to the kids...lol.....his was the only one being used and was the first one to break but was fixed by putting the string around it's neck (Orange Card)....lmao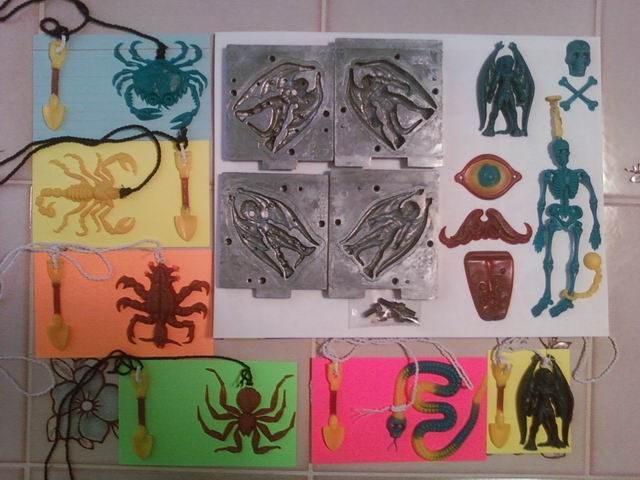
Here is my Shrunkin Head Creepy Crawler Necklace ...SEE this stuff can be made into jewelry and will be much better once i can cast these 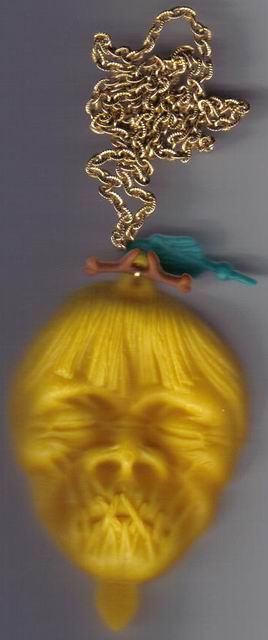
Here is all the rocks finished....turned out really well 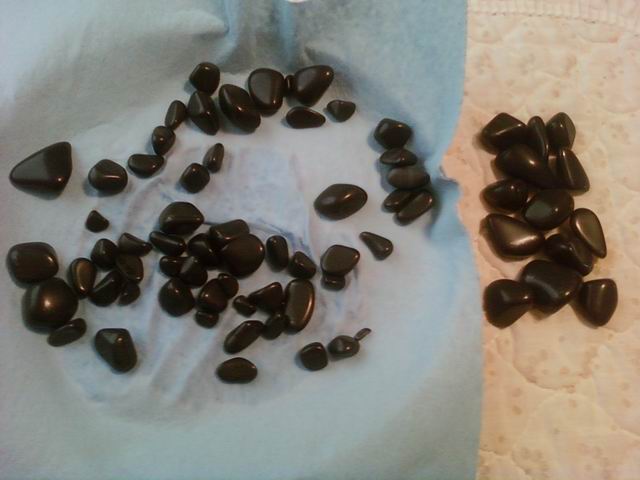
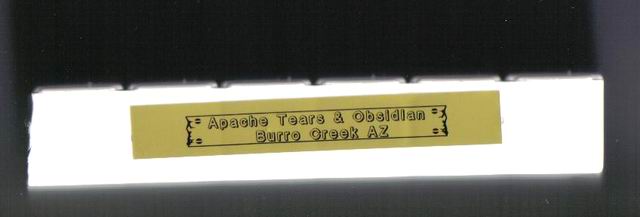
Here is something cool i made with my new label maker (Christmas gift...Thanks Mommy and Mike...Thanks Grandma for the pill container ).....Do you all remember what i said before i started the bach (What makes this load different...not only the M-5 polish but i'm going to grab one rock after each grit so people can see the step process....I can't wait to see the results.....Isn't Rockhounding FUN) Nov 15 2009, 11:35 PM .........Welp i made this 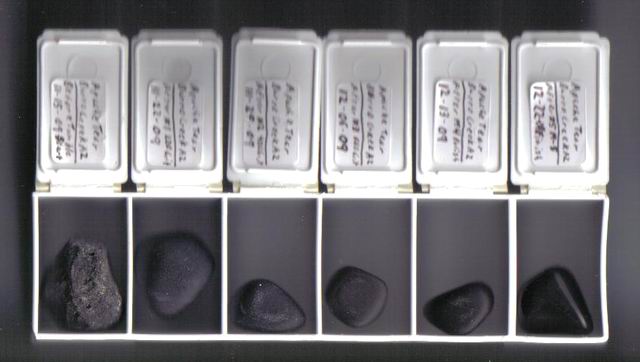

Posted by: ScottKS Jan 22 2010, 01:24 AM
New Stuff for the Rock Shop
More Creepy Crawler Molds....did some wireing to make legs for the Ant and Wolf Spider 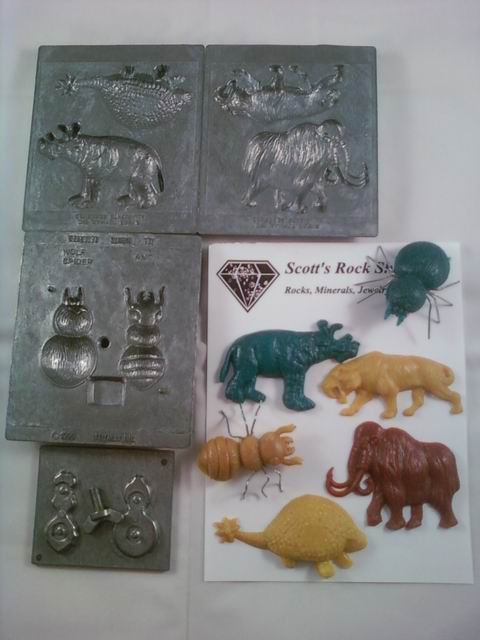
Here is something i got from ebay.....I call them a Light Box.....now takeing photos shouldn't be a problem (just as long as it fits in the box...lol) http://cgi.ebay.com/ws/eBayISAPI.dll?ViewItem&item=270510430090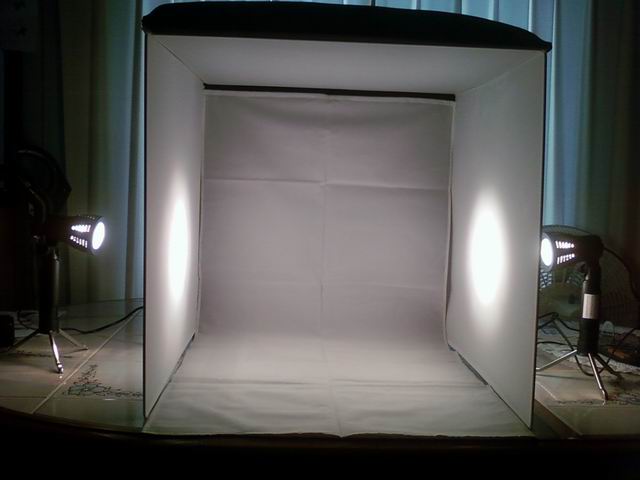
It's been almost a week ago but last Saturday i went to Wichita and went to Ebersole's......I have never been there before and have always wanted to go.......Granny and Gramps (Spear's Rock Shop) did alot of business with this company and i asked the owner and he said he remembers them........i was told that this company has been trying to sell out for 5 years now but it's still open...just don't know for how long .......there's still alot i want from them so i will do more business with them (until they close the doors)....they said that most of the venders (settings/findings mostly) are about all out of business.....they wouldn't tell me who they are.....i don't know what i'll do about stone settings if Ebersoles does close the doors.....i guess i just need to buy them out....lol ya right.....like i can afford that 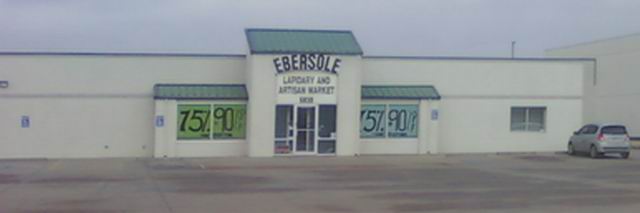
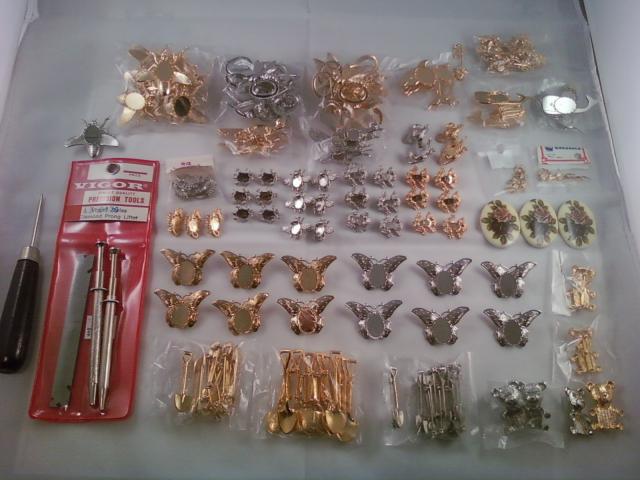
Here is all the stuff i got......Over $300 worth all for alil less then $100.....good thing everything was 75% off... (i'm keeping these two pics the original pic size so the items can maybe be seen better ...just click on the pic )
|
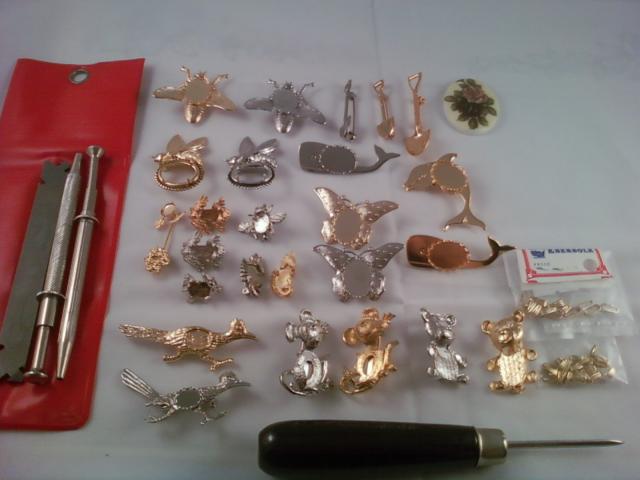
Closeup of one of everything....If anyone is ever in the area go check out Ebersole's....they have rocks.....a rockhounds dream...lol http://www.ebersolelapidary.com/
|

And finally here is some storage i got from Wal-Mart

Posted by: ScottKS Feb 14 2010, 11:40 PM
Here is some projects i'm working my way up too....i cut these slabs to get everything up to the same step which is dopping and then cabbing.
Here is the collection.....the black whole rock in the center will be cut in half as slabs then cabbed for the Cabbin' Fever Contest http://www.coloradoprospector.com/forums/index.php?showtopic=2827&st=15&gopid=18459&#entry18459 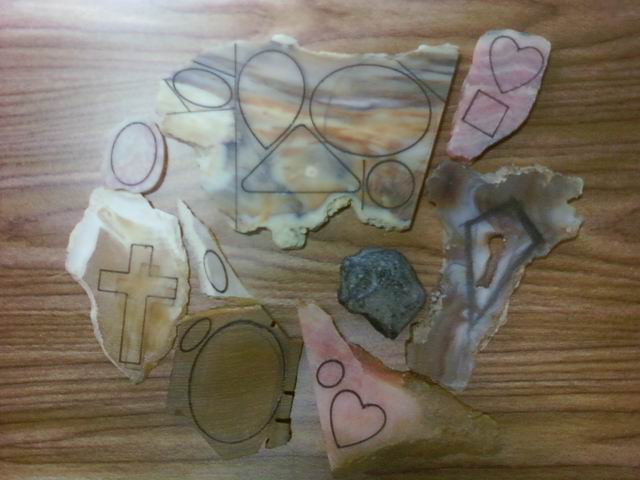
Here is the aftermath.....all the top stuff is the leftovers....as you can see one didn't make it....fractures are the worse things that can happen to cabbing  .....only thing to do is move on....sometimes it can be worked around....like just use the same slab but make the cab much smaller....well in this case i can't do that...not much there to work with (unless i do a free form....i might do that or little bits you can throw in the tumbler and make beads and such with them)
  ....now i have stuff to cab....many projects.....if you look above when i got my dopping station there is more cabs (Page 6....Nov 30 2009, 02:04 AM)(All these slabs are in that pic too).....sooo...i won't be cutting for awhile....next stage is dopping
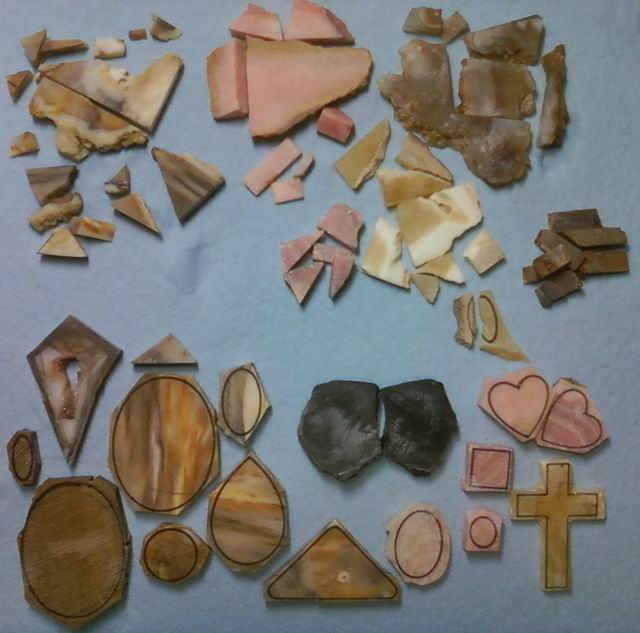
Posted by: ScottKS Feb 21 2010, 11:24 PM
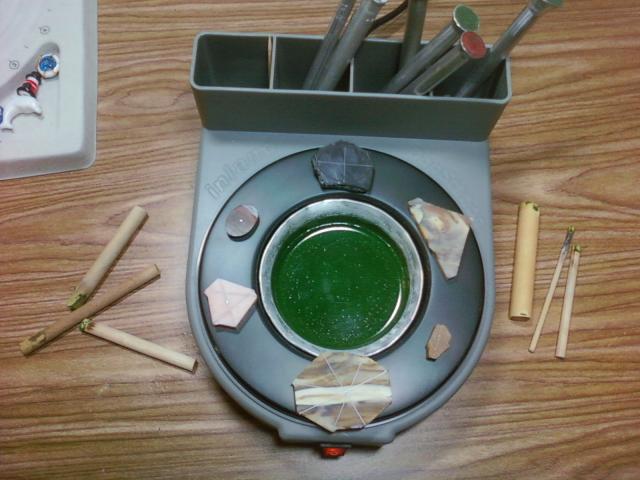
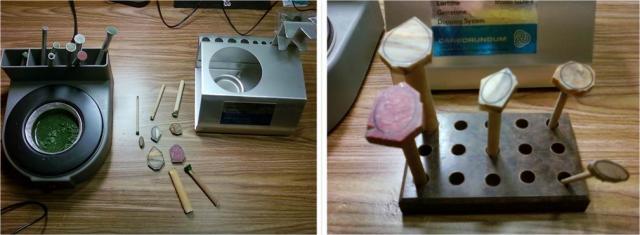
Dopping Time....1st time with this New Dop Station...it worked ok...might be a easyer way to do it tho...lol....that round strip below the slabs is a heating pad to heat the slabs to make the wax bond to the dop stick...it works but the stone is hot and i almost burnt myself....lol...so once you put the stick on it you can either grab the stick and hurry to flip it over (if not fast enough the slab will fall off and make a mess) or i found out that tweezers and holding on to the stick can be done to move it to a steel block for cooling (the wax has to cool some to make the stick stay and it can't do that on the heating pad lol...so i found out that tweezers is kinda a must because the other way is a mess lol)...will take some time to get use too...it's kinda safer then the old candle dopping station that i still have....lol....soooo anyways.....i picked 6 stones to work....i only do so many at a time.....don't want to over do it by doing abunch at one time. 

|
All Dopped and ready to go

|
P.S. Remember one of these stones (Top Right) is in the Cabbin' Fever Contest
http://www.coloradoprospector.com/forums/index.php?showtopic=2827&st=15#entry18572
Posted by: ScottKS Mar 1 2010, 12:35 AM
Ok Cabbing is all done and each stone had it's share of problems....first off you don't see the tiny lil tigereye cab (bottom right corner from pic above)...well it came off the dop...sigh...so i replaced that one and did the kite shaped one and let me tell you it turned out really good.....i gave it a faceted edges look and no dop...polished all around by hand except the keyhole of course...lol...can't really tell in the pic but can see a facet if you look really hard on the left corner....the heart one came off the dop too but i superglued it back on and it stayed ...oh boy hearts are not a easy task...inside point is hard to get the edge of the wheel in and really them wheels aren't made for that... but what else can one do ![confused0082[1].gif](http://www.coloradoprospector.com/forums/style_emoticons/default/confused0082[1].gif) . Everything else didn't do so bad...the big triangle turned out good and was easy to do...one corner is shallower domed then the rest (Top corner). That Obsidian did ok except them potholes...more info in the Cabbin' Fever Contest....one thing about some of these obsidians and like two rocks from tumbleing is the rings or swirals....i'm starting to think that these are Rainbow Obsidian ....maybe
. Everything else didn't do so bad...the big triangle turned out good and was easy to do...one corner is shallower domed then the rest (Top corner). That Obsidian did ok except them potholes...more info in the Cabbin' Fever Contest....one thing about some of these obsidians and like two rocks from tumbleing is the rings or swirals....i'm starting to think that these are Rainbow Obsidian ....maybe 
All in all this was a good learning experience 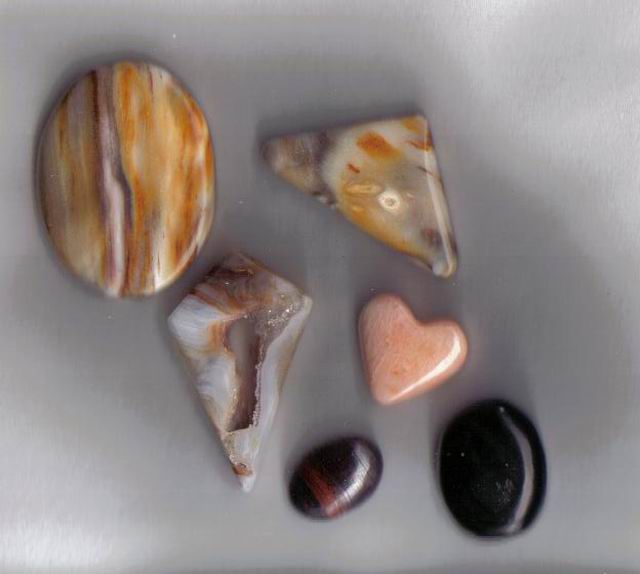
P.S. this pic is scanned and trust me it's alot better then the light box pic ....so cabs maybe scanned only from now on (mostly because my cell phone don't take good pics...pixals you know....lol)
Posted by: ScottKS Mar 14 2010, 11:31 PM
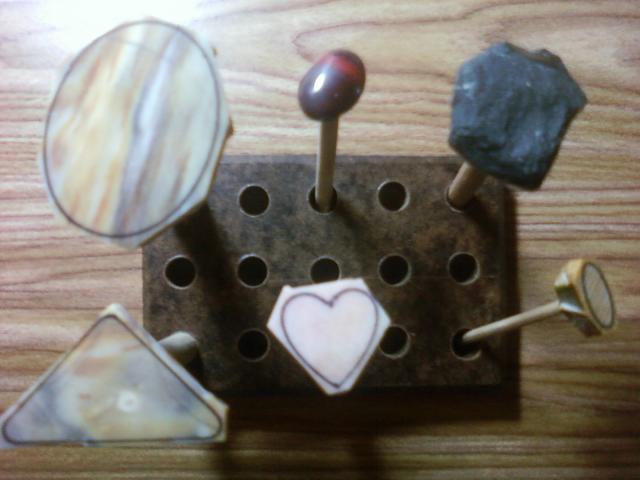
Here is the Drill Station that i setup last Sunday to make the holes for the two beads for the Cabbin' Fever Contest
|
The Cabbin' Fever Contest Project is done.....check it out
http://www.coloradoprospector.com/forums/index.php?showtopic=2827&st=15#entry18811
Posted by: faaus Mar 19 2010, 12:25 AM
Scottinski,
I just had to stop in and congratulate how far you've come.
Hang in there Buddy,
faaus
Posted by: ScottKS May 20 2010, 01:32 PM
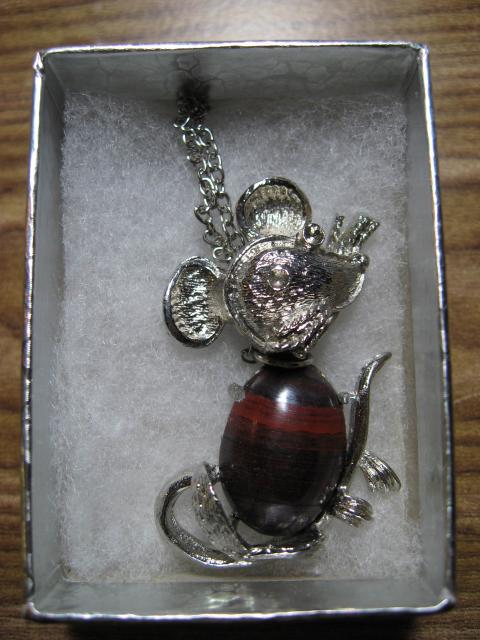
Silver Mouse Pendant with Iron Tigereye Cab....been done for awhile but couldn't post this until the person i made it for got it (cousin in Chicago). ...And Thanks mom for takeing this pic....that's why it turned out this well....wish my cell phone would take pics like this lol
P.S. This cab is in my last group cab post Posted Mar 1 2010, 01:35 AM
|
P.S. Lol Denise i changed it on ya.....mom thought it was cool but she isn't a mouse lover soooo.....lol she might of felt left out this time tho
Posted by: Mrs.CP May 21 2010, 06:02 AM
That turned out really cute Scott! Im sure your mom really likes it and is very proud of the great work you do.
Posted by: ScottKS Dec 15 2010, 07:41 PM
Ok Denise this one is for mom
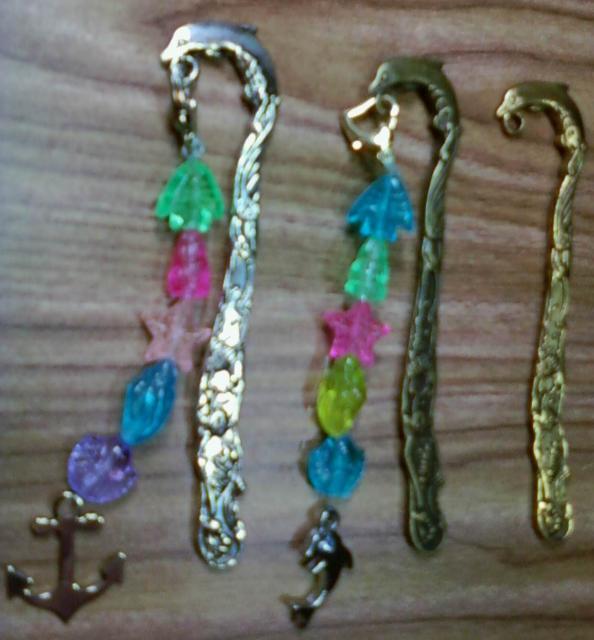
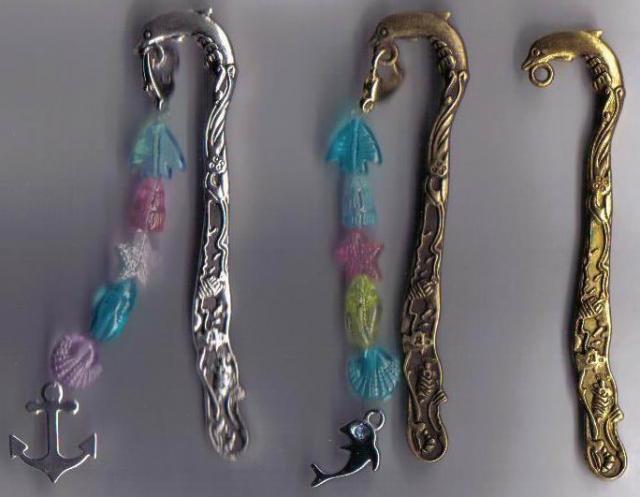
Mom's Dolphin Bookmark Project (Completed 12-01-10...Upgraded & Repaired 12-11-10)...Couldn't post this until i gave it to mom...
|
This Pic show's the bookmarks better..but not so much on the beads..that's why i post this one
|
Posted by: Mrs.CP Dec 19 2010, 08:50 AM
Very cool Scott! Those would look really cool with the Apache tears you tumbled also.
We have given away thin slabs of Coprolite that had too many fractures to work for book markers. It wasnt what we were expecting him to do with the slabs, but he says they work great! He even has a larger polished chunk of Coprolite from us that he uses to hold the book open as he's reading.
Im sure your mom loves them Scott! She always does since they are made by you.
Posted by: swizz Dec 20 2010, 10:43 AM
Scott, good stuff and keep up the good work!
I enjoy looking at your pics.
Posted by: ScottKS Dec 23 2010, 07:19 PM
Mom's Snowflake Pendant (Completed 12-16-10)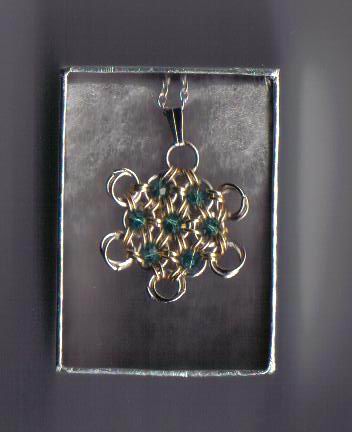
I was going to wait to give this to her on Christmas Day but she was looking for something to wear tonight so i just couldn't wait...lol
Posted by: ScottKS Jan 2 2011, 09:45 PM
Rings Redux with Tigereye Beads and Snowflake Pendant with Light Amethyst Beads
|
The Rings Redux (jumprings) has been done for a long time...i just got around to wire in the tigereye beads.
Snowflake Pendant with Light Amethyst Beads
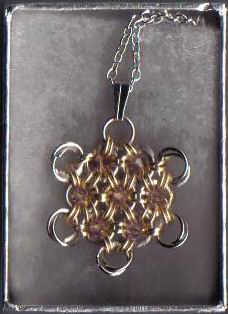
Posted by: ScottKS Jan 3 2011, 11:54 PM
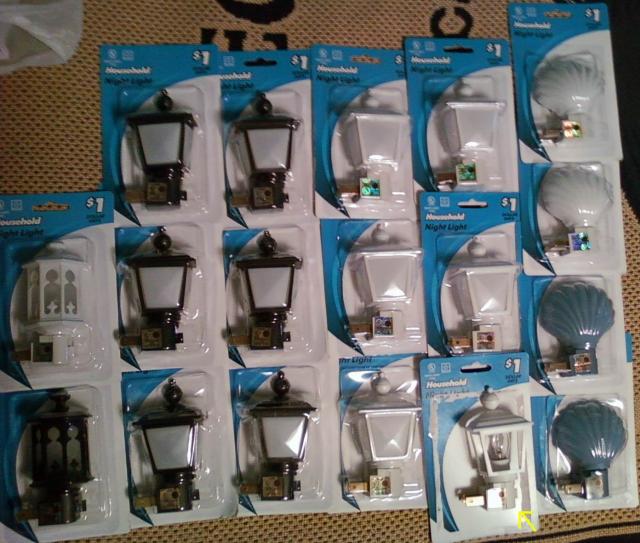
Stuff i got from Duckwalls...only 50 cents each...i am wanting to add see threw~ (sun catchers)~rock slabs to the open areas (the open one has the windows popped out...(yellow arrow) to show where the slabs will be glued in) projects in the makeing.
|
Sea Shells will just be a hole drilled out in the middle with a Sun Catcher slab or cab glued in....Yes Mom a blue one will be yours...just keep eyes open for what stone you want.
Posted by: ScottKS Jan 13 2011, 10:04 PM
Been working in the shop trying to get the clutter organized in this corner
|
Got a 4' folding table to put in the closet (so now i have 4' and 5' tables...both from Wal-Mart) but these will also be for shows once i get started on them and i got them magazine holders (50 all together) from ebay to put Rock and Gem Magazines in (years 1973-present month)
http://cgi.ebay.com/ws/eBayISAPI.dll?ViewItem&item=110584409997
Also trying to fill in the missing magazines...they are not all complete but most of them are...Granny did a good job keeping most all of them.
Posted by: ScottKS Jan 25 2011, 12:07 AM
Scott's Rock Shop Virtual Tour.....hope this works....let me know non facebook users.
http://www.facebook.com/v/496795867098
This link should work i logged out of facebook and messed with the Embed code and found the link that allows access....somtime i will post more video's from facebook on here.
Posted by: ScottKS Jan 25 2011, 12:13 AM
Posted by: swizz Jan 25 2011, 07:36 AM
Scott, it works for me and I'm not a Facebook user.
Nice shop you have there! Great displays and some cool relics. Also noticed the Mt Dew arcade that you won a while back.
Posted by: ScottKS Jan 25 2011, 04:13 PM
Stuff i got today
More Creepy Crawlers Molds
|
The bottom pic is the back side of the two above molds (Clothes for the dolls)...the whole left side is dolls...they came with this lot
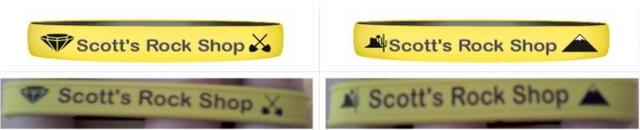
And a Scott's Rock Shop Wristband that i designed
Front.......................Back
|
Posted by: ScottKS Jan 31 2011, 12:38 AM
Dopping from today's (Step 3)
Before.........After
|
Here is video's i just posted on facebook that shows how cabs are made from Step 1-Step 4
Step 1: Cutting Slabs (Blue Agate)
http://www.facebook.com/v/499894457098
Watch what happens when i hit the fracture...
lolStep 2: Cutting Slabs Into Cabs (Cabochons) Shapes (Blue Agate)
http://www.facebook.com/v/499879932098
Step 3: Dopping (Today's Picture)
http://www.facebook.com/v/499878537098
I just made this video today....the rest was filmed awhile back...I have a video of this older dopping station in use that i might post sometime once i cut it down but i explain how it's used some...anyways the newer one is much easyer.
Step 4: Makeing The Cabs (Cabochons)...Blue Agate (Freeform Only)
http://www.facebook.com/v/499862992098
All steps but step 3 was done back in 2008 here is the posts
Aug 10 2008, 07:03 PM http://www.coloradoprospector.com/forums/index.php?s=&showtopic=1787&view=findpost&p=15068
Aug 19 2008, 06:33 PM http://www.coloradoprospector.com/forums/index.php?s=&showtopic=1787&view=findpost&p=15118
Posted by: ScottKS Feb 7 2011, 11:38 PM
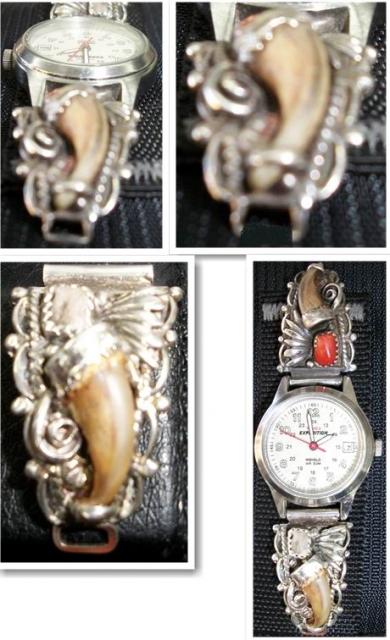
Betty's Project "Repair" (Completed 01-27-11)
|
1st pic is the other link and what this one is suppose to look like before it broke...2nd pic is kinda what it looked like when i got it (didn't take a before pic so i marked out in photo shop to make it close)...3rd pic is the work i did (first i tried to solder a cross wire but it wouldn't solder so i filed it all down to the base and made this wire ring to solder on)...4th pic is link put back in and battery changed out...Next is to put the stretch band on to make it completely done but i gave it back to Betty and she likes it.
I may not be a business and make myself known to everyone...maybe someday...But mostly i'm here with all my equipment to make repairs and to help people in this area because there just isn't anything like that around here...but i don't just only do repairs...i play around with all kinds of idea's floating around my head (if any...lol).
This project had it's risks...like that claw almost caught on fire (it was burning and smokeing) but i stopped and pulled the claw out just in time to save it..that was something i was worried about from the first time i saw it but i warned Betty about that and took a chance and it all turned out good. whew

I know what everyone is thinking....geez Scott...why didn't you just take out the claw before you started soldering?? Well the answer is i tried to move the bottom with pliers but it wouldn't budge (was stuck in there good with age, gunk and the claw was kinda hard too) but heat soften it and burnt some of the bottom tip off so it was budgeing and it came out almost by itself so i pulled it out. lol

Posted by: ScottKS Feb 12 2011, 01:41 AM
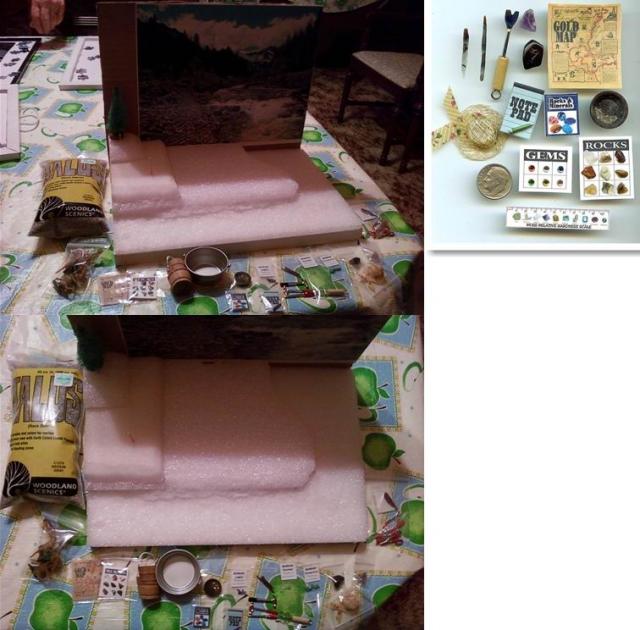
New Project In Progress...Rockhound/Gold Prospecting Diorama Scene
|
I remember in grade school we made shoebox diorama's...does anyone else remember those?? well this is like that but not in a shoebox but as a display instead...they have kits at like Hobby Lobby called scene-a-rama to make them but i'm starting from scratch.
http://scenearama.woodlandscenics.com/show/Item/SP4111The small pic to the right is a small rockhounding kit that got me started on the idea....that kit and some dollhouse accessories from Hobby Lobby.
http://cgi.ebay.com/ws/eBayISAPI.dll?ViewItem&rt=nc&nma=true&item=140505514604&si=E5qZQeGOsnMtY95cAYcEBl6LRbk%253D&viewitem
Posted by: ScottKS Feb 20 2011, 05:30 PM
Cabs i did today
The After: Cabochons Group #8 Projects 27-31
Posted by: ScottKS Feb 21 2011, 10:11 PM
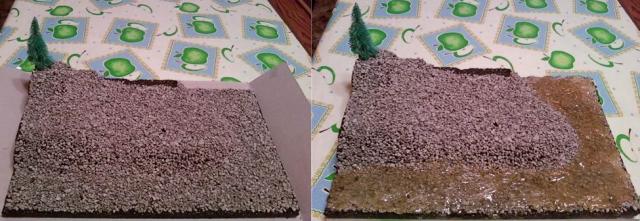
Rockhound/Gold Prospecting Diorama Scene (Step 2 & 3)
|
Posted by: ScottKS Feb 23 2011, 02:18 PM
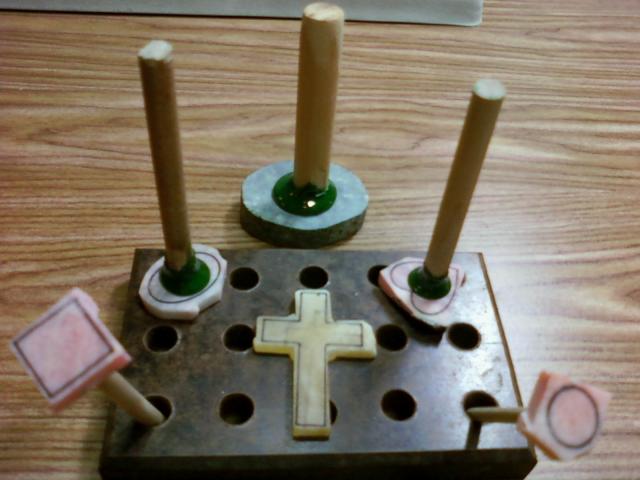
Group #9 Projects 33-37 (Before)
I only do 5 stones per group....the 6th one is just incase one comes off the dop like the small round one in the right corner might do that.
|
The heart one will probably be the hardest one to do just like the one in group #7...even more so then the cross but i'm excited to see how that turns out also.
The reason two of the stones is backwards from the rest (the top two on the block) is because i draw the shape on the most flat side and the other side of these two stones has a bevel on it and i'm hopeing to get rid of that with the doming...figers crossed.
Posted by: Mrs.CP Feb 24 2011, 08:19 AM
Your doing great Scott, also love the cabachon making videos.
Are those different kinds of Jades you have dopped in the last pic?
Keep up the good work, your doing great!
Posted by: ScottKS Feb 24 2011, 09:27 PM
Don't think so Denise...that one at the top i'm thinking is some kind of granet...if it is jade then is not any i have seen...lol...But you never know i guess.
Rockhound/Gold Prospecting Diorama Scene (Sluicebox)
Here is a Sluicebox i slapped together for the Diorama Scene...This is only 2" long by 1/2" wide...i used my sluice box for reference lol...the blue is not for water color it is for the color of the miners moss...clear water effect will be added going over the riffles for total effect...will see how this works with the scene.
Just think i used my imagination with only a Mt. Dew can, some wire, a sharpie, paper and a color pencil....bending the sides with my vice and cutting with scissors.  Oh ya and some sand paper.....lol.
Posted by: Mrs.CP Feb 25 2011, 07:50 AM
What? You havent identified your stones yet Scott?  0000000....hehe
Diorama sluice looks cool, but you really need to work on your picture taking.
Posted by: ScottKS Mar 13 2011, 04:22 PM
Yes Denise i know......like i have said in a past post....my cell phone doesn't take very good pics up close..that's why i use the scanner when i can.
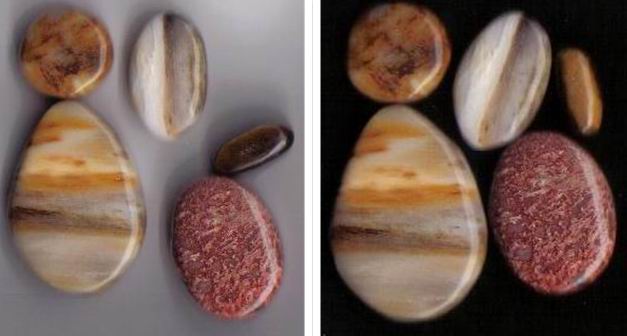
Group #9 Projects 33-37 (After)

|
The Cross (Honey Onyx)
The rest i believe might be Rhodonight or Rhodolite?? the oval one could be either that or Rose Quartz (that's why i post on here in hopes to have someone help me I.D. them but i did that in the last Spears Rock Shop thread hopeing to have someone chime in but no one never did
)The Cross was harder then i thought because on the bottom of the two arms won't reach the wheels very well...need bigger dia. wheels (like what the Genie has...lol)...but i got it to look ok i guess for what i have.
Posted by: ScottKS Mar 14 2011, 10:57 PM
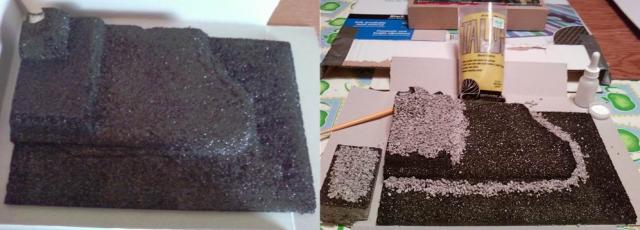
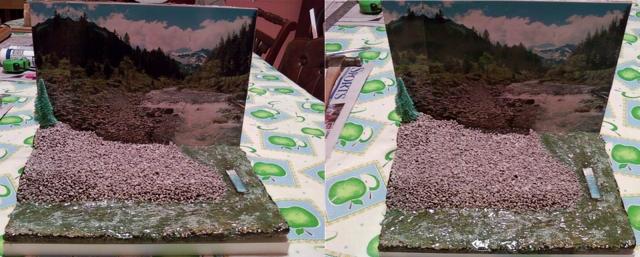
Rockhound/Gold Prospecting Diorama Scene (Step 3 Finished & 4)
|
The water has a yellowish tint to it (the pic looks better then in real life lol)...not clear like i wanted it to be (maybe someone peed in the river
lol) i might add one more layer to it...idk....not the best but will have to work. This is what i used http://woodlandscenics.woodlandscenics.com/show/Item/C1206/page/1 ...have to heat the pellets on the stove...it's a mess and has that yellowish tint to it......i should of got this http://woodlandscenics.woodlandscenics.com/show/item/C1211 but it drys slow and makeing the ripples would be harder.
Posted by: Mrs.CP Mar 16 2011, 07:31 AM

Group #9 Projects 33-37 (After)
The Cross (Honey Onyx)
The rest i believe might be Rhodonight or Rhodolite?? the oval one could be either that or Rose Quartz (that's why i post on here in hopes to have someone help me I.D. them but i did that in the last Spears Rock Shop thread hopeing to have someone chime in but no one never did
)The Cross was harder then i thought because on the bottom of the two arms won't reach the wheels very well...need bigger dia. wheels (like what the Genie has...lol)...but i got it to look ok i guess for what i have.
Nice job Scott, you did especially well on the heart and cross!
Posted by: ScottKS Mar 18 2011, 11:39 PM
Rockhound/Gold Prospecting Diorama Scene (Step 4 Complete)
|
Put on a 2nd layer and added some blue food coloring (grandma's idea at 1st..wasn't going to do it because i didn't know if it would mix and what it would look like in color and such but i said hec with it and did it anyways..it kinda turned greenish but is much better then the yellowish color under it)...it turned out really life-like with the riffles.
So all is good so far....next pic will be the completed once everything is added (pics will be taken with grandma's camera and the lightbox so the pics should turn out much better i hope). The water in the background is kinda blueish-greenish too so i think they match up really well.....after grandma looked at it she said "This looks 3D" and it does...makes the scene really pop out i think.
Posted by: ScottKS Mar 23 2011, 01:53 PM
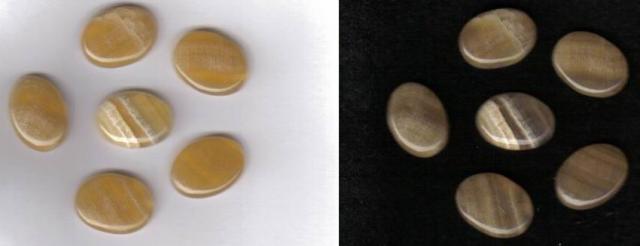
Group #10 Projects 38-43 "Honey Bees" (Honey Onyx Cabs)

|
Cool thing about this is the Honey Onyx slab looks like the bee hive (honeycomb)...These will be for sale once completed...I'm expecting for these to sell out quickly (may not make it threw the monday crew..lol).
Posted by: ScottKS Mar 25 2011, 10:12 PM
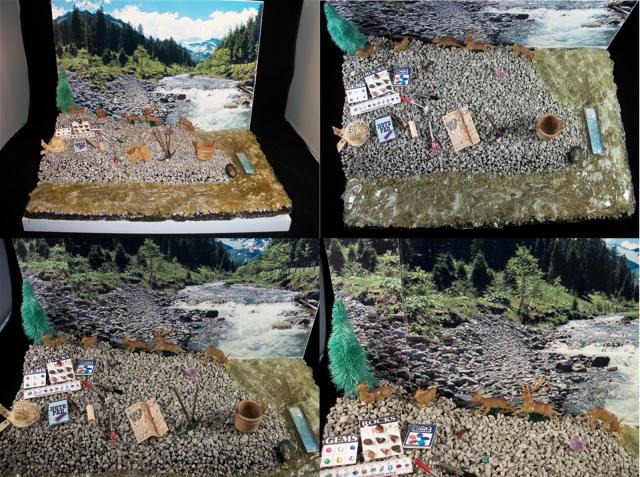
Rockhound/Gold Prospecting Diorama Scene (Complete)

|
The Blueish-Greenish tint that the river had seemed to disappear and didn't last...darn it
But it's done and that's a relief...someday i might try and find or build a clear plastic hood to keep dust off of it.
|
Posted by: ScottKS Mar 27 2011, 04:21 PM
Group #10 Projects 38-43 "Honey Bees" (Honey Onyx Cabs) Cut and Dopped
|
Dopped and ready to go.....As you can see i put the dop on the mark side...i might start to get in the habbit of doing this because if i do it opposite then the shape of the cab seems to turn into a different shape (like more of a egg shape......instead of oval) and thats because the mark is gone once i start the dome part so i have no guide to shape but the mark on the bottom doesn't go away until it's done and off the dop to do a quick polish on the bottom.
...Remember these cabs are going into settings so they need to be exact as possible.
Posted by: Mike B. Mar 27 2011, 05:39 PM
|
|
The Blueish-Greenish tint that the river had seemed to disappear and didn't last...darn it
But it's done and that's a relief...someday i might try and find or build a clear plastic hood to keep dust off of it.
|
|
Awesome job ScottKS....Well done!!!
Posted by: Mrs.CP Mar 29 2011, 07:36 AM
Looks cool Scott, you did a good job! Nice call on the honey Onyx cabs markings on the dop side.
Your right about the shape coming out more accurate with following the mark on the inside. When we dop thats the way we do it.
Keep up the good work!
Posted by: ScottKS Apr 3 2011, 07:11 PM
Group #10 Projects 38-43 "Honey Bees" Honey Onyx Cabs Finished
Center Cab is Mine
|
Group #10 Projects 38-43 "Honey Bees" Honey Onyx Cabs Finished and in Bee Settings.

|
Posted by: ScottKS May 31 2011, 10:04 PM
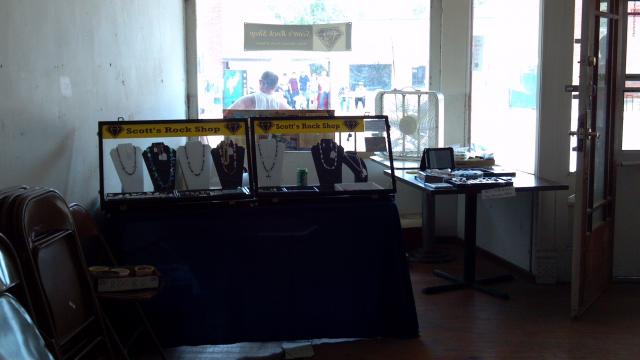
This Saturday June 4th I'm setting up my 1st Scott's Rock Shop booth for the Craft Show/Poker Run!!!
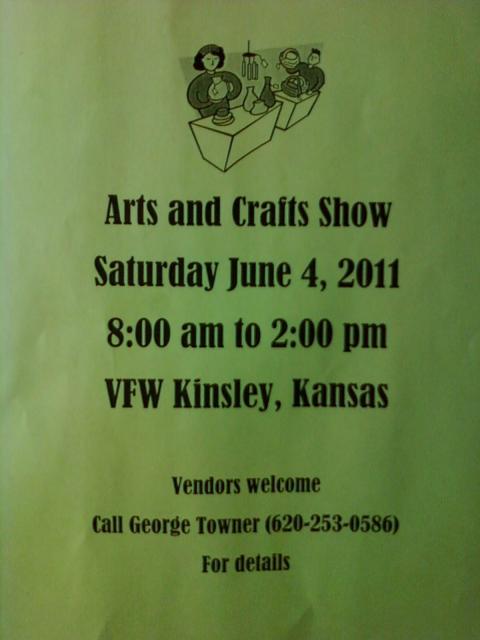
|

|
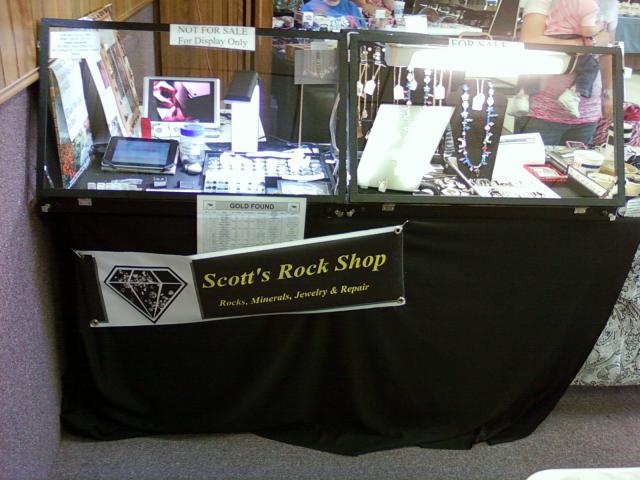
Scott's Rock Shop Booth Display....so far...almost done

|
Posted by: ScottKS Jun 4 2011, 04:44 PM
Craft Show/Poker Run 06-04-2011...The setup didn't work out like planned because i had to share a table with someone else but i used my 4 foot table with my half and made it work out.
|

|
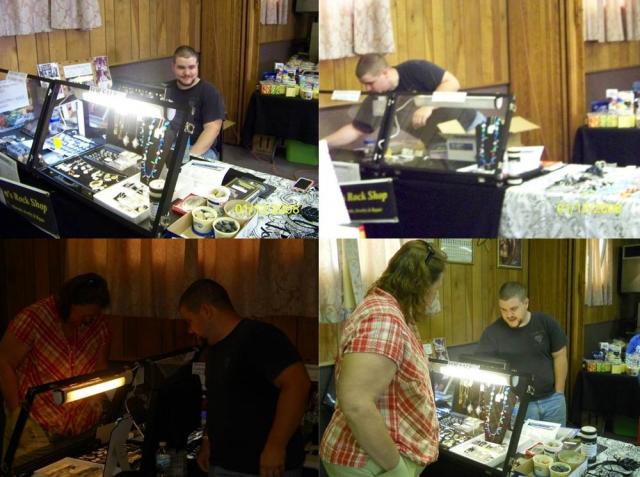
|
Posted by: ScottKS Jun 22 2011, 11:38 PM
Yay....I'm on the list to setup "My Tables" at the Lewis Days Booth Fair in the Community Hall Saturday July 2nd.

|
Posted by: ScottKS Jun 24 2011, 09:47 PM
Scott's Rock Shop in the Edwards County Sentinel

|
Posted by: ScottKS Jun 29 2011, 09:36 PM
Projects Cascade Of Hoops Earrings and Lace Skirts Pendants...Projects I made from Step By Step Wire Jewelry Magazines for this upcomming show.

|
I sold the only pair of Cascade Of Hoops Earrings i made for the last show and they sold right away so this time i made 5 pairs for this upcomming show...i sold one of the two Lace Skirts i made for the last show so i made two more for this upcomming show.
I made two pairs of all silver Cascade Of Hoops Earrings and 3 pairs of Mixed Silver & Gold......I made one of each for the Lace Skirts.
Posted by: ScottKS Jul 31 2011, 01:44 AM
Mom's Dolphin and Anchors Project
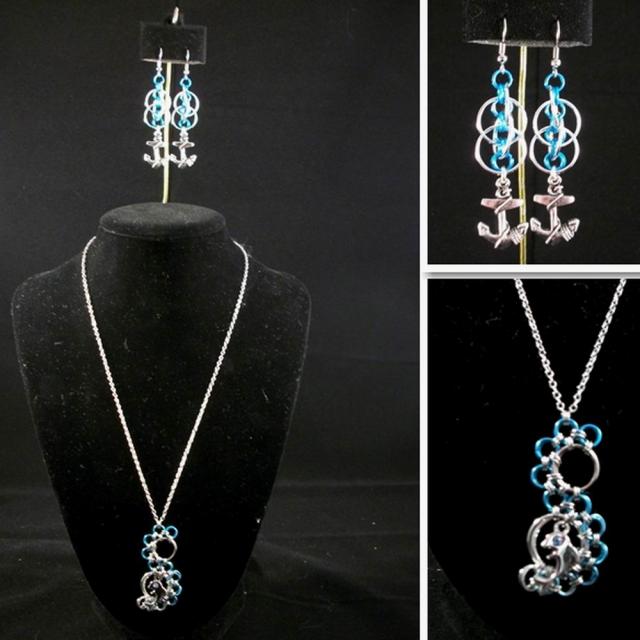
|
A New Spin from the same designs i made for the show (Lace Skirts and Cascade Of Hoops)...New technique useing color jumprings...these jumprings aren't the best in color quality some are lighter in color then others and that's why i went from darkest to lightest on the pendant and also when i put these in the sonic cleaner it also lighten them all.
I had this project done a week ago but couldn't post it until i gave it to mom...i think she likes it...i told her when she saw it that them earrings maybe too long and she said that's the style right now so i guess i did ok.
Posted by: Mrs.CP Aug 4 2011, 11:10 AM
Your doing great Scott! The dolphin and anchors set for your mom turned out really nice. The light blue and silver hoops look good together.
Posted by: ScottKS Sep 21 2011, 10:35 PM
Work for customers
Rocks mom's neighbor gave me to drill and put on bails

|
Inlay Bracelet someone at dad's work wanted me to fix

|
Posted by: ScottKS Mar 19 2012, 11:18 PM
Group #11 Projects 44-48

|
Posted by: ScottKS Apr 1 2012, 09:38 PM
Cabs done ...Group #11 Projects 44-48

|
Chinese Writing Stone (black and white ones)
http://www.google.com/search?hl=en&sugexp=frgbld&gs_nf=1&cp=21&gs_id=3g&xhr=t&q=chinese+writing+stone&bav=on.2,or.r_gc.r_pw.r_qf.,cf.osb&biw=1280&bih=714&wrapid=tljp1333337568419055&um=1&ie=UTF-8&tbm=isch&source=og&sa=N&tab=wi&ei=AB55T-vqA8js2QXHnNm1Bg
Agate and i think the big one is Granet(but i could be wrong)
Displays Video (rocks from AZ)
http://www.facebook.com/v/10150661706942099
Posted by: ScottKS Apr 6 2012, 11:09 PM
Grandma's the one on the left...i copied it and just made mom the one on the right.

|
I'm going to make abunch more or sell...i want to make some red-white-and blue ones.

Posted by: ScottKS Apr 9 2012, 07:52 PM
More done!!!

|
Posted by: ScottKS Apr 16 2012, 10:38 AM
Sister-In-Law's Project I Made Her

|
Close-Up Earrings

|
Close-Up Pendant

|
This Pendant is in the pic of cabs i completed (top right)...it's the back of this pic.
Posted by: ScottKS Apr 30 2012, 05:25 PM
More Done!!!

|
Posted by: Woody Apr 30 2012, 08:58 PM
You defiantly have a fine talent there. Do you have any idea where that Chinese writing stone comes from? Hope you get some good dividends for you efforts, Woody.
Posted by: ScottKS May 4 2012, 05:58 PM
Finally got the original (1964) Creepy Crawlers I have been wanting for a very long time

|
http://www.ebay.com/itm/180873267473?ssPageName=STRK:MEWNX:IT&_trksid=p3984.m1497.l2649
Woody...it came from Spears Rock Shop...it's hard telling where they got it from (probably from another rock shop)
Posted by: swizz May 4 2012, 06:12 PM
COOOOOLLL!!!!!
I owned the Creepy Crawlers kit in the 60s!
Really cool to see that. I remember each of those dies really well.
Posted by: ScottKS May 14 2012, 06:13 PM
Metallic Series...Done!!!

|
Posted by: ScottKS May 17 2012, 09:40 PM
Made For Upcomming Shows

|

|

|

Posted by: ScottKS May 25 2012, 04:12 AM
Made For Upcomming Shows
Hearts, Wings & Peace Necklace with Angel Earrings (Gold)
Angel Cross Necklace (Silver)

|
Necklace Extenders (Angels)

|
4th Of July Bear Necklace (Kids)

Gold and Silver Rose Earrings

|
Pink Abalone Shell & Pearls Necklace with Earrings

|
White Abalone Shell & Pearls Necklace with Earrings

|
Posted by: ScottKS Jun 7 2012, 10:45 AM
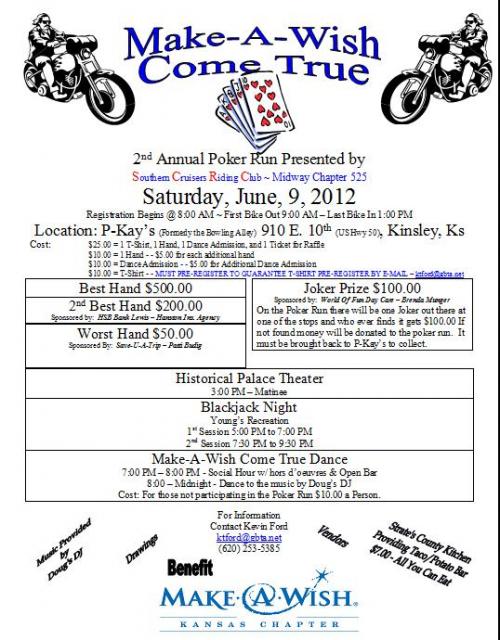
Scott's Rock Shop Will Be There!!!

|
"Let There Be Light" twice the lighting for the displays

|
I drilled holes in the lid and put eye-lets/hooks hardware to install them properly.
I have only 2 more days to be all done...still alot to do before showtime
Posted by: ScottKS Jun 7 2012, 04:20 PM
Purple Seed Bead Twist Necklace with Diamond Cameo Pendant
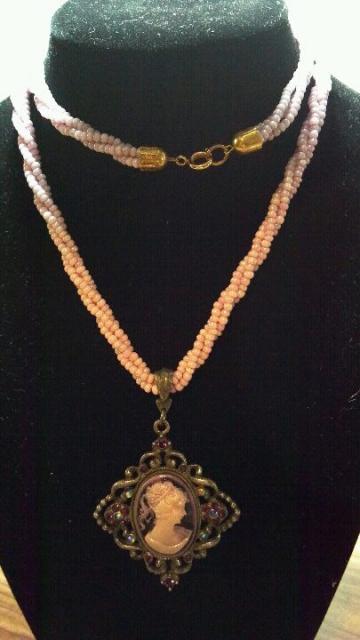
|
Posted by: russau Jun 8 2012, 07:08 AM
looks like something Tiffiany would sell! very nice!
Posted by: ScottKS Jun 10 2012, 11:04 AM
|
Yesturday's Showtime...Poker Run 2012
|
|
|
Came home with $44.50 but with booth fee it's only $34.50 BUT i made $6.50 more then last year
New banners i just ordered to replace the childish ones i made in this pic...lol http://www.bannerbuzz.com/order_product_details.php?product=49813
|
^ ^ ^ ^ ^ ^ ....so that means the money i just made yesturday is spent because of the banners....lol

|
I just pray the measurements will be correct
Posted by: ScottKS Jun 21 2012, 11:17 PM
New banners...look more professional but there is some air bubbles and in spots (like in some of the diamonds) the white shows threw because they are cheap made from finger oil wearing it off getting air bubbles out.
|
I'm going to try to get some money back...they should be able to take more then that..hec they should be able to take weathering because they are made for the outside of windows.
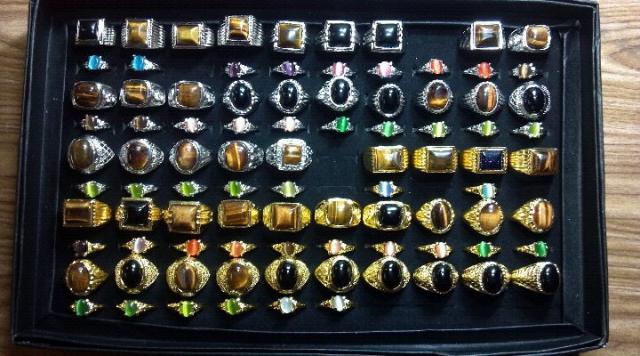
Here is all of the "NEW" Rings...all 94 of them. Top Half is Cat's Eye...Bottom Half is Tigereye and Black Stone
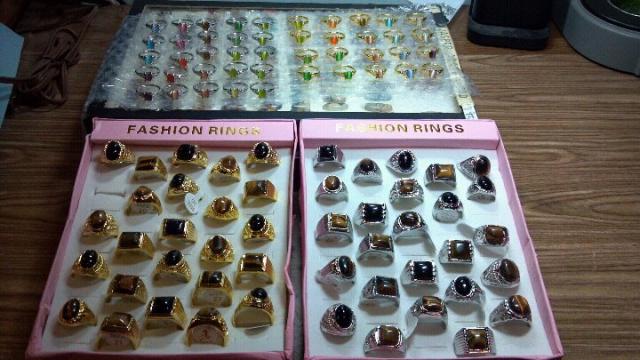
|
There was suppose to be 95 but one of the gold black stone ring's band is broke.
I will post a pic of all these rings in the display once i get the display
Cascade Of Hoops Earrings..first 3 (silver, gold and blue)
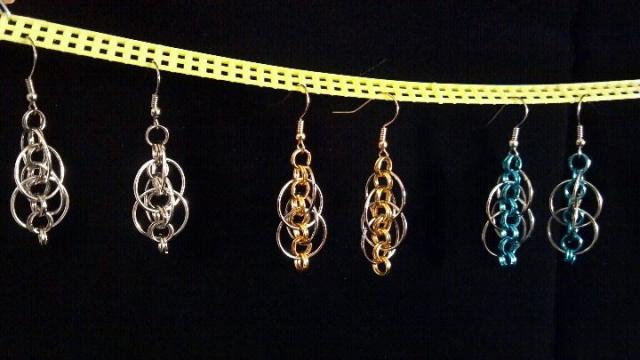
|
Cascade Of Hoops Earrings...last 3 (pink, purple and green)
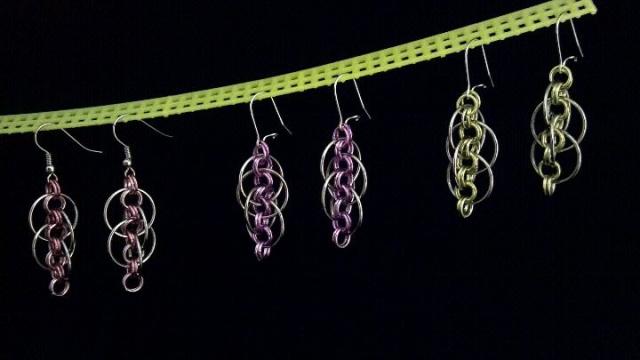
|
Posted by: ScottKS Aug 11 2012, 06:26 PM
Scott's Rock Shop Update: Seems like i'm about over a month behind on here for some reason so what's been going on......Nothing much been too hot to work in the shop (seeings my main room is the only room in this house with AC) but i did do a craft show here in town again this year for Lewis Days (June 30th) and i have done some work in the rock shop re-organizing so here's all the update pictures that i have posted on Facebook but not here yet!!!
June 25th
Rings Are Displayed and ready to go!!!
|
June 26
Someone's Necklace I restrung from dad's work
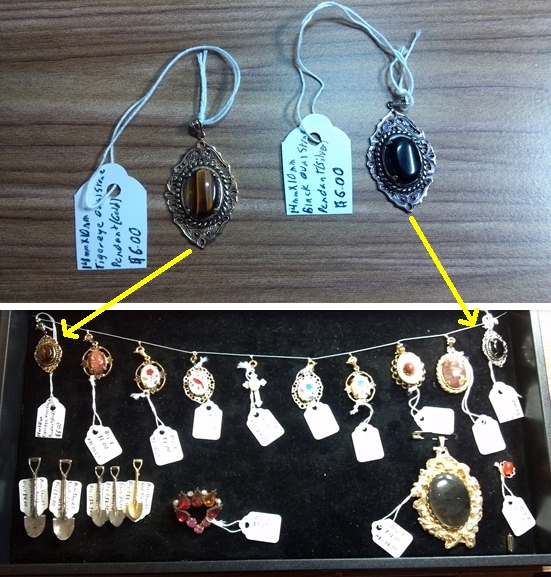
June 26
Tigereye and Black Stone Cabs from broke rings added to these settings to add to the pendant collection to sell
June 30
Showtime!!! Lewis Days
|
July 6
Shop Update
|
|
So where did the arcade go you ask.....In my main room of course
July 12
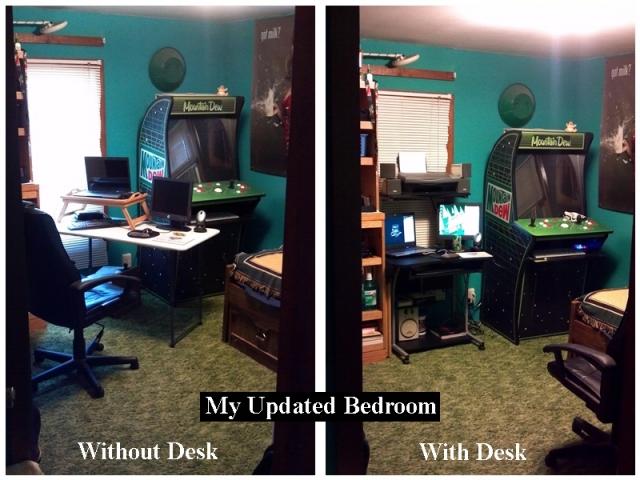
|
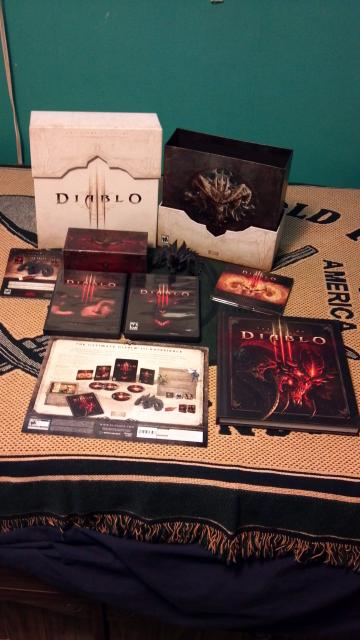
Made these changes so i can play a game (Diablo 3) in my ACed room

|
|
Well that's about all i have been up too lately...until next time!!!
Posted by: russau Aug 12 2012, 07:03 AM
expansion is good! congrats on doing so well!
Posted by: ScottKS Mar 16 2013, 08:11 PM
Started (1:00pm today) the 1st load of rock (Apache Tears) of the year (hope to do two more loads after this one)....tried to get the Blue Lortone to do it but it's not powerfull enough so had to do it on the other one (more powerfull because of the bigger belt wheel and also rubber tubeing on the rollers...need to get rubber on the Lortone..then it should work..rubber on rubber makes better traction).
This load should be done April 8th
I'm trying something different on this load (that i have never done before)...i'm skipping Grit #1 220 Grit because like river rock the apche tears have traveled with water action...the 1st grit is designed to round the rock (like river action does) so useing the 1st grit on river action rocks only makes the rocks even smaller....yes it makes them even more round but they are round enough with the river action.
|
Powered by Invision Power Board (http://www.invisionboard.com)
© Invision Power Services (http://www.invisionpower.com)