
Scott's Rock Shop |


 Colorado Prospector - Gem and mineral prospecting and mining forums > Prospecting, Mineral Collecting and Treasure Hunting Forums > Gem and Mineral Specimen Finds or Processes
  |
Scott's Rock Shop |
 Mar 29 2008, 10:34 AM Mar 29 2008, 10:34 AM
Post
#61
|
|
 Rock Bar!  Group: Members Posts: 464 Joined: 2-March 06 From: Lewis KS Member No.: 319 |
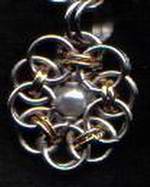
Welp the Malachite bead didn't work out.......tried to glue the jump ring into the half drilled hole but it just didn't stay so i found this pearl fully drilled bead at grandma's and wired it into the pendent.

Attached image(s)
|
 |
 
|
|
Mar 31 2008, 10:39 AM
Post
#62
|
|
|
Shovel Buster! Group: Members Posts: 120 Joined: 8-February 07 From: Kentucky Member No.: 978 |
Neat looking piece Scott!
I think the pearl was a great addition. faaus |
|
|
|
|
May 11 2008, 03:14 PM
Post
#63
|
|
|
Rock Bar! Group: Members Posts: 464 Joined: 2-March 06 From: Lewis KS Member No.: 319 |
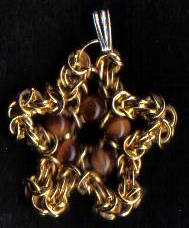
Here is my latest project i worked on Wed. and Thur. nights....took about 5 hours to make....it is called Starfish Pendent....the outside is Byzantine Chain made out of 4mm gold plated jumprings and the tigereye beads in the center is also 4mm.....i got the step by step project from a book i got....here is a link to who makes it.
http://www.davidchain.com/wk_starfish_P.html
Attached image(s)
|
|
|
|
|
May 20 2008, 07:57 PM
Post
#64
|
|
|
Rock Bar! Group: Members Posts: 464 Joined: 2-March 06 From: Lewis KS Member No.: 319 |
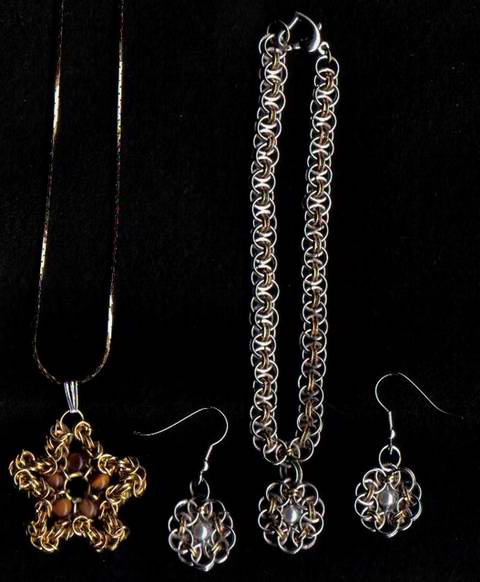
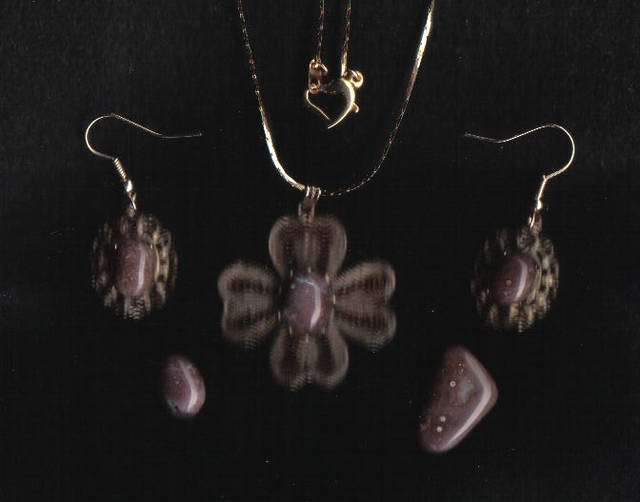
Just got done with the ear rings...took about 2 hours to make the ear rings.......here is the whole set.........hey the star is waveing

Attached image(s)
|
|
|
|
|
Jun 3 2008, 02:21 PM
Post
#65
|
|
|
Rock Bar! Group: Members Posts: 464 Joined: 2-March 06 From: Lewis KS Member No.: 319 |
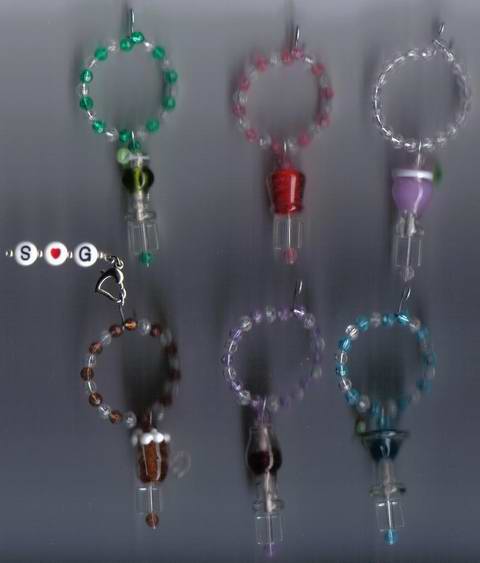
Well Denise just told me that this post got lost in test land
 .....sigh so here it is again.....these are Stem Glass Charms for like wine glasses or any glass with a stem or handle.......i finished them May 15 but couldn't post them until i gave mom hers at the outting because this was a mother's day gift. I still need to make my set and i made grandma a set too. .....sigh so here it is again.....these are Stem Glass Charms for like wine glasses or any glass with a stem or handle.......i finished them May 15 but couldn't post them until i gave mom hers at the outting because this was a mother's day gift. I still need to make my set and i made grandma a set too.
Attached image(s)
|
|
|
|
|
Jun 10 2008, 06:47 PM
Post
#66
|
|
|
Rock Bar! Group: Members Posts: 464 Joined: 2-March 06 From: Lewis KS Member No.: 319 |
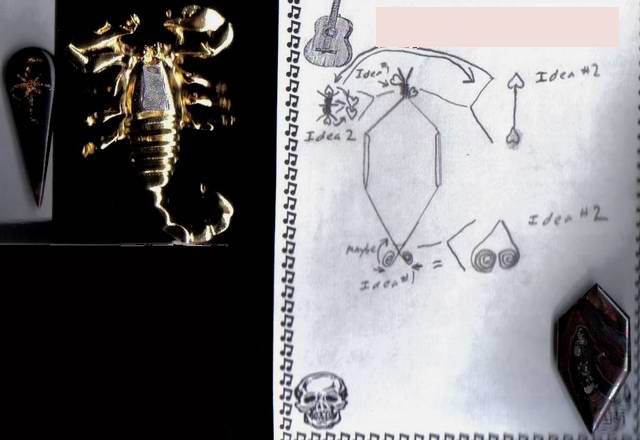
Here is my next 2 projects.......the first one i will be adding that gold inlay cab i won at the ranch at Fairplay to that scorpion....will have to trim the cab...as you can see in the pic it's alil too big for the scorpion and will have to make a setting for the cab..i took off the setting that was on the scorpion it sat where that lil patch of gray is at on the scorpion's head......the next project is the cab mom won at the ranch...she told me i have to make a wire wrap for it so here is my idea for that project......hope to get these projects done before the big move......hope i can do it

Attached image(s)
|
|
|
|
|
Jun 29 2008, 03:06 PM
Post
#67
|
|
|
Rock Bar! Group: Members Posts: 464 Joined: 2-March 06 From: Lewis KS Member No.: 319 |
Ok i just got done doing some cabbing....
 ....it's about time huh ....it's about time huh  ....here is the before shot...kinda hard to see but i will make up for that in the after shot ....the first cab is the cab i won at the ranch I cut the tip down so it will fit better on the scorpion. ....here is the before shot...kinda hard to see but i will make up for that in the after shot ....the first cab is the cab i won at the ranch I cut the tip down so it will fit better on the scorpion.
Attached image(s)

|
|
|
|
|
Jun 29 2008, 03:13 PM
Post
#68
|
|
|
Rock Bar! Group: Members Posts: 464 Joined: 2-March 06 From: Lewis KS Member No.: 319 |
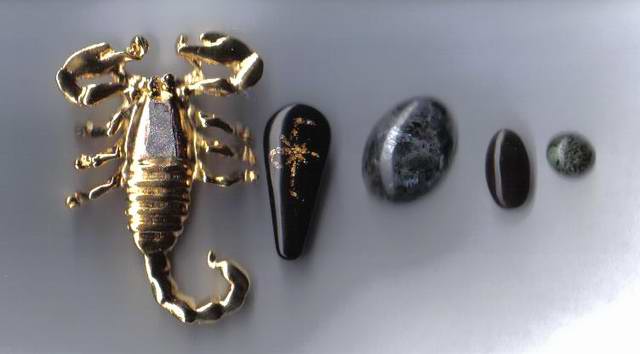
Here is the after shot...as you can see that' lil pink looking cab to the end on the right side from above post isn't in this pic...that's because it flew off the dop so will have to redop it and try it again but i think it also took a chip off of the cab itself so it will be smaller in size..sigh....oh well the rest turned out good the scorpion cab i think i did a good job but i think the M5 polish left a hairlike haze on it and i tried to take it out but it wouldn't come out....oh well it gives hair on the scorpion's back lol.....the black looking one isn't black in the light..it's really cool..it has kind of a cat's eye band shadow look and it's deep purple and when held up to the light it's totally black or gray clear...really cool and the bigger cab kind of has some mica or abalony shell fire bits to it...it's cool too....it was good to cab again...i think i will try and do more cabs it's not as bad as i make it lol.
 P.S. the last three was cabs that Granps or Granny started but didn't finish..they was still on the dops so i finished them.... ....if you look at post Mar 31 2007, 10:22 PM in this thread(1st page)...that is all the cabs that Granps or Granny started but didn't finish....these last 3 cabs are in that pic still on the dop and that lil pink one is in that pic too.
Attached image(s)
|
|
|
|
|
Jul 2 2008, 03:27 PM
Post
#69
|
|
 Master Mucker! Group: Admin Posts: 7,208 Joined: 7-October 03 From: Colorado Member No.: 4 |
Your lapidary work is looking good Scott! Keep up the good work.
 <----- Waves back to the star /)
-------------------- Education is the key to the future,
and participation opens the door to opportunity. Discover your prospecting independence & success! ColoradoProspector.com Owner/Webmaster Core team member ♥  |
|
|
|
|
Jul 10 2008, 05:41 PM
Post
#70
|
|
|
Rock Bar! Group: Members Posts: 464 Joined: 2-March 06 From: Lewis KS Member No.: 319 |
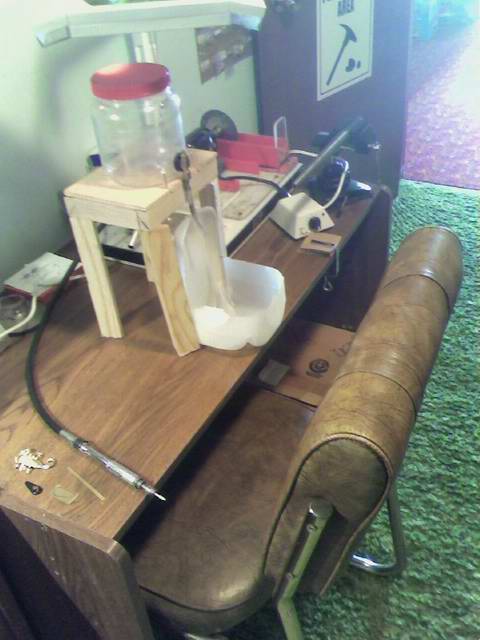
Welp i just got done setting up the station to drill some holes in the Scorpion's back so i can add the stone with the setting.....if you look really hard in the bottom left corner you can see that i have started on the setting for the stone itself them were made with a sheet of brass....the strip of brass there is for the bezel to set the stone in the base and the lil sheet there with a trace mark of the stone is the base itself......after drilling two holes on the Scorpion then i need to drill one small hole in the setting for a total of 3 holes....will see how it turns out
Attached image(s)
|
|
|
|
|
Jul 13 2008, 05:58 PM
Post
#71
|
|
|
Rock Bar! Group: Members Posts: 464 Joined: 2-March 06 From: Lewis KS Member No.: 319 |
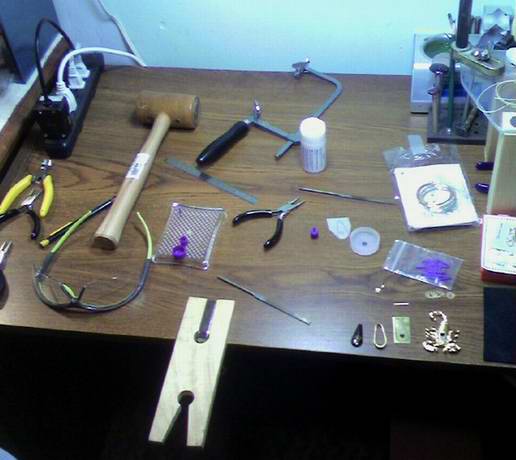
Just got done cutting and sizeing the bezel....it's the ring right beside the stone at the bottom right of the pic.......i used the Thing-A-Ma-Jig (that clear peg board with the purple pegs) to size the bezel and then used the saw to trim it down to size......now i need to start soldering....first i need to solder the bezel ring shut and then solder it to the base.
 P.S. The drilling turned out ok....will see how it works out after it is all inline with the scorpion's back...after the bezel is complete.
Attached image(s)
|
|
|
|
|
Aug 3 2008, 06:08 PM
Post
#72
|
|
|
Rock Bar! Group: Members Posts: 464 Joined: 2-March 06 From: Lewis KS Member No.: 319 |
Here is my next project....Blue Agate from Washington..someone at work used to live in Washington and we talked rocks and he gave me this rock so i could make some cabs for him and also for me too....here is one link to the Blue Agate site and also here is a video of me cutting the slabs
.......Sorry the camera moved on me and i didn't notice that...see what happens when i hit a fracture lol but it's ok.... http://www.myspace.com/scottgalyardt Click on the play button in the clip window called Cutting Blue Agate Slabs on the right side of the screen...you might have to scroll down just a tad. http://www.blueagates.com/ |
|
|
|
|
Aug 10 2008, 07:03 PM
Post
#73
|
|
|
Rock Bar! Group: Members Posts: 464 Joined: 2-March 06 From: Lewis KS Member No.: 319 |
Here is the next two steps i just got done with today in makeing the Blue Agate Cabs.
Cutting Blue Agate Slabs Into Cab Shapes (watch as i hit another fracture  ) )http://vids.myspace.com/index.cfm?fuseacti...ideoID=40491662 Dopping Blue Agate Slab Cabs http://vids.myspace.com/index.cfm?fuseacti...ideoID=40493532 |
|
|
|
|
Aug 12 2008, 07:33 AM
Post
#74
|
|
|
Master Mucker! Group: Admin Posts: 7,208 Joined: 7-October 03 From: Colorado Member No.: 4 |
Cool Scott.
Video of you in action in the Rock shop......heheBlue agates are very pretty! Cant wait to see your finished pieces. Thanks for sharing the videos with us! -------------------- Education is the key to the future,
and participation opens the door to opportunity. Discover your prospecting independence & success! ColoradoProspector.com Owner/Webmaster Core team member ♥ |
|
|
|
|
Aug 19 2008, 06:33 PM
Post
#75
|
|
|
Rock Bar! Group: Members Posts: 464 Joined: 2-March 06 From: Lewis KS Member No.: 319 |
Welp Sunday i got to cabbin.........Here is the process of makeing Cabochons....in this video i'm makeing Blue Agate cabs......this is the final process of this blue agate project....this video is only one cab...being the free forming cab because the original video is about a hour long with all 5 cabs
....the ending pic is all the cabs done and 3 are in settings.This was a fun project with not too many disappointments but there was some fractures in makeing the slabs but i got past it all......whew http://vids.myspace.com/index.cfm?fuseacti...ideoID=41134378
Attached image(s)
|
|
|
|
|
| Lo-Fi Version | Time is now: 21st July 2025 - 12:02 PM |


