Printable Version of Topic
Click here to view this topic in its original format
Colorado Prospector - Gem and mineral prospecting and mining forums _ Gem and Mineral Specimen Finds or Processes _ Specimen cleaning
Posted by: Mrs.CP Sep 10 2009, 03:07 PM
We get alot of questions about the do's and dont's when specimen cleaning. So I thought a thread with some good tips and links would be handy here in the forums. Knowledge is power right?
After a good day of prospecting and digging in the dirt, we have these flats filled with muddy/clay specimens, some even with Iron deposits all over them. Now what?! 
Picture of Anita with a flat of fresh Fluorite and Smokey Quartz finds.
We like to keep it as safe and simple as possible. We start off with a plastic black tub, filled with water (room tempature). Some minerals are sensative to quick tempature change, so be careful with the water temp! Place some of the specimens into the water. Gently hold one in your hand, and agitate it in the water to remove some of the dirt. You will be supprised how well just a little water works. Repeat several times till you can see If there are more minerals present on the specimen. Colorado is well known for combo specimens, so keep a close eye open! After examining for other minerals present, you can use an old tooth brush to remove more dirt in the crevices. I have even had tiny Fluorites, Goethites and Quartz crystals etc. pop up in those crevices after using the tooth brush and spray bottle!
Sometimes just the water helps to clean, but when you get those iron stains you might want to move on to straight vinegar. It is a very mild acid, and can remove some mild iron stains. Leave sit in the vinegar for several days as needed, and gently agitate the vinegar every once in a while to help remove the stain. If the vinegar fails to remove all the stain, you might want to try "SuperIronout" stain remover. This product is used for removing iron stains in sinks, tubs, toilets etc., and is easy to find at your local hardware store or any where they sell plumbing chemicals like drain cleaners.
Always read all instructions and warnings for use, before attempting to clean any specimens!
It's best to use a small sample for testing first, before cleaning the better pieces.
For mineral cleaning with SuperIronOut (SIO), we mix up enough SIO powder in the water to completely saturate the mixture with as much SIO as the water will dissolve (or close to that). This is a strong mixture and depending on your stains to be remove, soak time will vary from a few hours to a few days or a week. The mixture does not always need to be this strong. Use in a well ventilated area, we put lids on our soak containers to keep down the fumes/smell. Use containers just big enough for your specimens to be cleaned.
Always use distilled water with this soak process as the SIO will leach any minerals out of the tap water and cause a crusting on your specimen.
After soaking you will need to rinse off the specimens. If you have a pressure wash gun (textile cleaning gun) you can use this with tap water. Very carefully rinse off the specimens with the pressure wash gun. Depending on the specimens and delicacy, you will want to adjust that gun's output and distance used from specimen while rinsing. If you do not have the textile pressure gun, go to the rinse soaking step.
Next you will need to rinse soak (distilled water again) for at least the same time as the SIO soak or longer. Some pieces with heavy staining (iron deposits) may need to have clean rinse water about half way through the soak period. After the soak period, some pieces may need a repeat of the whole process, some may just need sprayed off after one process for the desired effects.
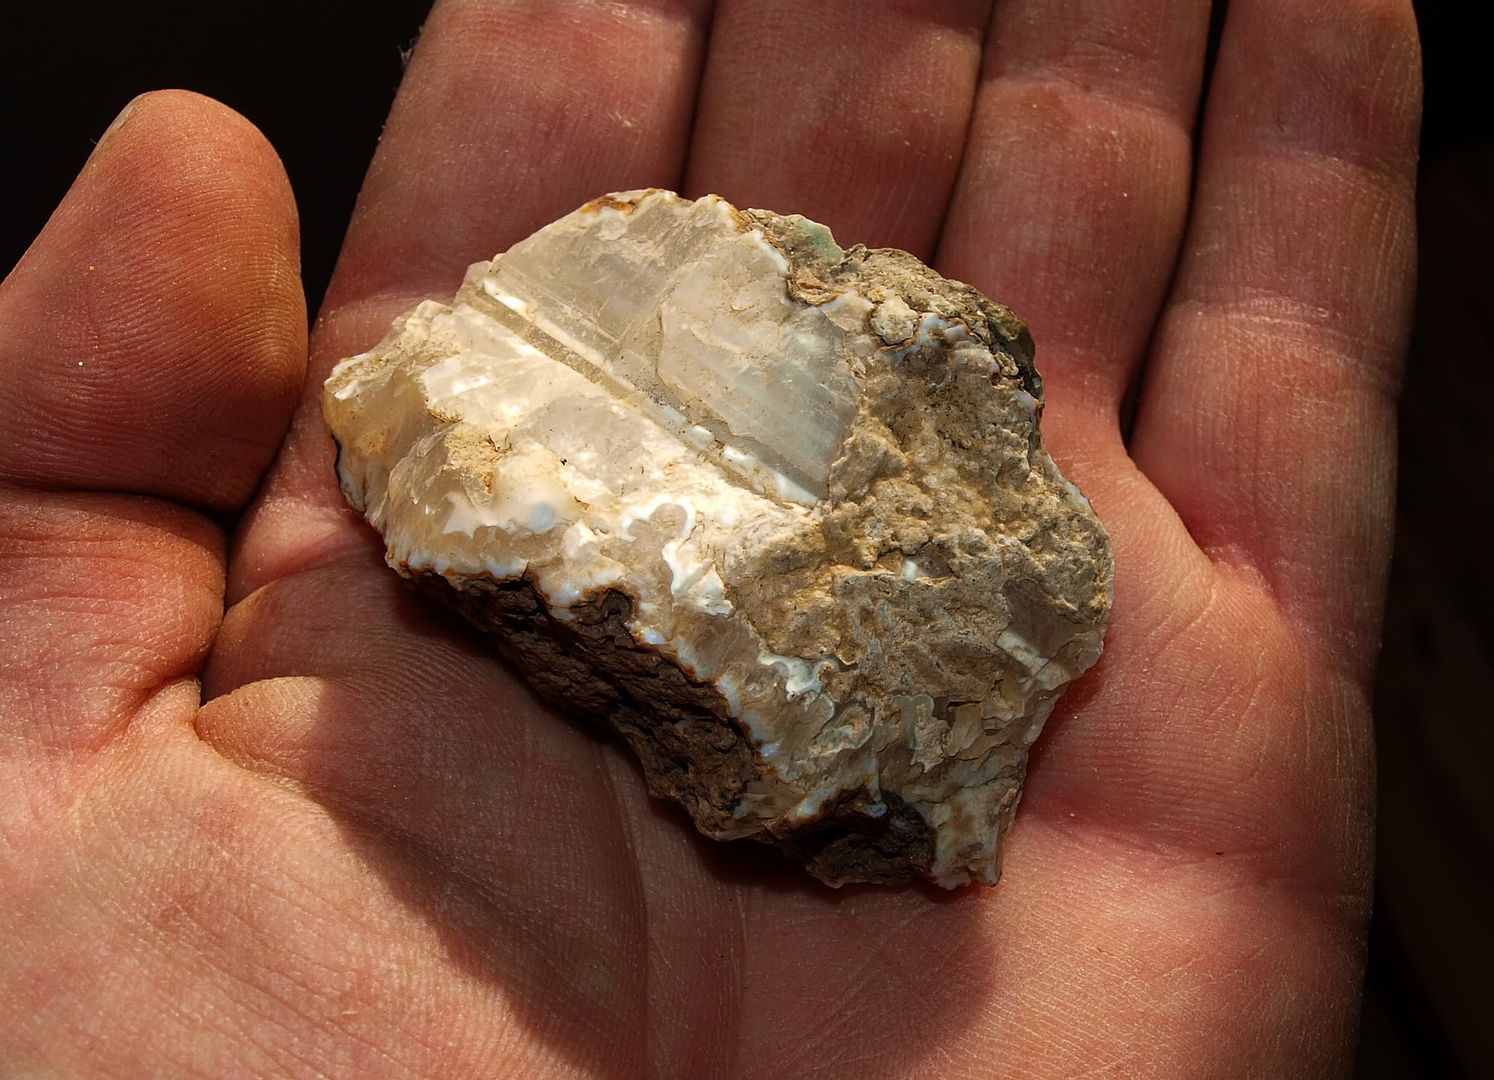
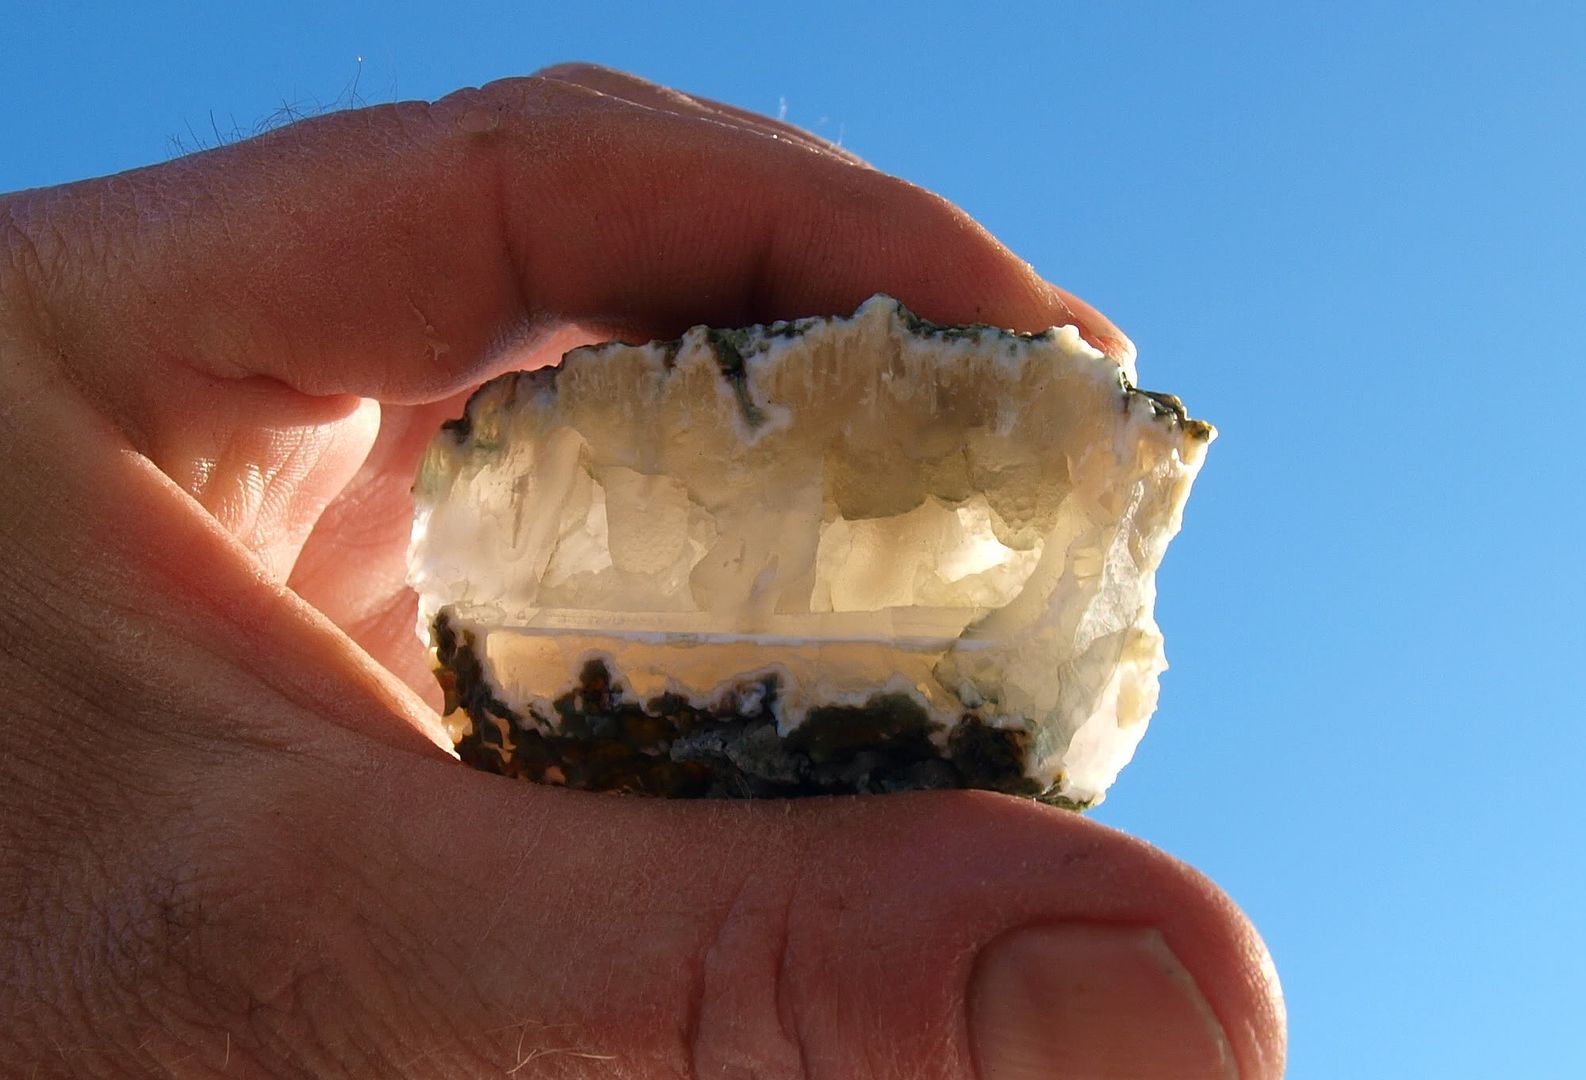
Here are a few before and after pictures of a Smokey Quartz crystal we cleaned using SuperIronOut.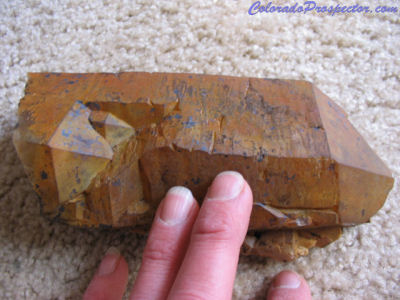
Picture of Smokey Quartz with only water cleaning.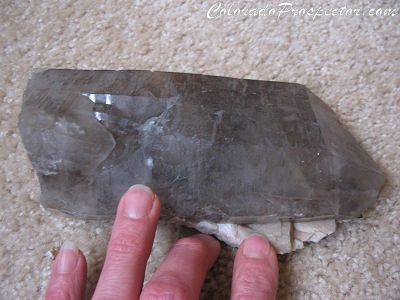
Picture of Smokey Quartz after cleaned with SuperIronOut.
Rock Currier at Mindat.org did an excellent article on cleaning Quartz that goes into alot more details and methods if needed. Very good reading and an awesome write up!
http://www.mindat.org/article.php/403/Cleaning+Quartz
We hope this info will help you some when cleaning your mineral specimens.
Good luck with all your finds, and remember to stay safe out there!

Posted by: swizz Sep 10 2009, 04:59 PM
Yowsa!! The before/after images of the Smokey Quartz piece are incredible, very interesting.
Posted by: Mrs.CP Sep 17 2009, 08:10 AM
Thanks swizz! We thought it cleaned up nicely also.  The white part under the quartz is Microcline.
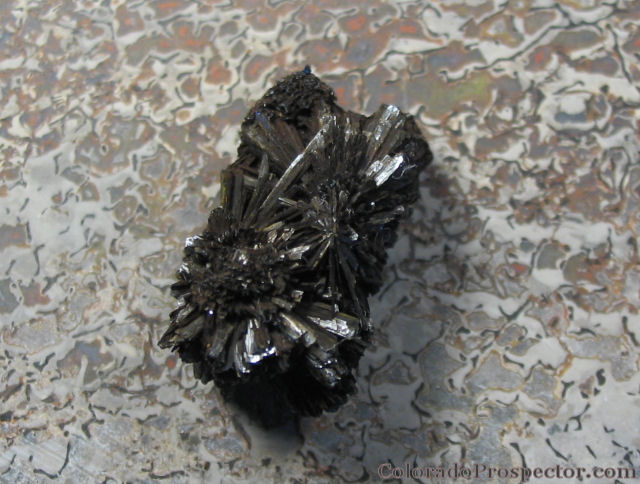
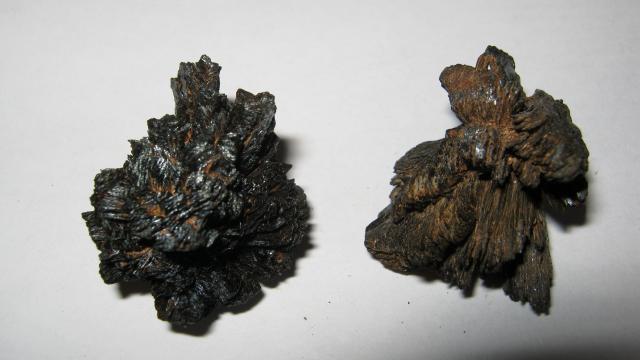
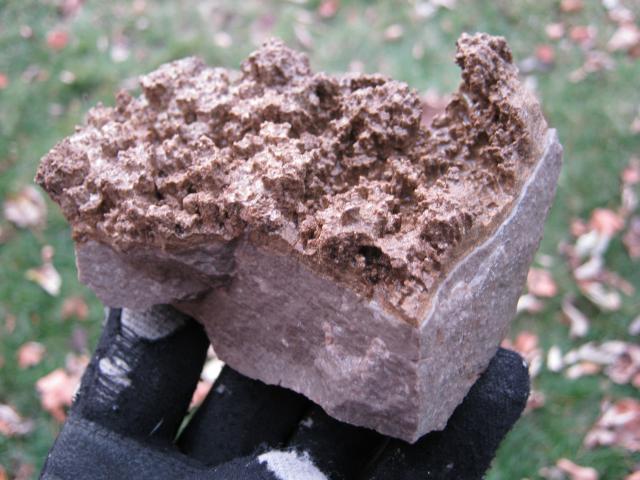
Here is a Goethite that was soaked and agitated in water, and then blasted carefully with the textile pressure gun.
We use the pressure gun for lots of different kinds of mineral cleaning!!
It started off looking like a small muddy clay ball. Wish I had before pics of this one but I dont. 
Guess we were too excited to see it after it was cleaned.

Posted by: ColoradoProspector Nov 6 2009, 09:43 AM
The goethites are very delicate and just full of mud when you find them. Tough ones to clean for sure.
With the textile cleaning gun they turn out very well though. You do need to use caution with distance from the nozzle though, too close and the pressure itself can tear off or cut through some materials.
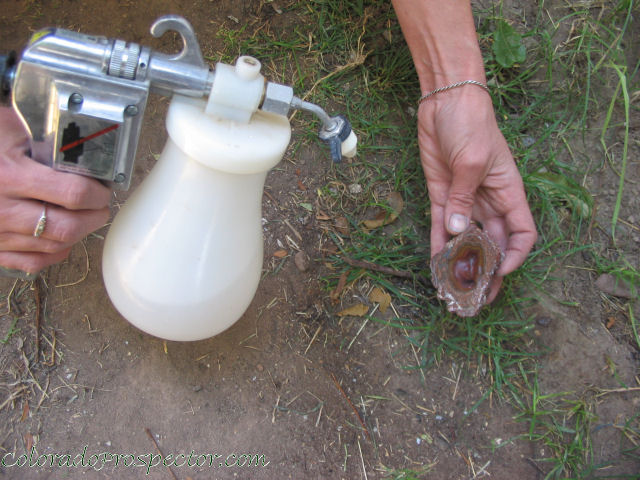
For those who might be looking for one of these, just search "textile cleaning guns". Ours is an Arrow brand from overseas and works really well for many kinds of cleaning specimens or flat lapped stones between grit stages.
Here's a picture of ours in use blasting out a thunderegg between grits for the flat lap process. Always remember to use safety goggles when cleaning minerals or specimens with these pressurized water guns, they can back splash alot and it's best to do outdoors if possible.
What's everyone else been cleaning from their finds this year? 

Posted by: swizz Nov 6 2009, 06:29 PM
I have some stuff to clean.
The pressure gun you pictured looks like a great tool! It gives me an idea... I have a couple of 3 gallon high-pressure spray canisters that I occasionally use for my biz. They have three different tips. I can pump the canister with as much pressure as I want. I'm going to fill one with water and give it a go with the smallest tip (one of these days when I have a few minutes and the sun is shining, that is).
Posted by: Mrs.CP Nov 8 2009, 05:12 PM
Sounds like a great idea Swizz, and no power needed! I love the textile cleaning gun for cleaning specimens.
I nick named ours "Master Blaster".
It means it when it says to keep your fingers clear of the stream too!

Posted by: Coalbunny Nov 13 2009, 02:52 AM
I have a few specimens of pyrite that have a limonite film on them, just took a tooth brush and dishsoap to them. Leaves a neat red tarnish on them.
Posted by: Mrs.CP Nov 15 2009, 07:51 AM
An old toothbrush works great for helping the cleaning process.
We would love to see pics of some of the specimens you guys are cleaning. Maybe some before or after pics.....
Or maybe both.

Posted by: ScottKS Nov 16 2009, 12:01 AM
Here is something cool i got a couple years ago and will be useing it to clean the rocks in between grits (I also use it to clean coins and other items after metal detecting and i just used it today to clean a ring for a customer after repairing prongs).....Power Toothbrush....lol  .....need to get more brushes like the one that's on it....seeings i won't be able to use it for anything else but cleaning grit off of rocks....lol....I got this at Wal-Mart for $20 total....$10 for the tool and $10 for the replacement brushes.....good deal.
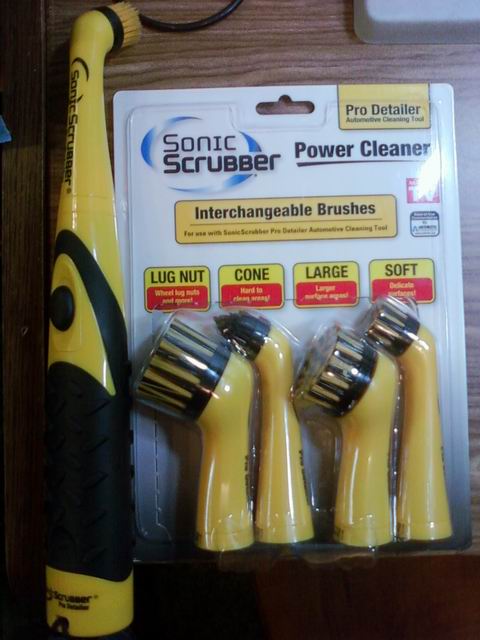
Posted by: Mrs.CP Nov 16 2009, 01:01 PM
Very cool tool Scott. I have used one of those kids battery opperated ones bofore, but those look like they have a little more oomph in them.
Here is a before and after pic of a Thunderegg that was a bit scrambled when cut.
Sure is cool looking, but there is no way we could polish this egg with this soft center.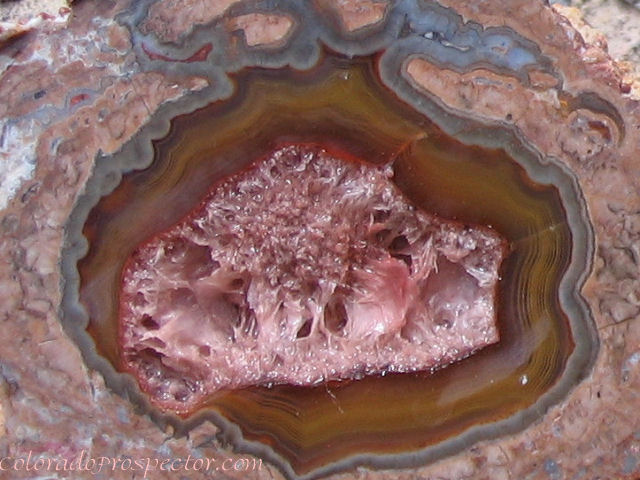
Here is the same egg half after I used the pressure washer gun on it and polished it.
It ended up with these velvety looking red crystal walls. Pretty cool, and polished out great!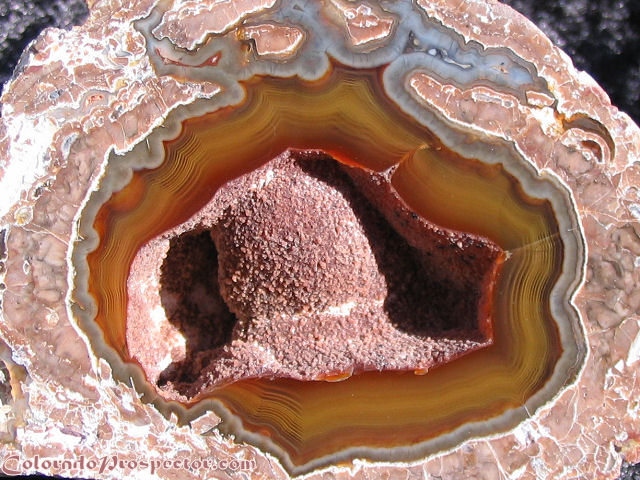

Posted by: swizz Apr 5 2010, 09:37 AM
Denise, thanks for this tutorial. I am going to attempt your techniques. I have everything except SIO, so hopefully vinegar will do the trick if it comes to that. I'm on step 1 today.... warm water and toothbrush. Next.. vinegar if necessary.
This pic is my first batch - prior to doing anything. From the top left going right, Stromatolite fossilization (druzy pocket on other side), next to the right is (what I believe to be) Marine Breccia, and the rest are unknown crystallized clusters. These are from my stash of rocks hounded from various fishing trips in CO and WY. Most are extremely dirty. The center one on the bottom didn't photograph well but it's an interesting cluster of small crystals on both sides with a possible metallic or oxidized matrix running through the center. The bottom left piece looks to be 90% or more quartz crystal of some kind but it's really dirty... almost black. Should be interesting, wish me luck!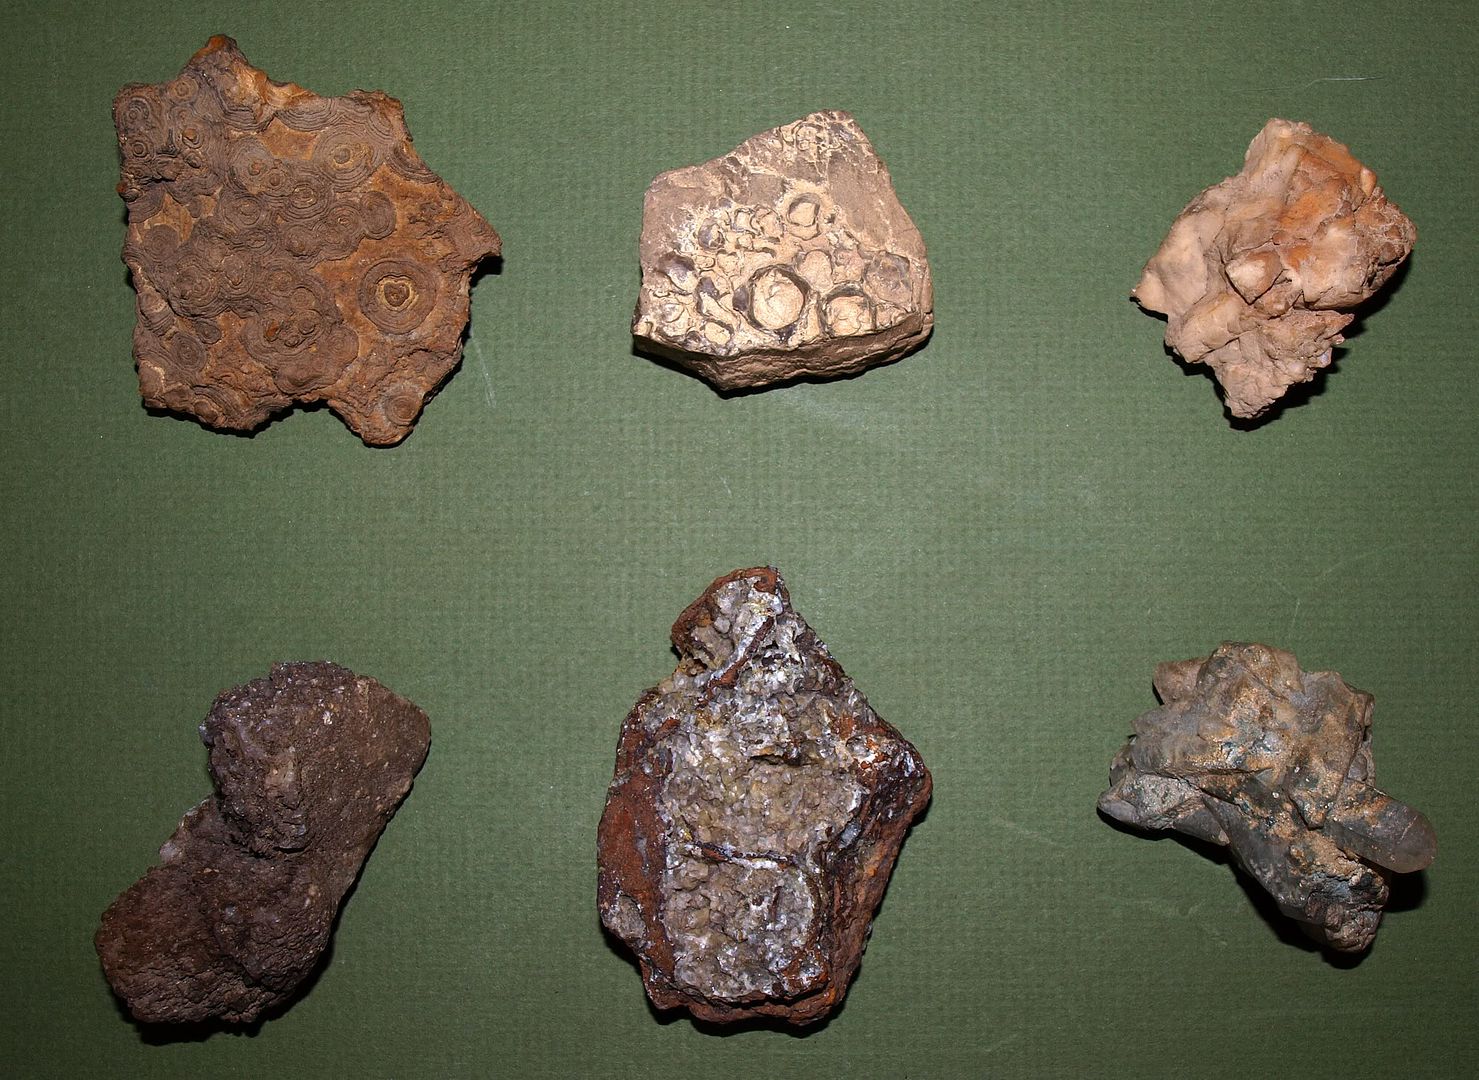
Posted by: swizz Apr 5 2010, 10:37 AM
Interesting. I placed the upper right stone in vinegar and it's fizzing like Alka-Seltzer.
Should I run?
Posted by: ColoradoProspector Apr 5 2010, 10:49 AM

Should I run?
Yes! Run back to pull it out right away.....and rinse it. Denise said ACK hurry and post a reply Dan
Then frowned because she told me to do 20 minutes ago. Fossils many times will do this because of the calcium carbonate I believe.
Always test a small part or sacrificial piece when testing for reaction with an acid used to clean specimens. Hopefully that piece will still be okay after the rinse if it wasn't a tester piece.
CP
Posted by: swizz Apr 5 2010, 11:22 AM
I pulled it. No biggie there, that one looks more like a piece of standard white Quartz after cleaning.
The fossilized Stromatolite is coming along well. I'm going to give it a light cleaning with the textile gun and call 'er good.
I'm going to soak the crystal on the far lower right in vinegar, it has greenish stain or tarnish of some kind and it's not fizzing. This one might look nice.
Posted by: Mrs.CP Apr 7 2010, 04:30 PM
Hows the specimen cleanig coming Swizz? Inquiring minds want to know.
Dont forget to wear goggles when using the pressure gun or toothbrush cleaning. They send pieces of loose rock flying.

Posted by: swizz Apr 7 2010, 04:46 PM
It's coming along great!
The Stromatolite is finished, just lightly washed with the gun and toothbrush was all it needed. Same deal with the breccia, just a light cleaning sufficed. The piece of white quartz on the far upper right is boring.
I'm still soaking the bottom three in vinegar (separately). Once they're all done I'll try and recreate the picture for an 'after' shot. I ordered some SIO which should be here by Friday. I may try soaking the bottom-center one in that to see what happens.

Posted by: jim Apr 8 2010, 01:17 PM
Swizz have you checked with home depot for the sio? You might even find it at wally world.
Posted by: swizz Apr 8 2010, 01:36 PM
Unfortunately not a convenient option, I live in the middle of nowhere (actually on the top of nowhere). We have a local Ace Hardware and an Alco store. It wasn't a problem to have Ace order it for me. Plus.. I get to help out the local Mom & Pop business since they are privately owned and usually cut me a deal. [At the risk of sounding like a politico] I despise large corporations and try my best to avoid them like the plague. Even if I have to pay a little more for something at times or wait a little longer, I feel a lot better giving my hard earned money to the small business folk when it's an option (although the products I purchase are often produced by corporate America [or worse, outsourced to China by an American corporation], wherein lies my unavoidable hypocrisy regarding the matter).

Posted by: Mrs.CP Apr 9 2010, 05:12 AM
Dont forget If your using Super Iron Out, to use distilled water NOT TAP WATER! The tap water can leave mineral deposits on the specimen.
Posted by: swizz Apr 9 2010, 01:45 PM
I have two specimens soaking in SIO + distilled water now (separated and covered). The rest are finished.
Posted by: swizz Apr 13 2010, 01:22 PM
Here are the before/after results:
BEFORE
AFTER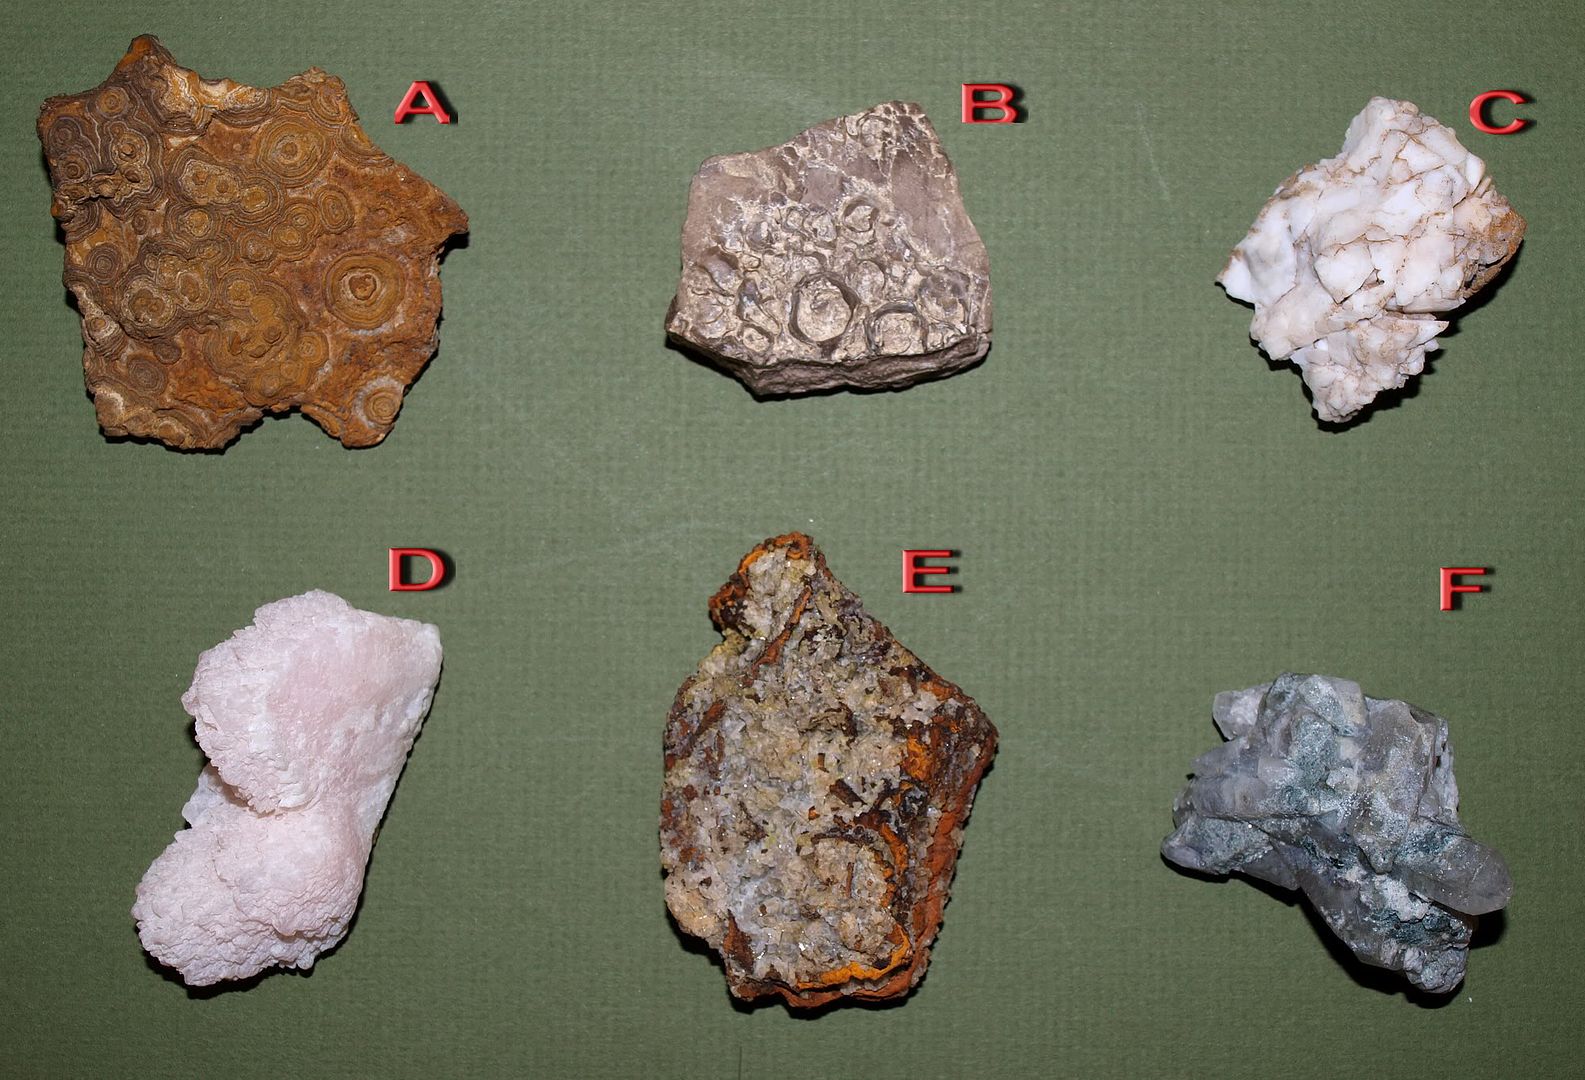
a. Stromatolite - cleaned up nicely using textile gun lightly, toothbrush, and distilled water soak.
b. Marine Breccia - no huge difference, same process as the Stromatolite.
c. turned out to be just a boring piece of white Quartz - vinegar soak, textile gun, toothbrush, distilled soak.
d. Pink or Rose Quartz is my guess - this got every treatment except SIO to come out this clean, the vinegar did wonders!
e. cleaning revealed that this is an encrusted piece of Stromatolite. Not sure what it's encrusted with but some of the crystals have a bright green hue (other side of specimen). - This got every treatment plus SIO X2 and distilled soaking X2.
f. I believe this to be a nice cluster of Smokey Quartz with a greenish material stained inside and out throughout part of it, possibly nickel? - this required vinegar soaking, textile gun, toothbrush, and distilled soak
Overall, I'm really happy with the results considering this was my first attempt at cleaning. Definitely couldn't have done it well without Denise's tutorial.
What else did I learn?
1. You only have to nip your finger or hand once or twice with the textile gun and your body will never let you do it again. 
2. SIO really, really smells bad. When I first mixed it I thought "this doesn't smell so bad, what was Denise talking about?", then I pulled the lid after a day and almost chundered. 
Great fun! I already have some more specimens lined up to clean.
Posted by: Mrs.CP Apr 13 2010, 02:40 PM
Great job Chris!! I especially like how well the rose quartz came out! Sure is pretty!
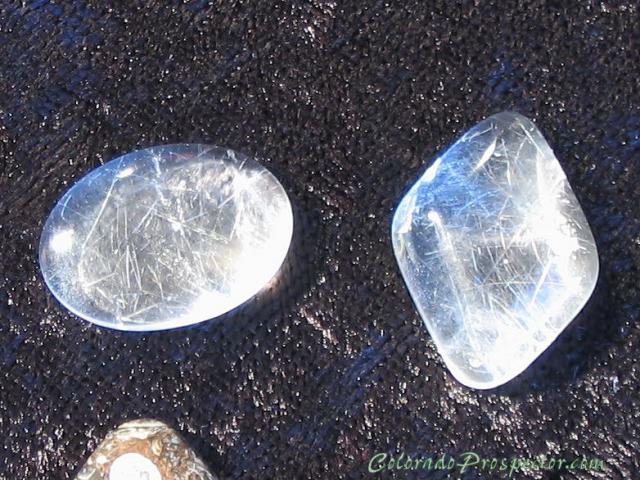
Oooooooooo, you may have a nice specimen of Colorado Rutilated Quartz.(F) I havent been lucky enough to find any myself, but we were given a small broken piece to work. Really neat stuff, as it had this crusty green coating on the outside, but inside the crystal revealed green rutilated strands. Very thin and hard to detect so you may want to check it out closer with a 20x loop and some light. 
Thanks for the before and after pics! You sure brought out the beauty in those specimens!

Posted by: swizz Apr 13 2010, 03:07 PM
hmmmm, interesting regarding the possibility of Rutilated Quartz.... now I have to figure out what that means. 
I'll have to break out the small Pentax and take some super-macro shots with backlighting and study it on the screen.
Posted by: Mrs.CP Apr 13 2010, 03:13 PM
http://www.mindat.org/min-3485.html link to Mindats database. They have a location listed for Colorado, but no pictures. Its beautiful stuff!
Oh yes, you will definately have to do that Chris!

 But you need to share the results with us.
Posted by: swizz Apr 13 2010, 03:25 PM
Well... I'm not sure that it's Rutilated. The only decent windows into the piece are the prominent shard (which actually may have that going on inside) and the bottom (not pictured). The bottom is a nice sharp formation of interlocking shards and has no greenish color inclusions and no obvious Rutilation on that side. May never know unless I zip it in half on GB's saw. Dare I?
I'll take some pics before deciding to do anything harsh like that.
Posted by: Mrs.CP Apr 14 2010, 07:14 AM
 "I don't know how you could cut that and still live with yourself."
I wouldnt cut that beautiful crystal, but thats just me. Especially if you dont have another one.
 Its sometime hard to decide to cut or not to cut isnt it?
Posted by: swizz Apr 14 2010, 05:57 PM
yeah, I don't think that I can cut it... maybe if I had a box of 'em
Posted by: ColoradoProspector Apr 15 2010, 04:11 PM
Nice job on the clean up Swizz, those turned out nicely.
Don't let Mrs.CP's no cuttin' influences sway ya.....
Here's how it can be cut and one can still live with themselves.
Very fine green hairs within a beautifully clear quartz. These are small cabs (under 5/8") so that's almost finer than frogs hair. 
Only 2 cabs I've ever seen made from the Colorado rutilated Quartz crystals too. Wonder how many other cabs from this material might be out there?
|
Pardon my turritella tip.....

Posted by: swizz May 14 2010, 10:35 AM
GB & I have been doing a little rockhounding up here.... specimen cleaning today.
Posted by: Coalbunny May 20 2010, 01:51 AM
Don't let Mrs.CP's no cuttin' influences sway ya.....
Here's how it can be cut and one can still live with themselves.
Very fine green hairs within a beautifully clear quartz. These are small cabs (under 5/8") so that's almost finer than frogs hair.
Only 2 cabs I've ever seen made from the Colorado rutilated Quartz crystals too.
Wonder how many other cabs from this material might be out there? |
|
Pardon my turritella tip.....
Looks like cough drops.
Posted by: ColoradoProspector May 22 2010, 02:38 PM
the Colorado rutilated quartz cabochons are way to smooth to have in your throat, they'd get swallowed for sure!
Interestingly enough though, these were said to be found up near your area Coalbunny......  Ya' seen any green funky lookin' quartz points lately?
Cool Swizz, we are looking forward to seeing the cleaned up specimens afterwards.
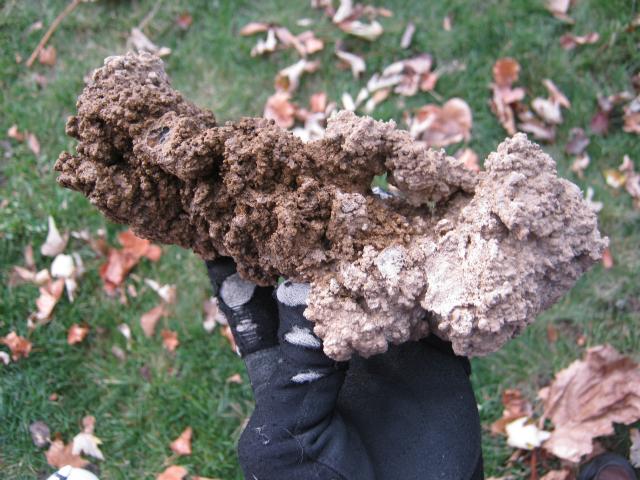
Here's a pic of a batch we need to do an SIO process on next, they sure look dirty and ugly here but when finished there will be some real eye catchers. I'll post updates later as we get it going, these have been rinsed and washed with soap and water so far.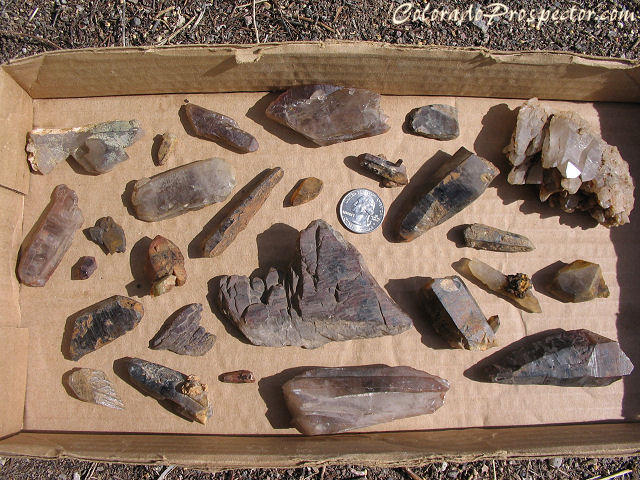
Don't know if all these will get into one batch at the same time but we'll keep ya'll posted.
This thread has some really good information so we added a link on the http://www.coloradoprospector.com/EquipmentPlans/PlansAndTips.html for easy reference as well.
Who else has some cleaning processes to demonstrate?
CP
Posted by: swizz Nov 20 2010, 10:09 AM
Here's an interesting piece I found and will start the cleaning process today.
Nice druzy on one side and the other side shows some agate. Ill post some pics after she's cleaned up. 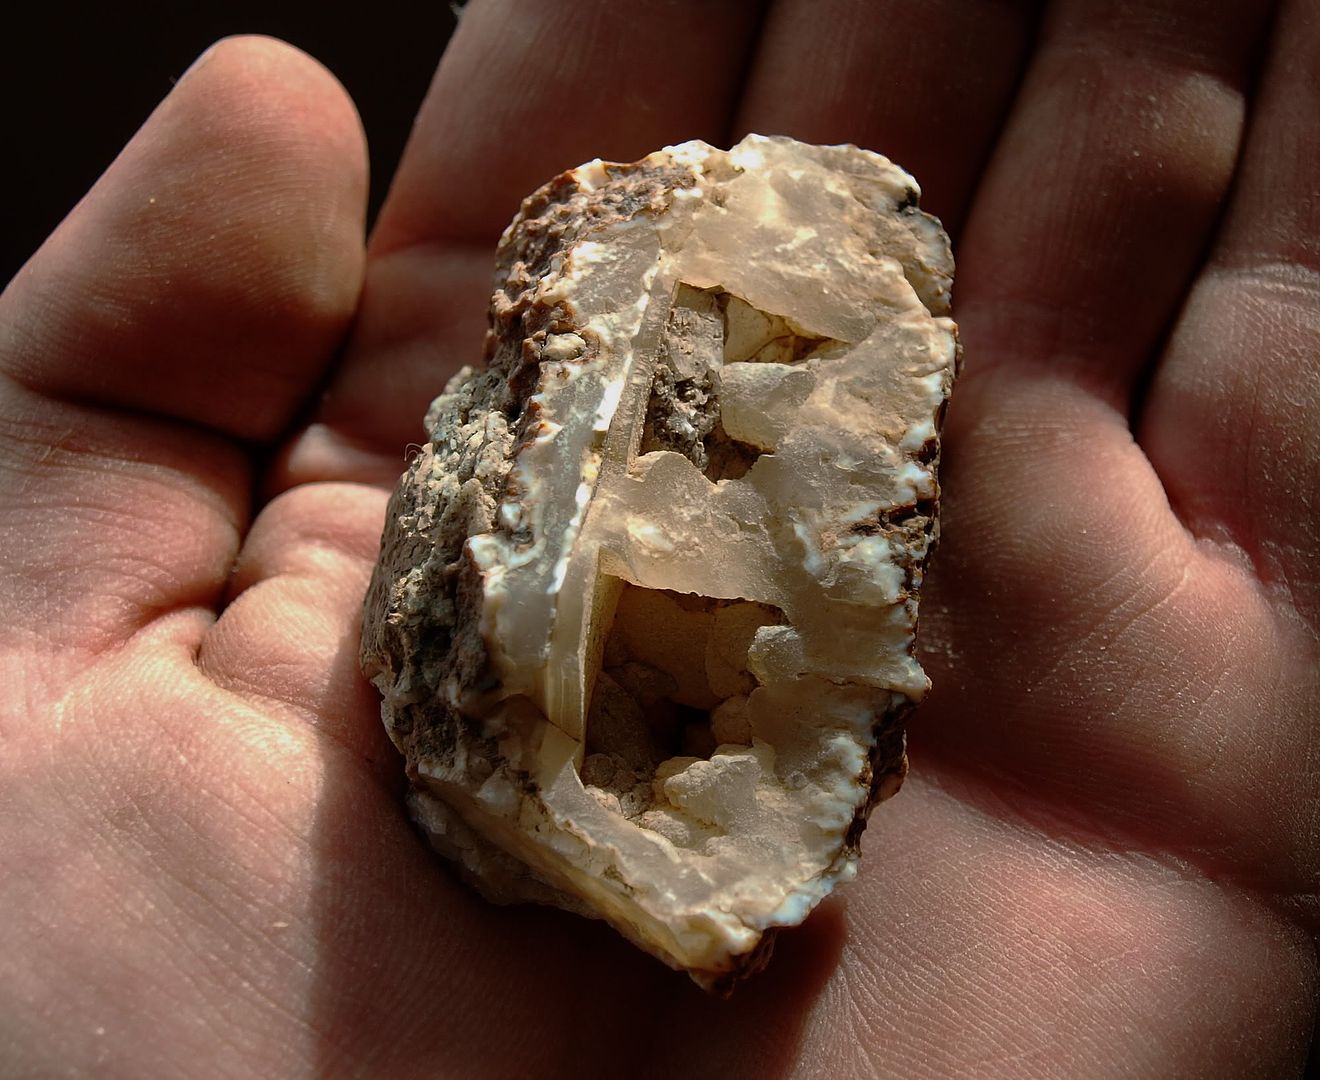
Posted by: ColoradoProspector Nov 20 2010, 04:44 PM
Nice find Swizz, I'll bet that will have a nice sparkle in those cavities when cleaned up too. We'll all be looking forward to the updates of it cleaned.
CP
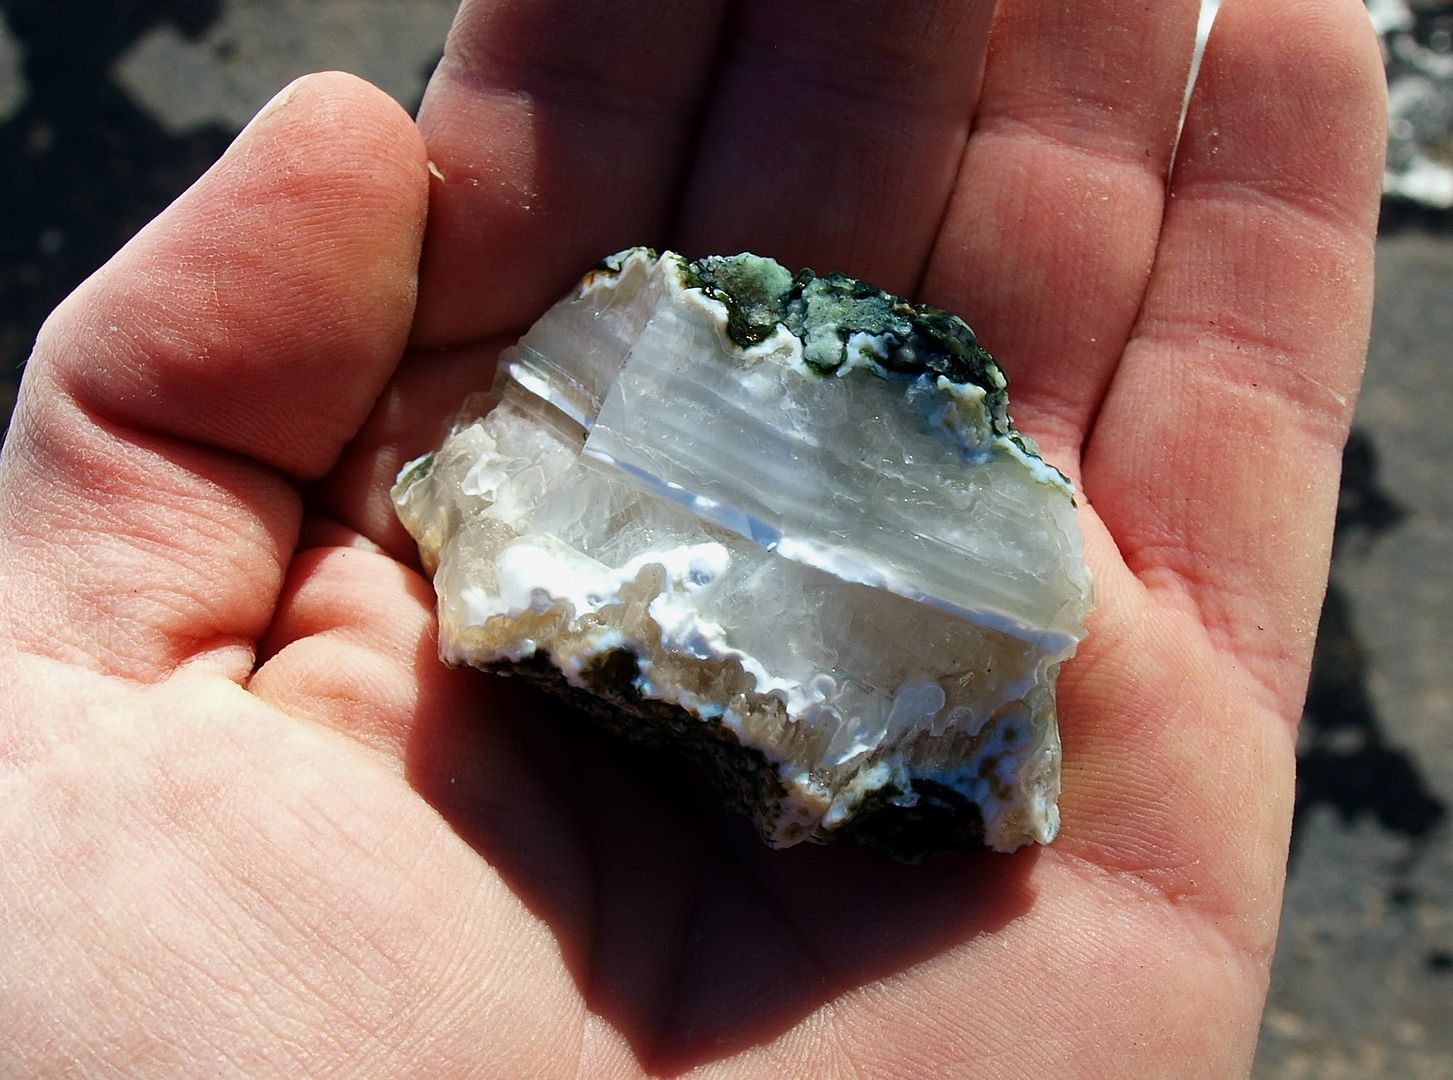
Posted by: swizz Nov 23 2010, 02:56 PM
... and here are two shots of the specimen 'after' cleanup for comparison.
I used this process:
1. Washed with distilled water with lightest setting on Textile Gun
2. Soaked in Distilled White Vinegar for +/- 12hrs (this did most of the work)
3. Soaked in medium strength solution of SIO for +/- 12hrs
4. Soaked in distilled water for 24hrs
5. Blasted and rinsed with low-med pressure using Textile Gun with distilled water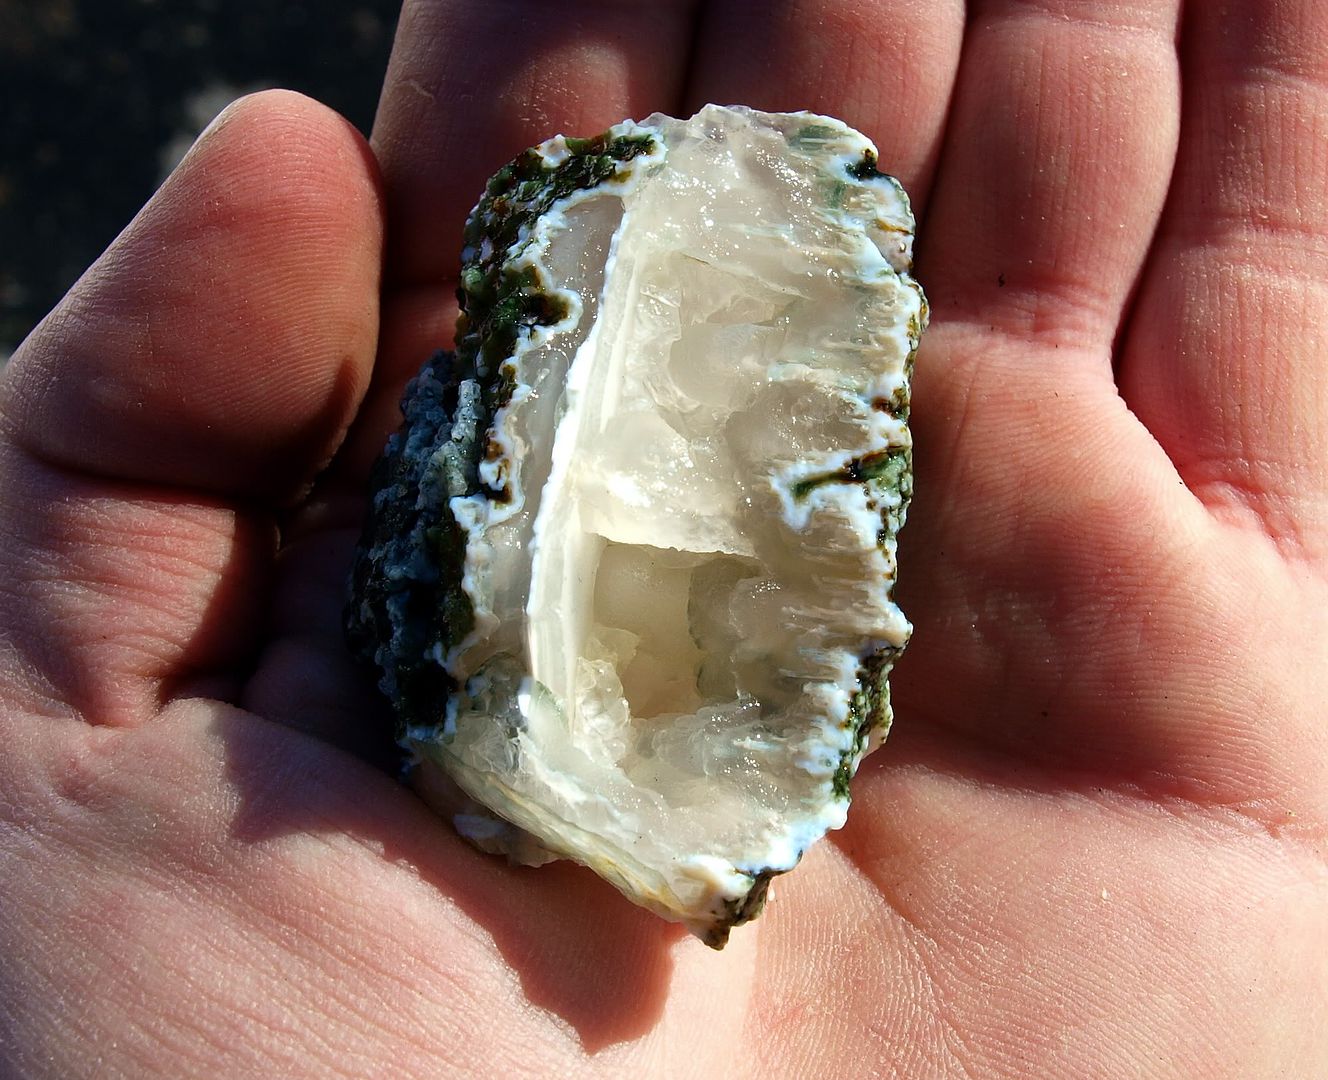
Posted by: dickb Nov 23 2010, 03:08 PM
Hi Swizz:
Really cleaned up great. Now to figure out what to do with it. Might make a nice display specimen to keep on the table.
Dickb
Posted by: swizz Nov 23 2010, 03:39 PM
Thanks dickb!
Yup.... I don't own any lap gear so it either goes to the specimen display or out in the back yard.
If any of you lap dawgs would like to make something from this I'd be happy to send it your way, kinda bubbly inside 
Here are a few more pics:
Interesting mineralization on the crust
..... and some translucency pics
Posted by: Mrs.CP Nov 24 2010, 08:11 AM
Cool piece of Agate Swizz, and it cleaned up nicely!
Posted by: yotafly Nov 6 2013, 11:37 AM
Hi every one new guy here, awesome specimens. I use SIO works great but have been trying to find a textile gun, when I lived in Salida, I visited the rock doc and the nice lady there told me to get a textile gun any suggestions would be greatly appreciated.
Posted by: Crusty Nov 6 2013, 11:49 AM
I got mine on ebay; a quick search there will get you lots of results (and a good idea of the going price on them). They do work really well!
Posted by: Wisher Mar 5 2014, 11:30 AM
Picture of Anita with a flat of fresh Fluorite and Smokey Quartz finds. We like to keep it as safe and simple as possible. We start off with a plastic black tub, filled with water (room tempature). Some minerals are sensative to quick tempature change, so be careful with the water temp! Place some of the specimens into the water. Gently hold one in your hand, and agitate it in the water to remove some of the dirt. You will be supprised how well just a little water works. Repeat several times till you can see If there are more minerals present on the specimen. Colorado is well known for combo specimens, so keep a close eye open! After examining for other minerals present, you can use an old tooth brush to remove more dirt in the crevices. I have even had tiny Fluorites, Goethites and Quartz crystals etc. pop up in those crevices after using the tooth brush and spray bottle! Sometimes just the water helps to clean, but when you get those iron stains you might want to move on to straight vinegar. It is a very mild acid, and can remove some mild iron stains. Leave sit in the vinegar for several days as needed, and gently agitate the vinegar every once in a while to help remove the stain. If the vinegar fails to remove all the stain, you might want to try "SuperIronout" stain remover. This product is used for removing iron stains in sinks, tubs, toilets etc., and is easy to find at your local hardware store or any where they sell plumbing chemicals like drain cleaners. Always read all instructions and warnings for use, before attempting to clean any specimens! It's best to use a small sample for testing first, before cleaning the better pieces. For mineral cleaning with SuperIronOut (SIO), we mix up enough SIO powder in the water to completely saturate the mixture with as much SIO as the water will dissolve (or close to that). This is a strong mixture and depending on your stains to be remove, soak time will vary from a few hours to a few days or a week. The mixture does not always need to be this strong. Use in a well ventilated area, we put lids on our soak containers to keep down the fumes/smell. Use containers just big enough for your specimens to be cleaned. Always use distilled water with this soak process as the SIO will leach any minerals out of the tap water and cause a crusting on your specimen. After soaking you will need to rinse off the specimens. If you have a pressure wash gun (textile cleaning gun) you can use this with tap water. Very carefully rinse off the specimens with the pressure wash gun. Depending on the specimens and delicacy, you will want to adjust that gun's output and distance used from specimen while rinsing. If you do not have the textile pressure gun, go to the rinse soaking step. Next you will need to rinse soak (distilled water again) for at least the same time as the SIO soak or longer. Some pieces with heavy staining (iron deposits) may need to have clean rinse water about half way through the soak period. After the soak period, some pieces may need a repeat of the whole process, some may just need sprayed off after one process for the desired effects. Here are a few before and after pictures of a Smokey Quartz crystal we cleaned using SuperIronOut. Picture of Smokey Quartz with only water cleaning. Picture of Smokey Quartz after cleaned with SuperIronOut. Rock Currier at Mindat.org did an excellent article on cleaning Quartz that goes into alot more details and methods if needed. Very good reading and an awesome write up! http://www.mindat.org/article.php/403/Cleaning+Quartz We hope this info will help you some when cleaning your mineral specimens. Good luck with all your finds, and remember to stay safe out there! Posted by: MikeS Nov 23 2014, 12:19 PM
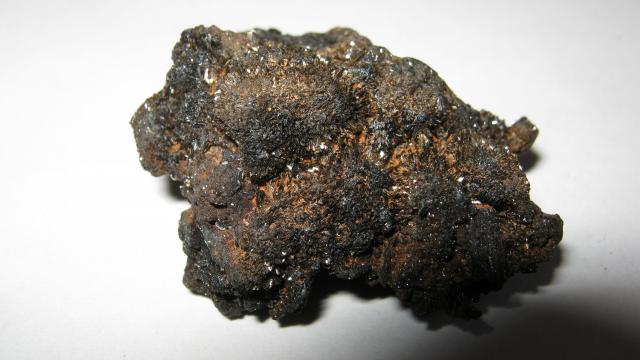
I was able to use my textile gun for the first time yesterday. I was very impressed with the results on my goethite and the more complex fluorite pieces. It also works very well on some coral fossils although the visual difference was less dramatic with the fossils.
Both of these Goethite sprays were gently scrubbed with a toothbrush and soapy water. The one on the left was worked for a few min. with the textile gun using water only. It needs a little more work but the difference is even more dramatic than the photos can show.
|
This Goethite piece was mostly covered with the orange coating even after a gentle scrubbing. A few min with the textile gun and it now shows hundreds of tiny fine blades. The reddish looking area on the left I believe is a Hematite formation. This piece needs a little more work also.
|
Here is a piece of coral fossil from New Mexico that my buddy found on the surface. It is in great condition for a surface find. This one was lightly sprayed on the left side but we didn't get into cleaning it yet.
|
Here is a smaller piece of coral on limestone that I did clean the right side with the textile gun. These corals are likely from the Pennsylvanian sub-period, approx. 300 million years old.
|
Posted by: Mrs.CP Nov 23 2014, 12:43 PM
Sweet specimens Mike! I'm glad to hear the textile gun is working out for you, the Goethite results are great.
Fantastic NM coral fossil, especially for a surface find!...Score! I bet your eyes were peeled the rest of the day after finding that one!
Posted by: swizz Nov 23 2014, 03:16 PM
Really nice Mike!
Can I ask which brand of textile gun you bought? Do you like it?
I busted mine and haven't pulled the trigger for a new one yet.
Posted by: MikeS Nov 23 2014, 04:44 PM
I bought it of Ebay for $50 w/free shipping and the company it came from was Golden Cutting & sewing supplies (goldstartool.com)
It has an adjustable nozzle on front and volume control on back and I like it so far. It also came with extra springs.
Posted by: jfresh Feb 9 2016, 06:51 PM
What's a textile cleaner? Is that just a fancy word for a paint gun with a compressor?
Thx,
J
Posted by: jfresh Feb 9 2016, 06:54 PM
http://www.ebay.com/sch/i.html?_odkw=textile+gun&_osacat=0&_from=R40&_trksid=p2045573.m570.l1313.TR0.TRC0.H0.Xtextile+spray+gun.TRS1&_nkw=textile+spray+gun&_sacat=0
Found it...Thx! It doesn't even need a compressor. That's pretty cool!
Posted by: Greenday401 Jan 23 2017, 07:32 PM
I know the hard part is finding a mineral specimen, but are there local companies that can clean the rocks for a fee? I have never tried cleaning before and, assuming we find something good on vacation, I would not want to risk harming the rock.
Posted by: Denise Jan 24 2017, 10:23 PM
Good question! Yes there are local companies that do clean and trim specimens like Collectors Edge. They are one of the more pricier ones but there are many more to choose from. Others might chime in with who they like to use when they don't clean them themselves. I personally think cleaning them up is half the fun.
Posted by: Jcwisvo Dec 6 2017, 04:58 PM
I have been using a carpet cleaning grade rust remover similar to wink but I noticed when I take them out they are much better as far as iron goes but then soon turn white. I assumed it was a pH thing so I tried a mild alkiline mixture to no avail. Any suggestions for that?
Posted by: cholman Jun 13 2018, 03:16 PM
For those who might be looking for one of these, just search "textile cleaning guns". Ours is an Arrow brand from overseas and works really well for many kinds of cleaning specimens or flat lapped stones between grit stages.
Here's a picture of ours in use blasting out a thunderegg between grits for the flat lap process. Always remember to use safety goggles when cleaning minerals or specimens with these pressurized water guns, they can back splash alot and it's best to do outdoors if possible.
What's everyone else been cleaning from their finds this year?
I'm having trouble adjusting my Arrow CM-11a spot cleaning gun to give me anything but a soft spray. How do you dial in the back knob and the front lever to get that piercing jet I was hoping for? It worked when I took it out of the box this morning, but after the first refill - just mist. Wish I hadn't messed with the knobs...
Posted by: Denise Jun 13 2018, 07:11 PM
Hi cholman, and welcome to the CP forums. 
Adjusting the sprayer can be very tricky. Here is Arrows usage instructions for their textile cleaning spray guns...
"http://www.arrowspraygun.com/usage.html"
It says..
This one specifies your spray gun...
I hope this info helps some and good luck adjusting it.
Powered by Invision Power Board (http://www.invisionboard.com)
© Invision Power Services (http://www.invisionpower.com)