Printable Version of Topic
Click here to view this topic in its original format
Colorado Prospector - Gem and mineral prospecting and mining forums _ Living Off The Lands _ Taxidermy Class
Posted by: swizz Nov 27 2010, 07:55 AM
I'm taking on fish taxidermy as a new creative outlet and will have my first lesson today! 
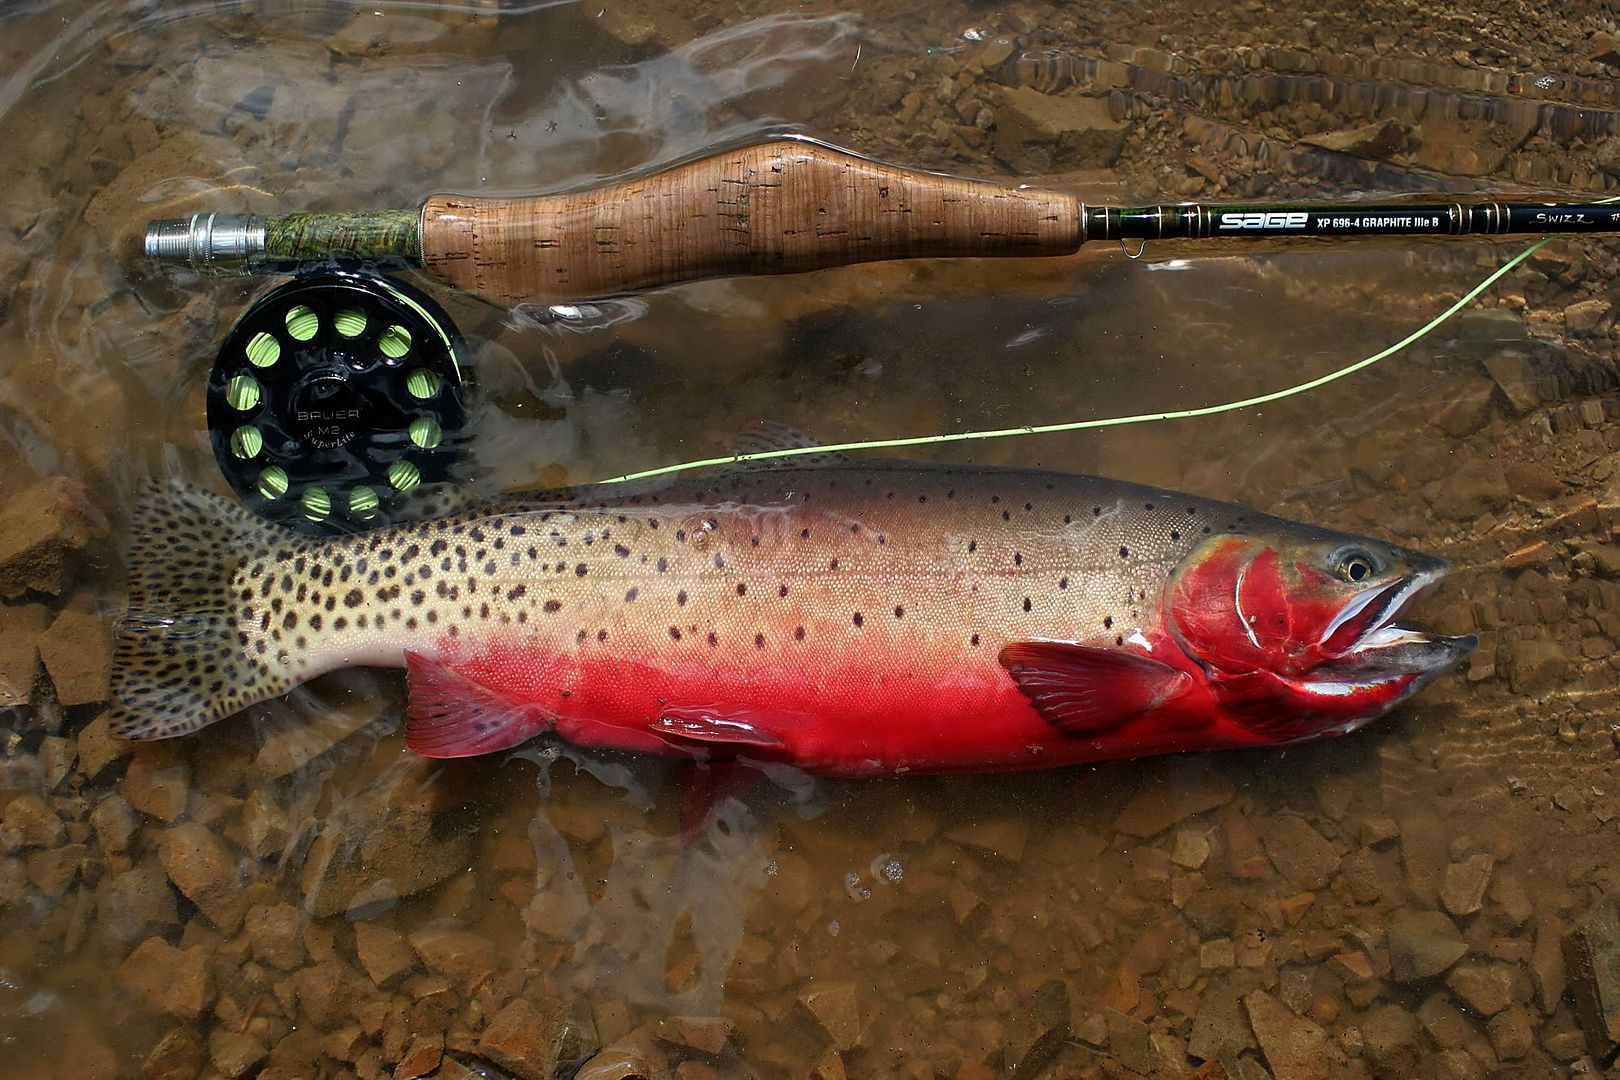
I have a 26"-27" male Rainbow which I caught a while back for my first specimen.
My instructor is a world renown and award winning taxidermist (fish, birds, big & small game) and professional photographer, check out his work! http://www.freestonefineart.com/
I'm honored to have the opportunity to learn from the best. Kevin is also fine woodsman and prospecting buddy.
I may post pics of my progress but I think that the process will take a while since I'll be doing it one weekend at a time and there are many steps.
Wish me luck!
Disclaimer: Kevin does NOT offer classes or lessons to individuals or the general public, he's doing this for me as a friend.
Posted by: ColoradoProspector Nov 27 2010, 11:18 AM
Sounds like a fun class to take and good luck on the project Swizz, we'll all be looking forward to seeing how it turns out too.
CP
Posted by: swizz Nov 29 2010, 09:38 AM
Doing well so far after two days.
I carved and sculpted my fish body from a block of taxidermy foam. This was difficult but really fun. I used calipers and numerous reference points on the actual fish, then transferred them to the foam block. Using Sharpie markers, knives, rasps, and sandpaper I sculpted my fish form. This step took me most of day 1 as my instructor is very particular when it comes to shape, size, and anatomy. If it isn't perfect the skin will not fit the mount properly. Most commercial taxidermists purchase pre-formed generic foam fish bodies (which lack detail) and work from there.... not Kevin, he sculpts incredible custom forms in his shop tailored to each specimen.
Next I skinned the fish which was difficult. I had filleted many fish throughout my life and figured that this step would be easy for me but it wasn't. Completely different technique and tools used for this as the skin must be preserved well and have absolutely no meat or fatty tissue attached. Skin is now soaking in mineral spirits.
The head was carefully removed. I then learned to create an exact cast of the the actual head which is an incredible process! Again, MOST commercial taxidermists just purchase a factory pre-formed head from a supply house and fit it to their body. This is another thing that sets Kevin apart... exact replication of the head rather than a generic trout head.
My next lesson will probably be mid-week, looking forward to it! I think the most difficult steps are behind but still very much work and many steps to go.
Posted by: swizz Nov 29 2010, 09:51 AM

Correction.
Upon closer inspection it has clear Cutthroat markings under the gill folds and is hence a hybrid Cuttbow (as are most "Rainbows" in CO).
It measures 24.5", not 26" - 27".... must've shrunk in the freezer.

Honestly, I had caught this fish nearly two years ago and couldn't remember exactly until unfrozen. It's from a location that produces trout up to 30"... many in the 22"-27" range. I harvested this one as it was a particularly well proportioned and colored specimen, not so much for its size.
At least I got its gender right!

Posted by: swizz Dec 9 2010, 12:20 PM
Update.
Pictured below is my fish head in progress. My next lesson is Saturday and I have this to work on as my week's homework.
The head is made from an actual physical casting of the original fish's head. It's hollow and made from about 1/8" thick Bondo which molded it with surprisingly accurate detail. My homework is to smooth and/or fill all imperfections with a putty-like epoxy which is sandable. Meanwhile, back at the shop..... during my last lesson I had attached and stitched (stitching on the backside) the fish's skin to the body which I had carved and shaped previously. The skin takes approximately 1 week to dry and shrink to the form so it should be a workable piece for my next lesson which will involve attaching this head.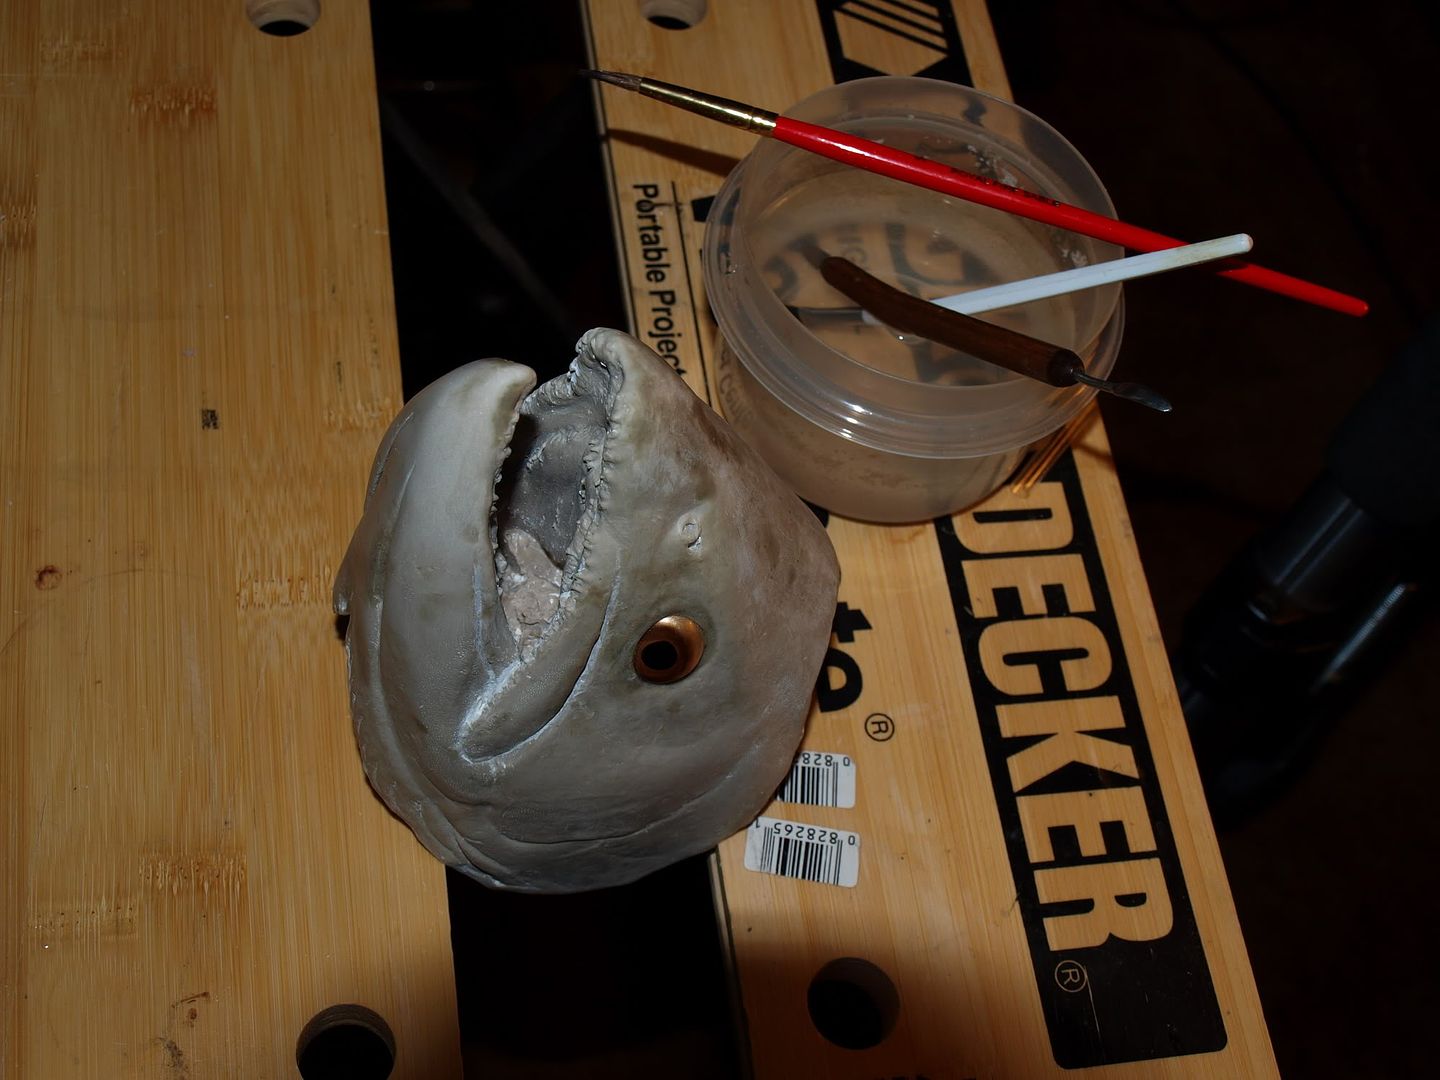
Posted by: swizz Dec 29 2010, 04:56 PM
... another quick update
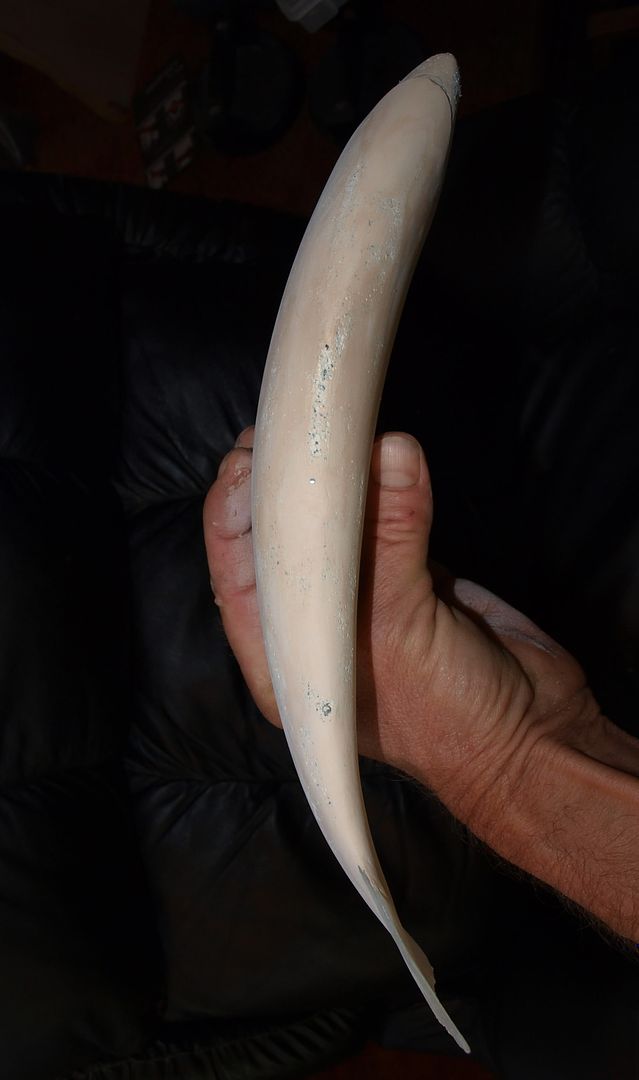
This is a pic of the fish's skin fitted around my foam body. The skin is sewn together on the reverse side. This pic was taken after the skin has totally dried and I have also attached some of the fins as you can see. The fish skin is very much like leather. The fins were formed from the actual fins and poured with a flexible material. Once cured, I attached and sculpted them into the body using reference points obtained earlier in the process. I have also attached the head which is not pictured here.
The finished product will not look much like this at all. The skin has darkened significantly and lost its color throughout the process - which is to be expected.
The next steps involve airbrushing and are very involved. This fish will be painted completely white and I will have a clean slate to work with. The fish's natural colors will be replicated using reference photos taken when it was alive. The skin will retain its natural texture which is extremely important.
I've been doing lessons at a rate of about 12hrs per week on weekends, excluding Christmas weekend. Next lesson is on Saturday. He has me airbrushing on a scrap fish in the shop now before he unleashes me on the real thing. That may be a while - airbrushing is really, really, tricky... but I'm getting it! 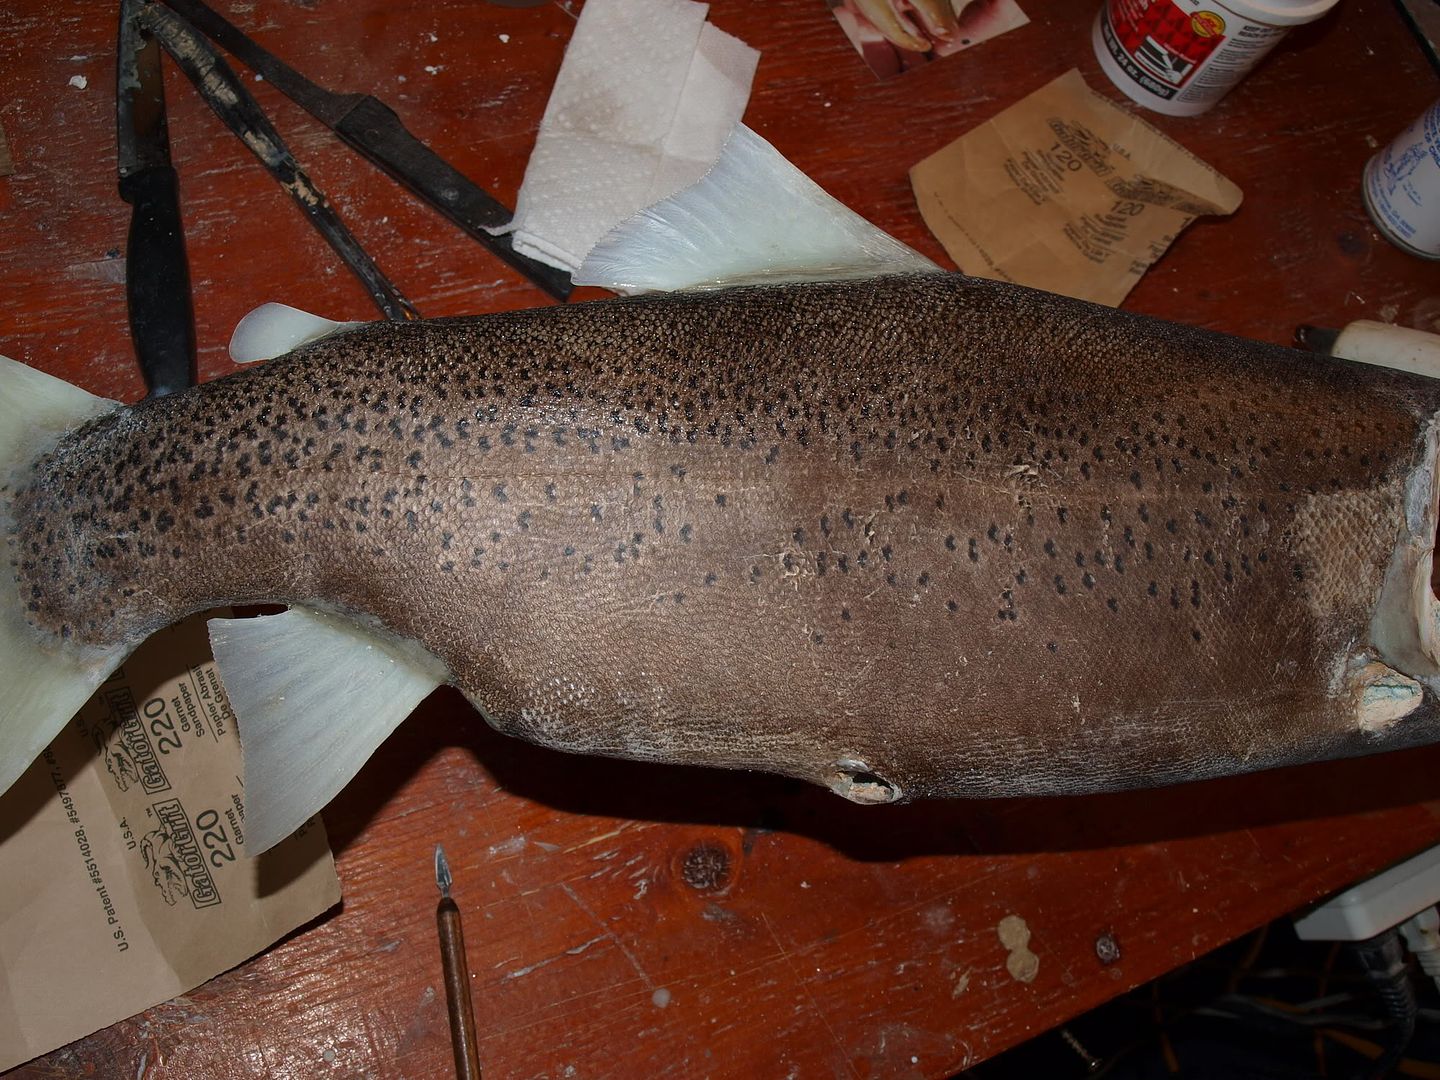
Posted by: Mrs.CP Dec 30 2010, 09:51 AM
Very cool Swizz, and what a fascinating process. I have always wondered how they do that, and it looks like its coming along nicely for you.
OOOOOO, airbrushing is fun, you will have a blast with that! I have one, and it definately takes a bit of practice getting use to the way it flows, but once you get the hang of it, you will be amazed at what you can do. 
Im looking forward to seeing the finished piece, but sure enjoying the processes thats getting you there!
Thanks for sharing with us, and keep up the good work! Its looking great!
Posted by: Mrs.CP Feb 16 2011, 11:07 AM
Hows the project and air brushing coming along Swizz? Inquiring minds want to know.
Posted by: swizz Feb 16 2011, 12:51 PM
Hi Denise,
I'm getting there. My fish is ready to paint but I have been practicing on a dummy fish for the last few weeks before I apply it to the real thing. In addition to airbrush I'm also working with powders and acrylic dab & smear techniques. I've had some major breakthroughs in the last couple of classes and am really enjoying it! The process has been relatively slow since I typically have been working on it only one day each week as he's only available on weekends.... but I ain't in no hurry. Probably a couple more classes before I'm comfortable enough to paint the real thing. I've become pretty handy with the airbrush now though.
Posted by: ASTROBLEME Feb 16 2011, 07:29 PM
I have been practicing on a dummy fish for the last few weeks...
swizz,
What do they taste like and is there a limit on those dummy fish? Most fish seem to be way more "smarter" than me, so when I finally get into those dummies, I want to make sure I don't keep too many!
ASTROBLEME
Posted by: swizz Feb 18 2011, 01:24 PM
What do they taste like and is there a limit on those dummy fish? Most fish seem to be way more "smarter" than me, so when I finally get into those dummies, I want to make sure I don't keep too many!
ASTROBLEME

Don't keep em! This one would taste like injection molded epoxy.

My practice fish is a detailed cast from an actual fish... he has a few spares (replica casts) that didn't quite make the grade but are good enough for me to practice on.
Posted by: Coalbunny Feb 18 2011, 10:34 PM
I'd love to get me a "stuffed" rainbow trout.
Posted by: swizz Feb 19 2011, 07:41 AM
yum
Posted by: Mrs.CP Feb 24 2011, 08:13 AM
In addition to airbrush I'm also working with powders and acrylic dab & smear techniques. I've had some major breakthroughs in the last couple of classes and am really enjoying it! The process has been relatively slow since I typically have been working on it only one day each week as he's only available on weekends.... but I ain't in no hurry. Probably a couple more classes before I'm comfortable enough to paint the real thing. I've become pretty handy with the airbrush now though.
Sounds great Swizz! The processes sound facinating and challenging. I have never worked with the powders and acrylic dab & smear techniques.
You feeling confident enough to show more pics of the process?
Pretty please!
Posted by: swizz Feb 24 2011, 11:11 AM
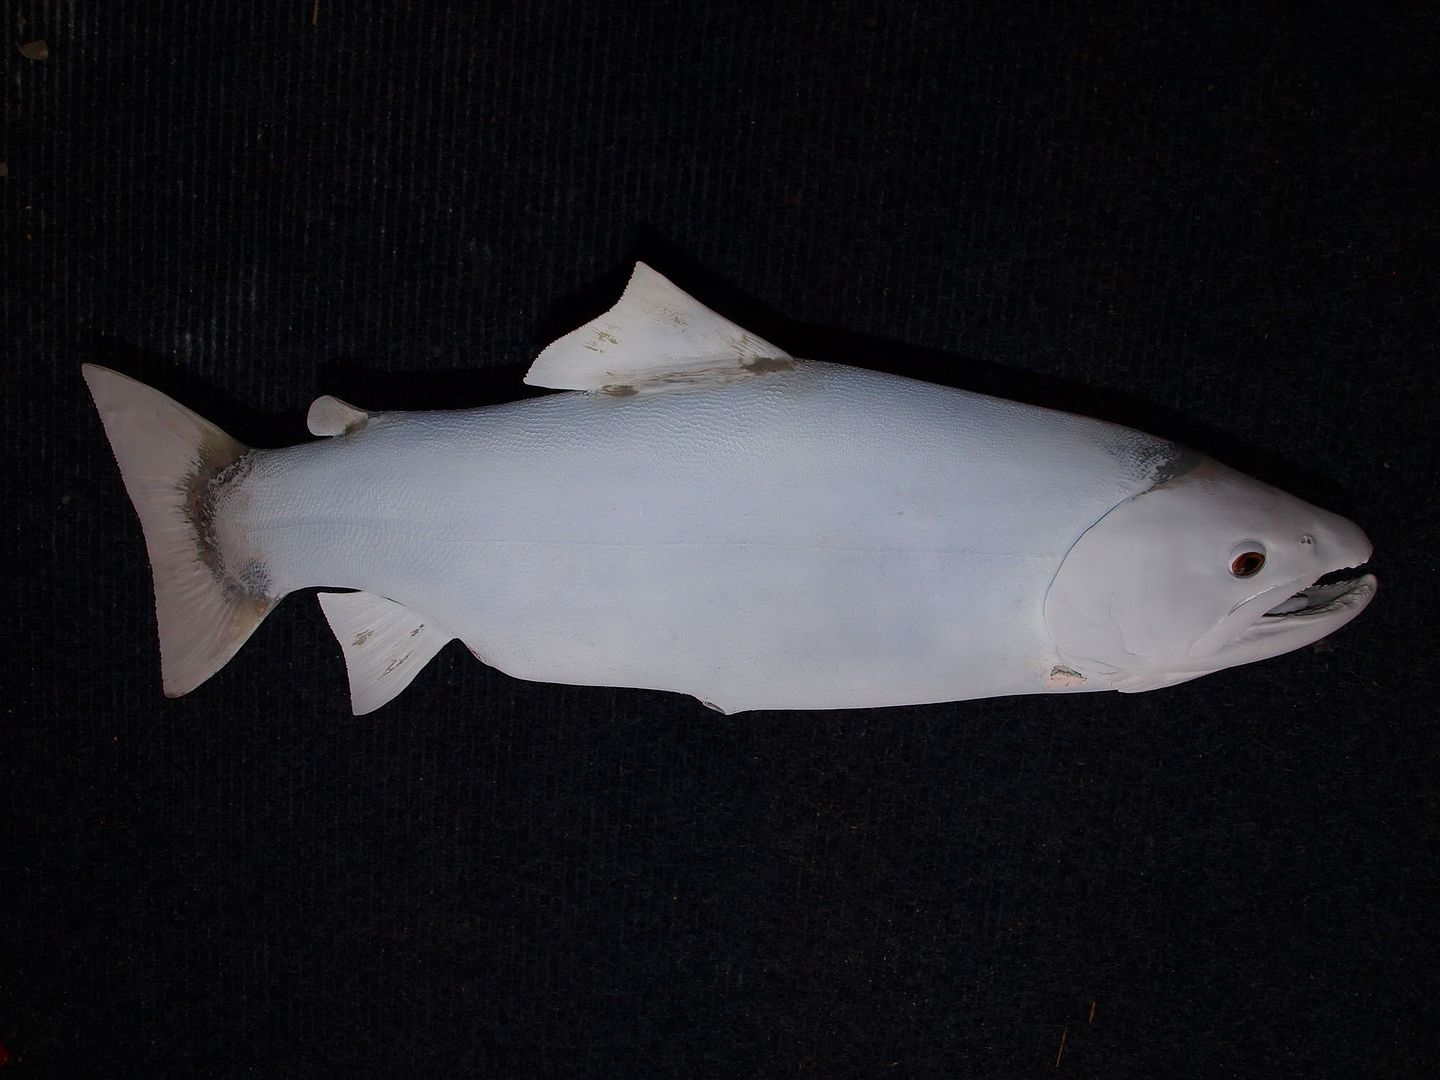
Any pics at this phase would be kinda boring. My mount is currently painted 100% white and ready for final painting. It'll be like that until I'm comfortable enough with my practice pieces to move on.
This is what it currently looks like (two sets of fins yet to attach):
Posted by: Mrs.CP Feb 25 2011, 07:40 AM
Looks cool Swizz! Bet your having a blast learning all the different techniques involved.
Cant wait to see more, hope all goes well.
 Too funny Astrobleme!
Posted by: swizz Feb 26 2011, 07:22 PM
Thanks Denise,
I had another good session today.
This is a pic of some of the detail on my practice head so far (without gloss). This head won't be on my fish but it'll look similar. A mold is cast from a real fish head and poured with Bondo. It's hollow and maybe 1/8" inch thick when pulled from the cast.... then painted, from scratch.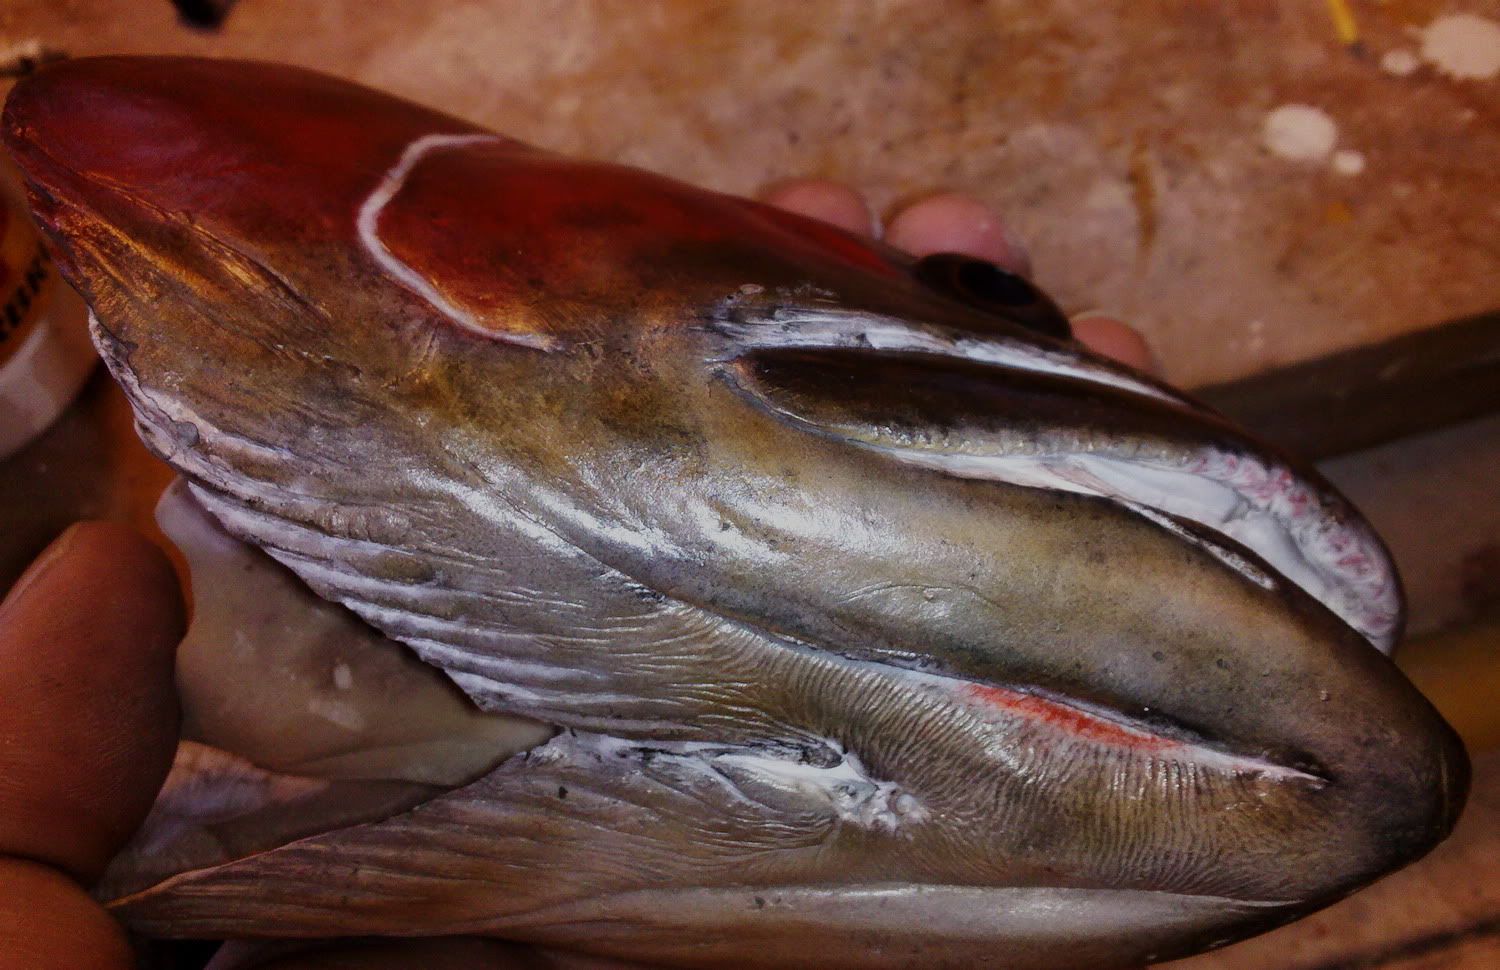
Posted by: Mrs.CP Feb 27 2011, 07:58 AM
That looks great! I have no doubt that your finished piece is going to look amazingly real. 
Keep up the good work Swizz, your doing great!
Posted by: swizz Mar 5 2011, 07:11 PM
Update
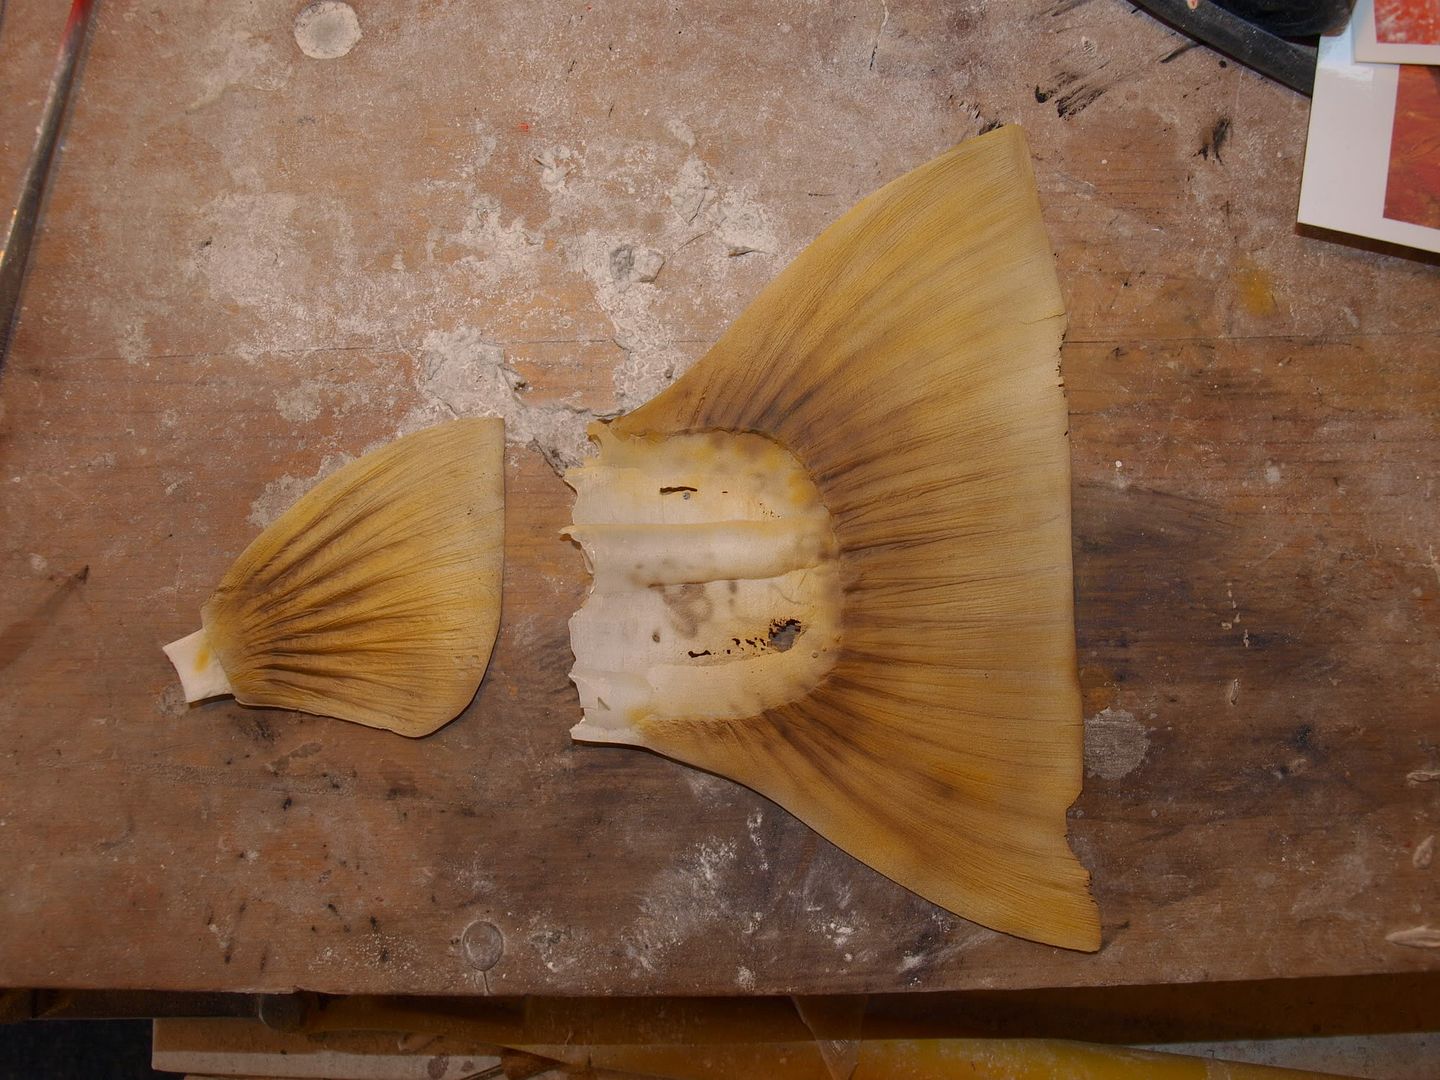
I learned to paint fins today.
The following pictorial is today's progression of painting my first practice fins.
These are similar in size and shape to the fins that will be on my fish. They were cast from an actual fish and are made of a translucent flexible material.
My practice fins: one side fin and tail fin
This is just after I painted the tail white, but prior to painting the side fin so you can see the translucency 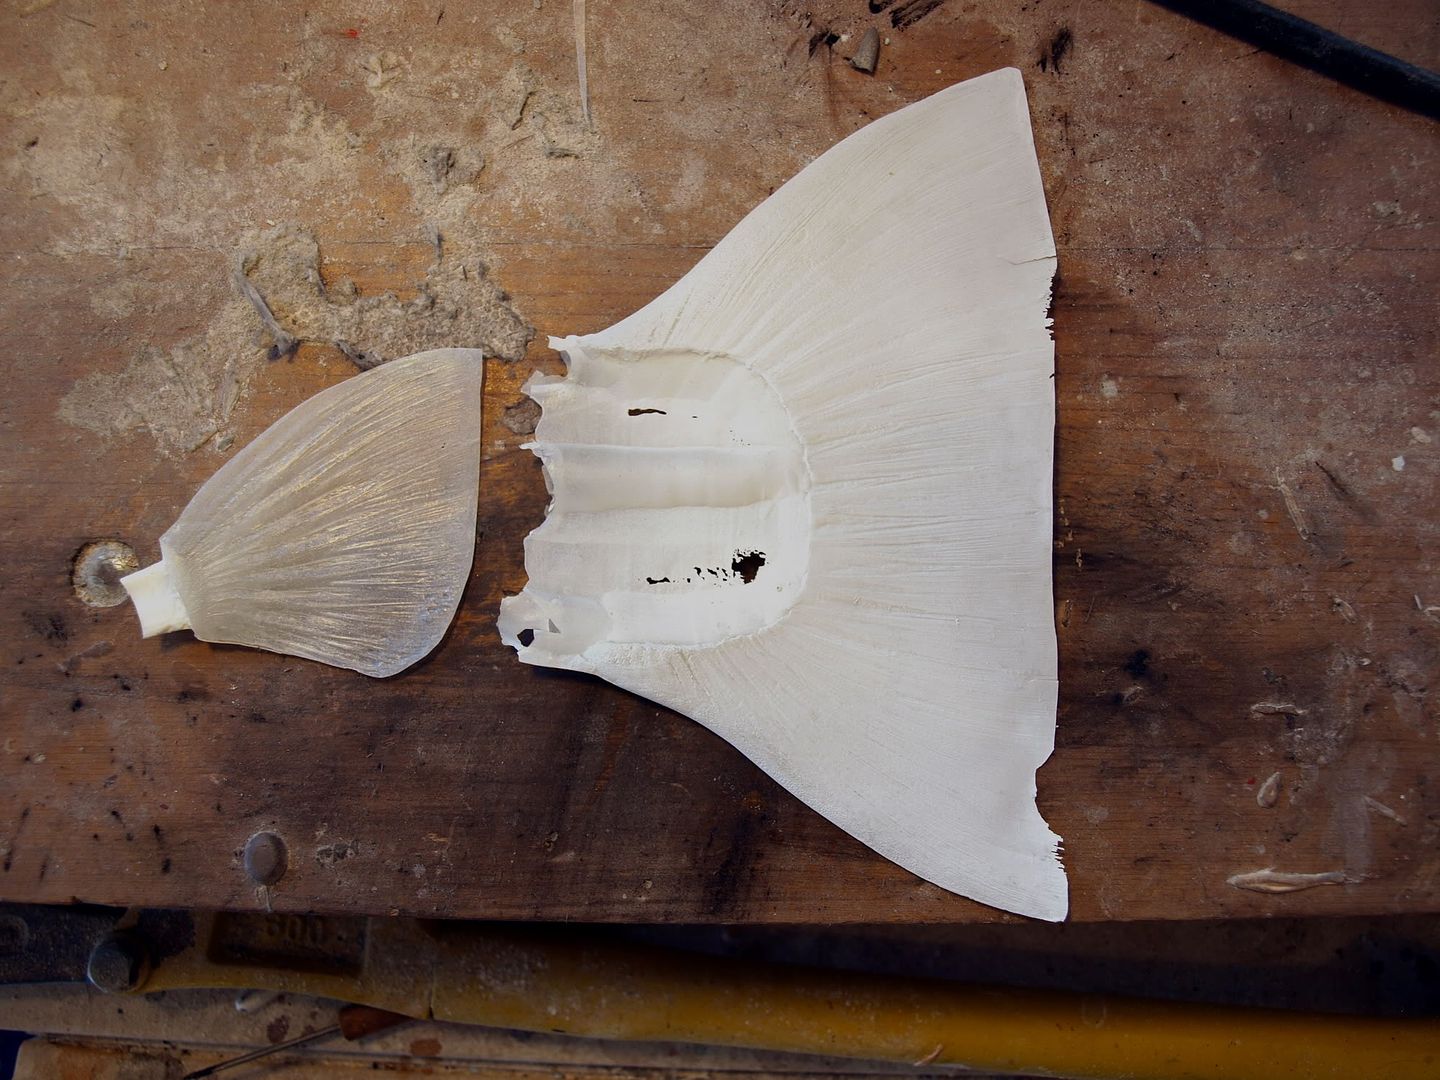
Remarkably, the fins will remain translucent throughout this process
Light easily shines through the tail fin after the initial coating of white seen here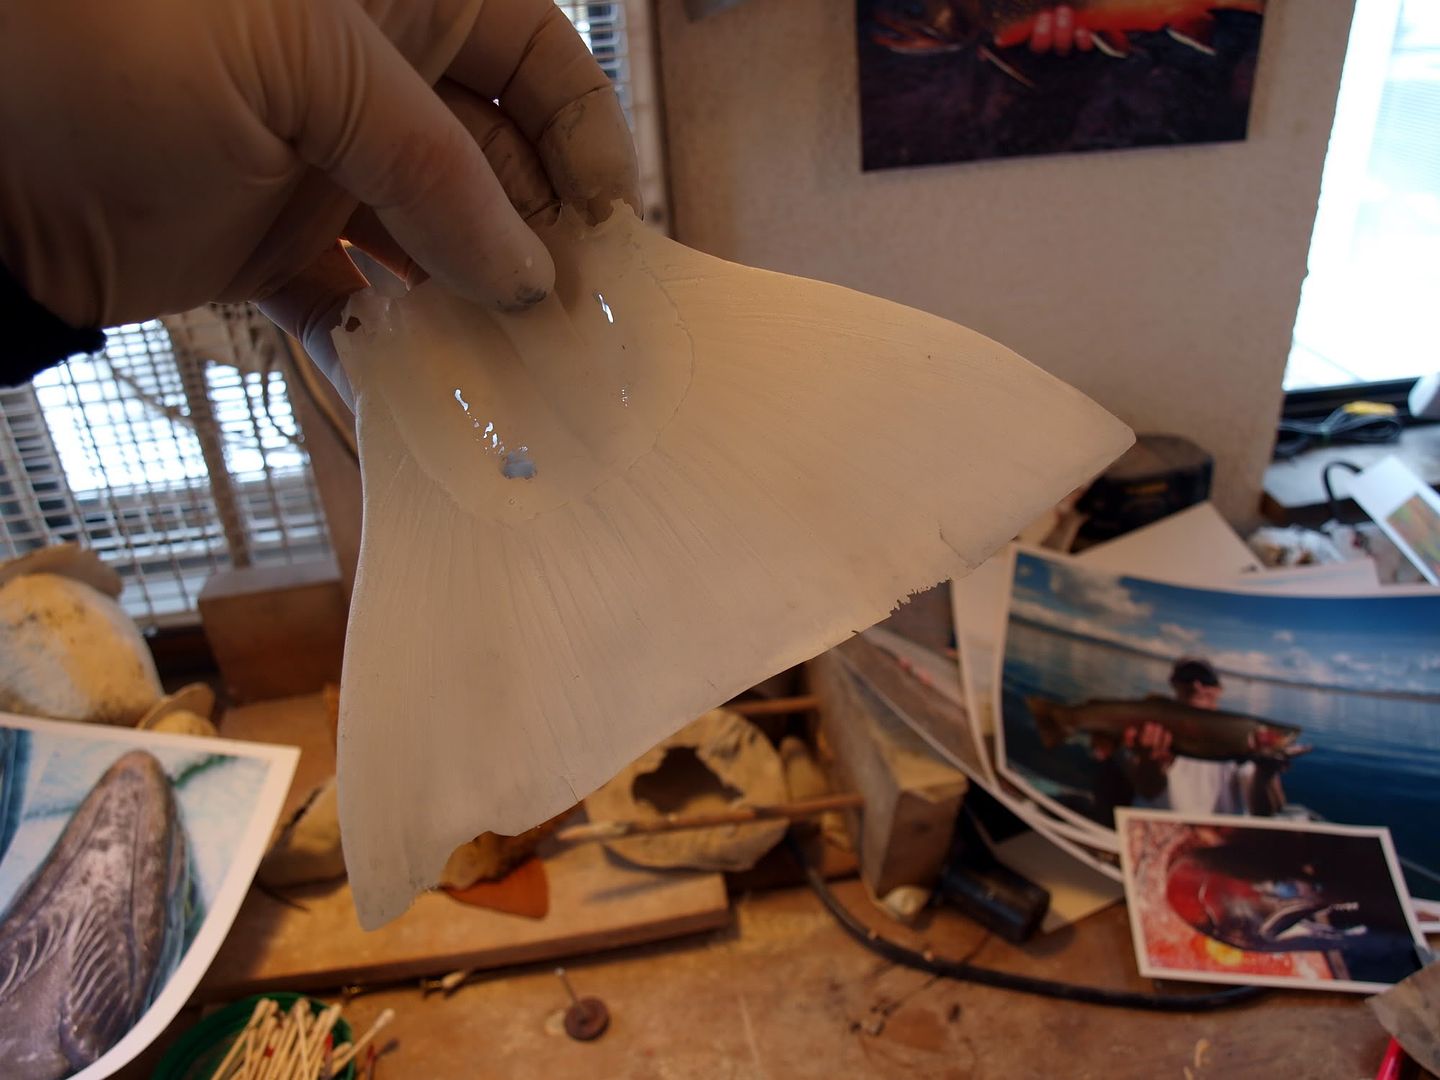
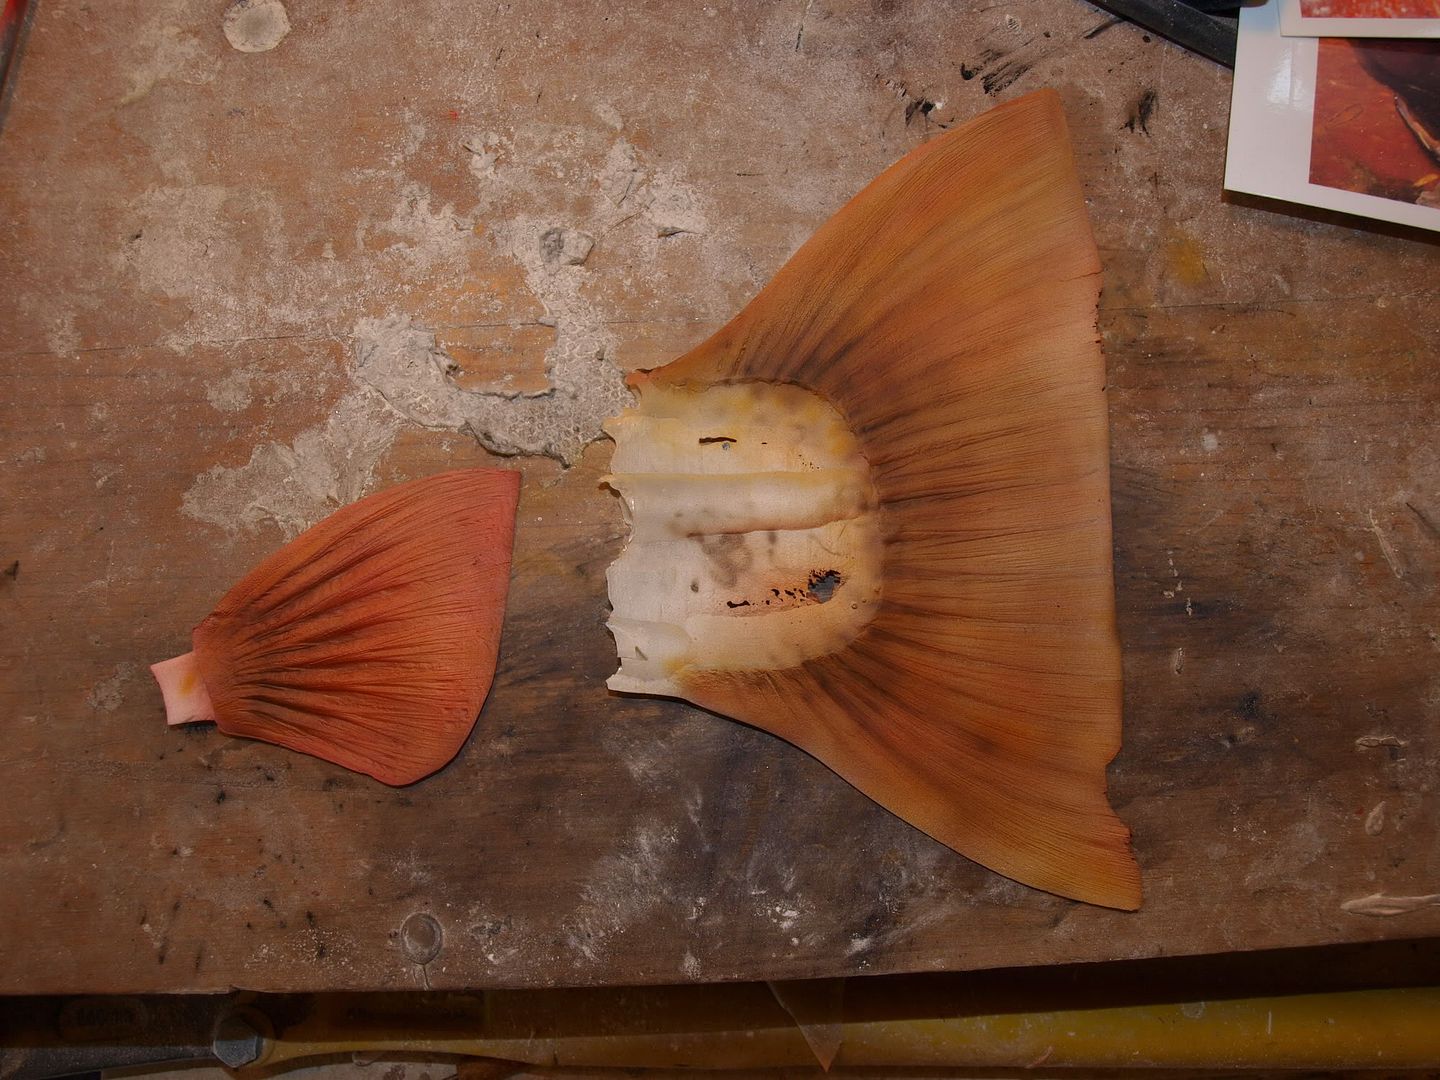
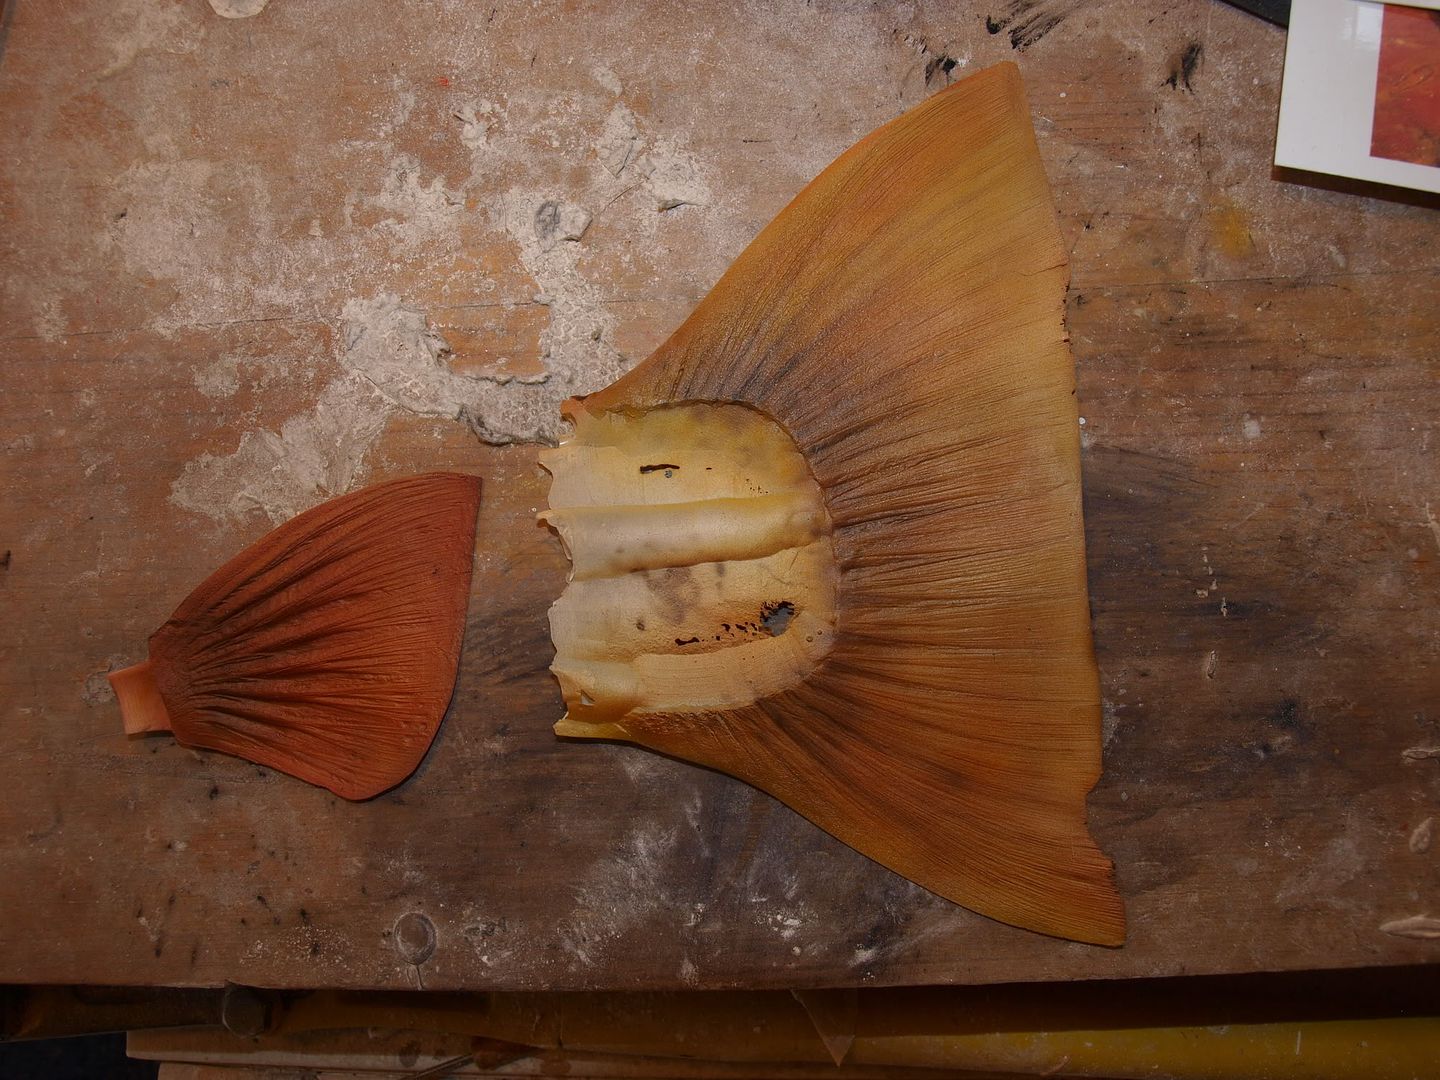
The following pics are my progression of paint layers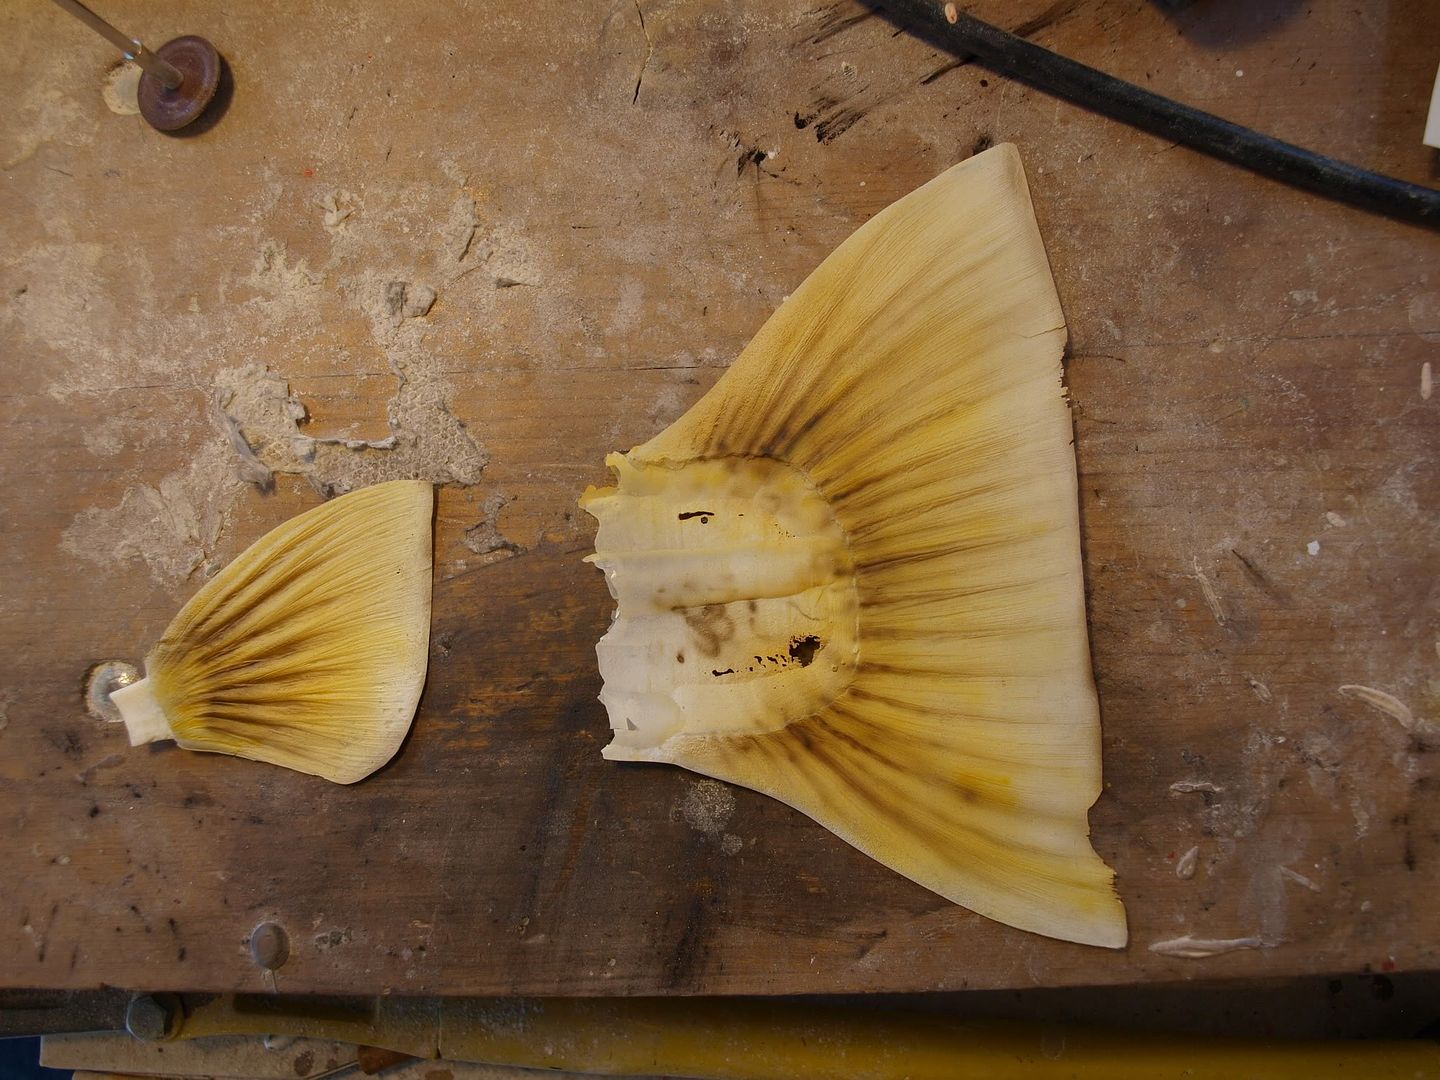
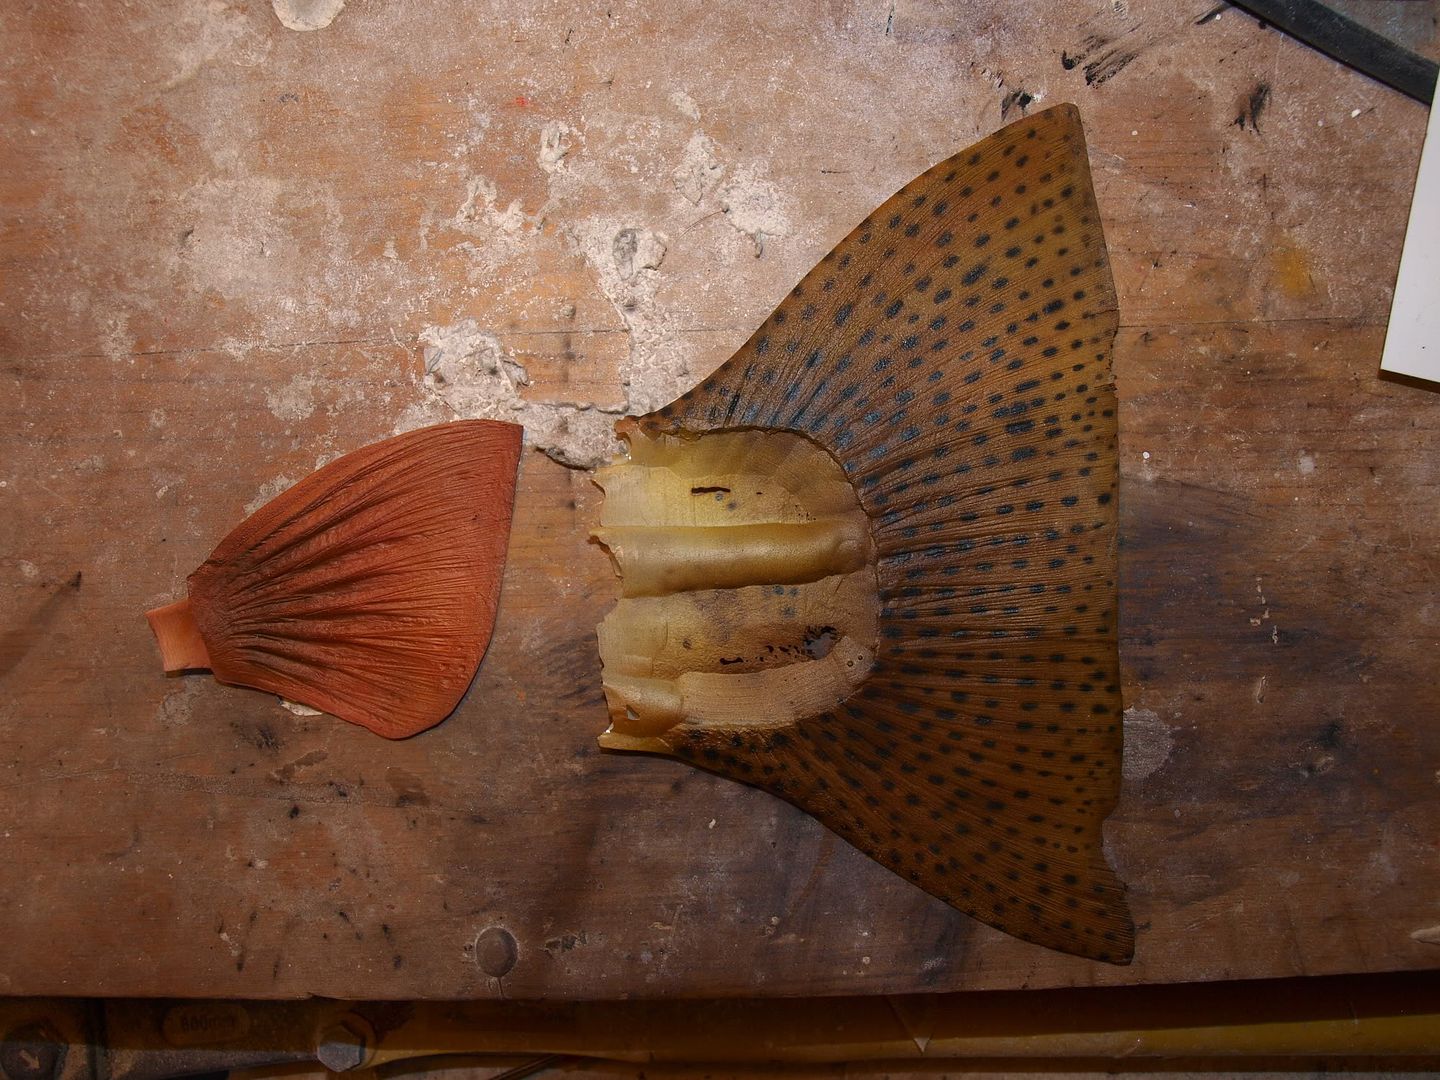
This is how they look with some gloss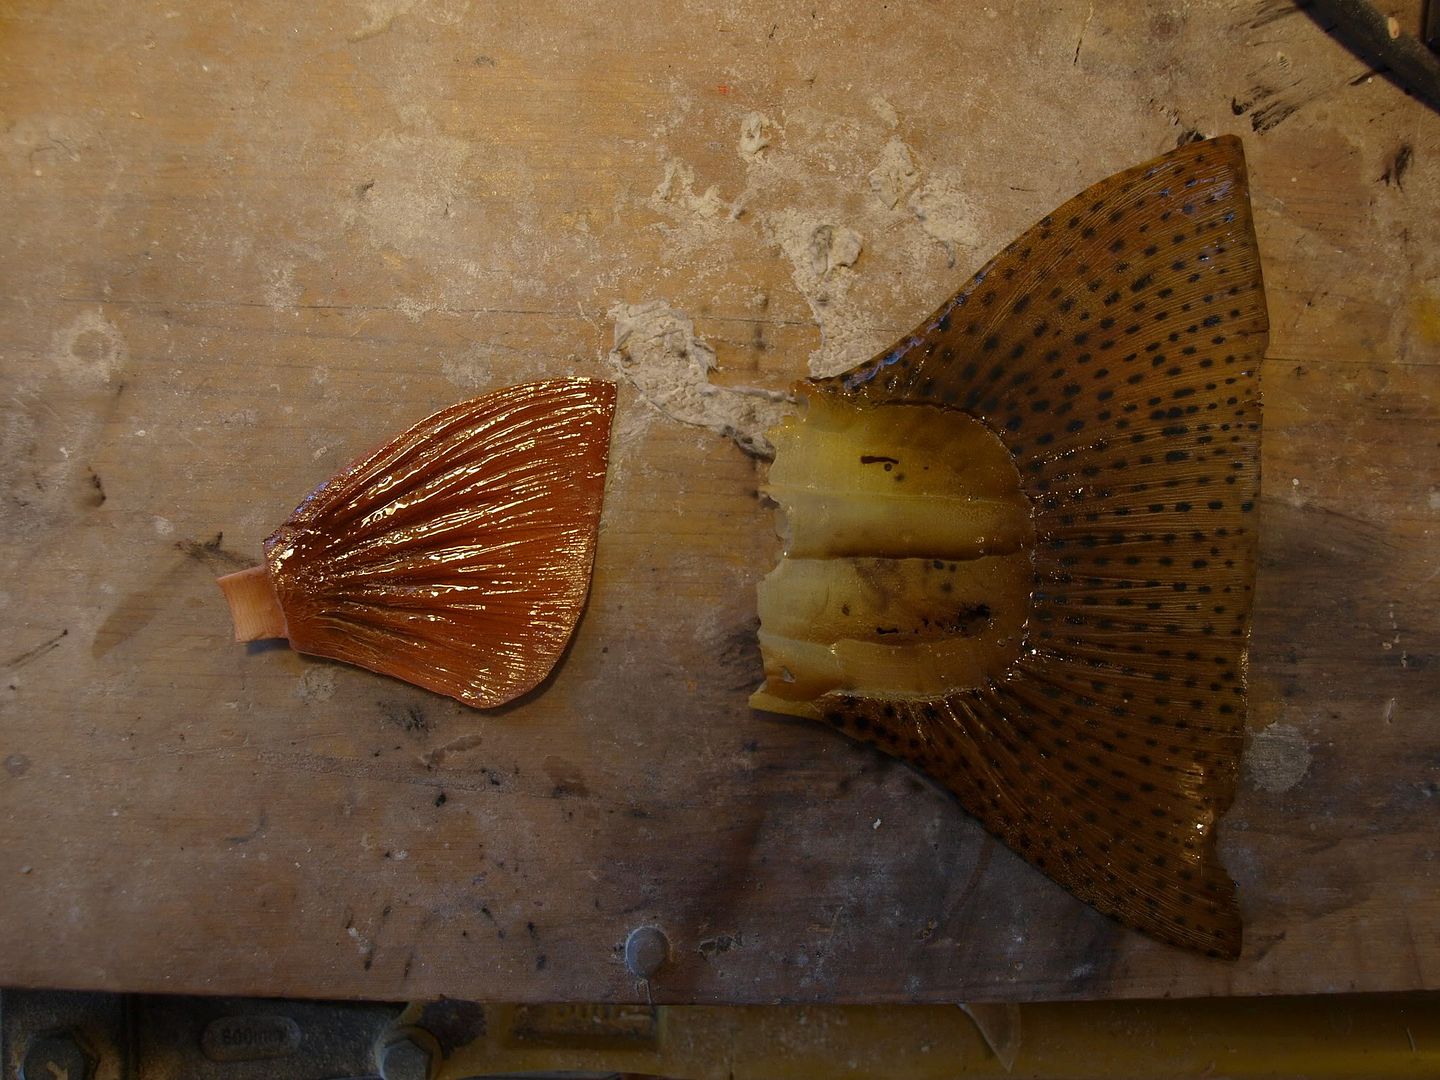
These fins will go in the trash, as they were just for practice
Instructor was happy with my progress today and I may begin painting my mount for real tomorrow!
Posted by: Mrs.CP Mar 6 2011, 08:02 AM
Your doing a fantastic job Swizz, your finished piece is going to be awesome!
Thanks for the process pics, its cool to watch the transformation.
Posted by: swizz May 15 2011, 09:23 AM
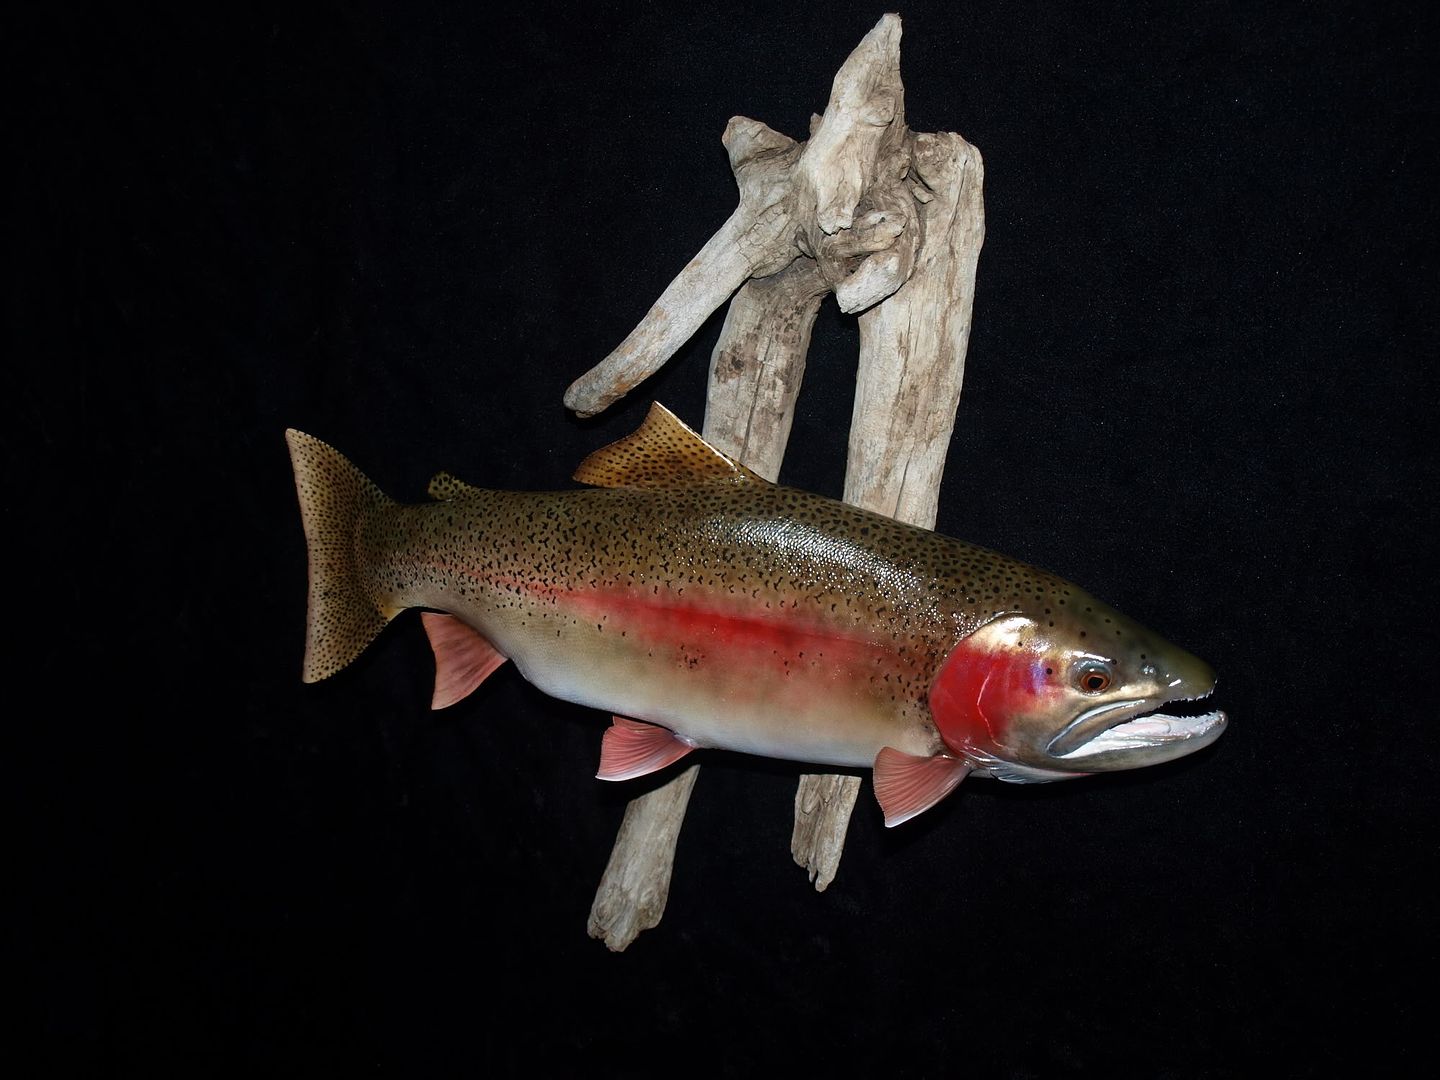
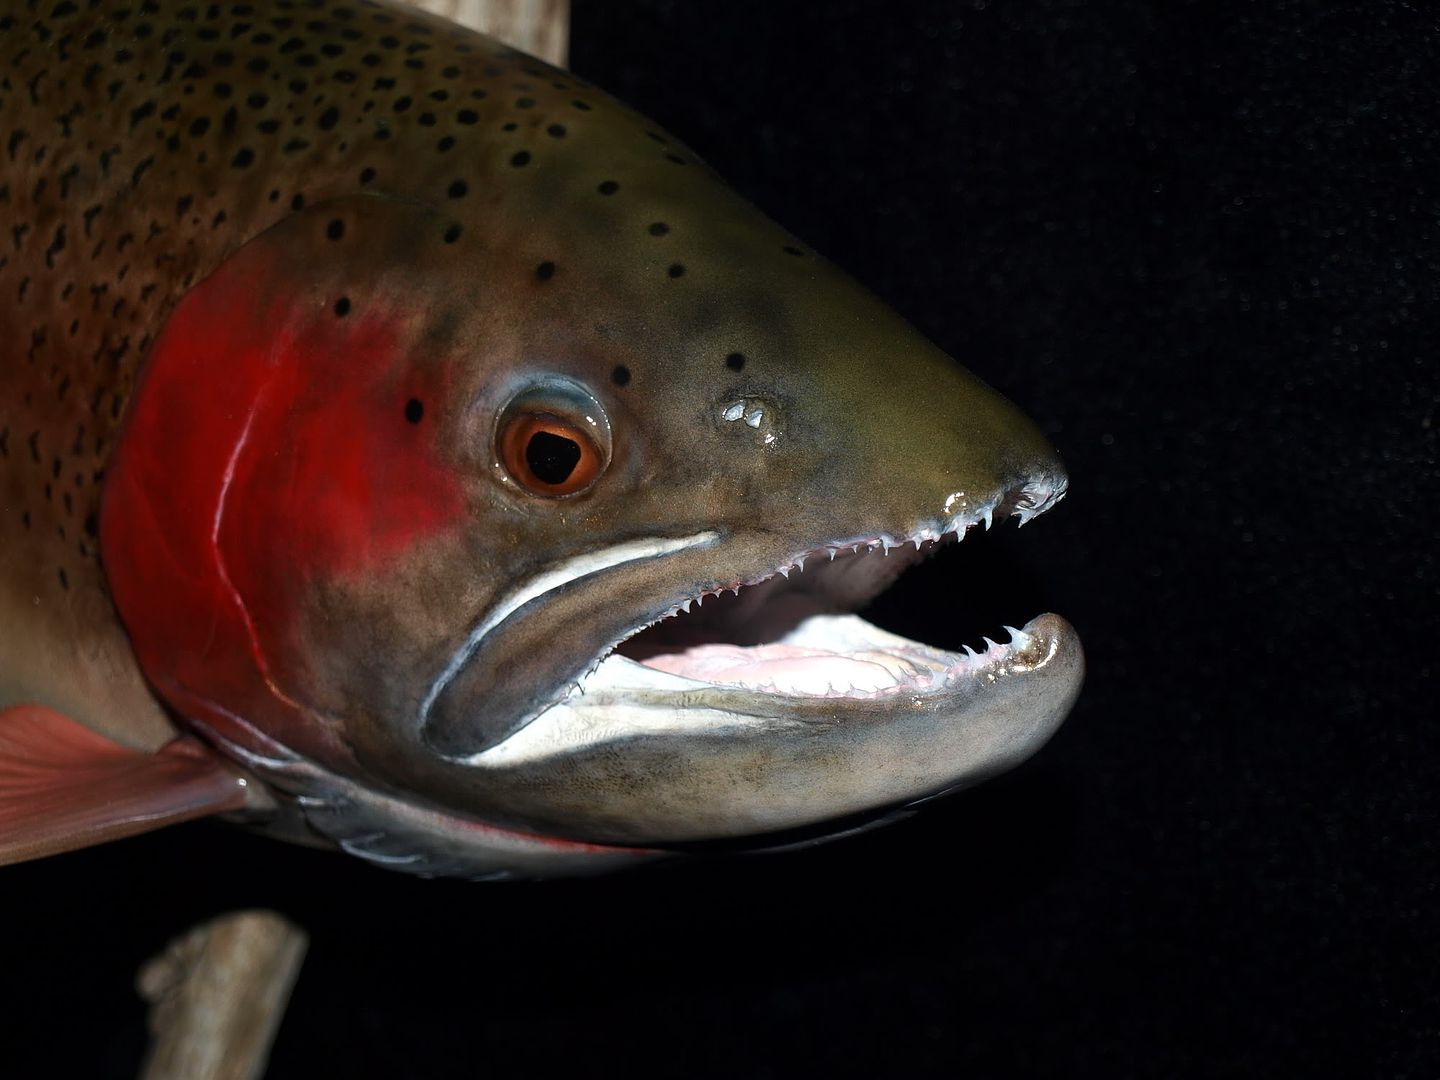
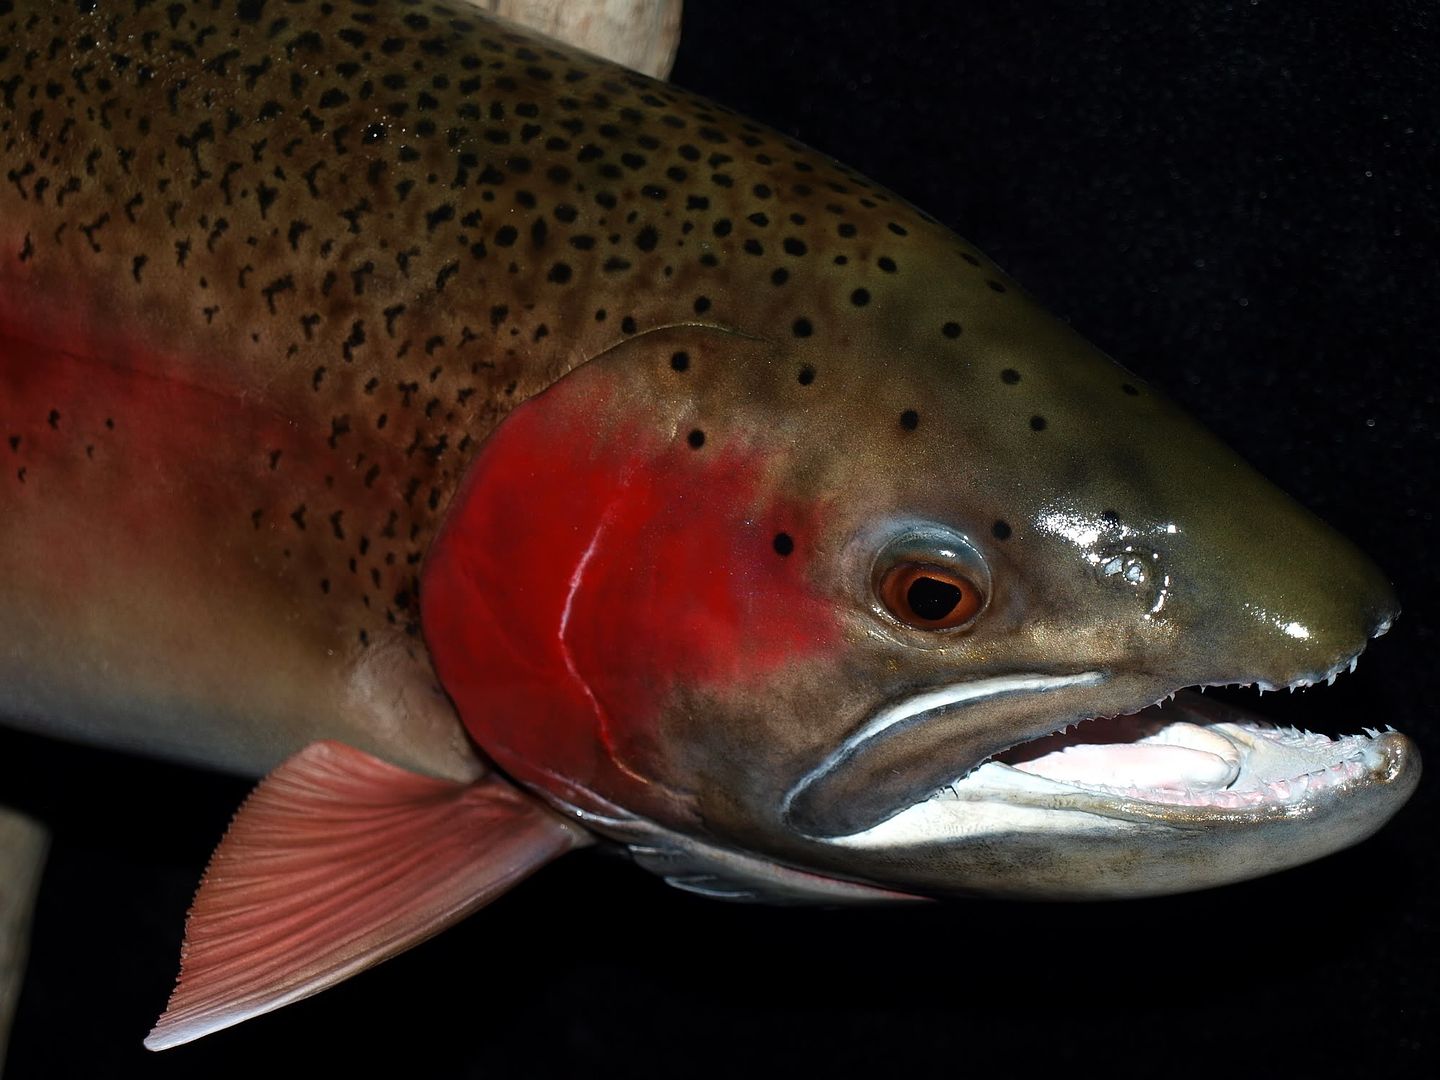
OK... for those interested, here is my completed project. I received high marks from the instructor and plan to continue this pursuit.
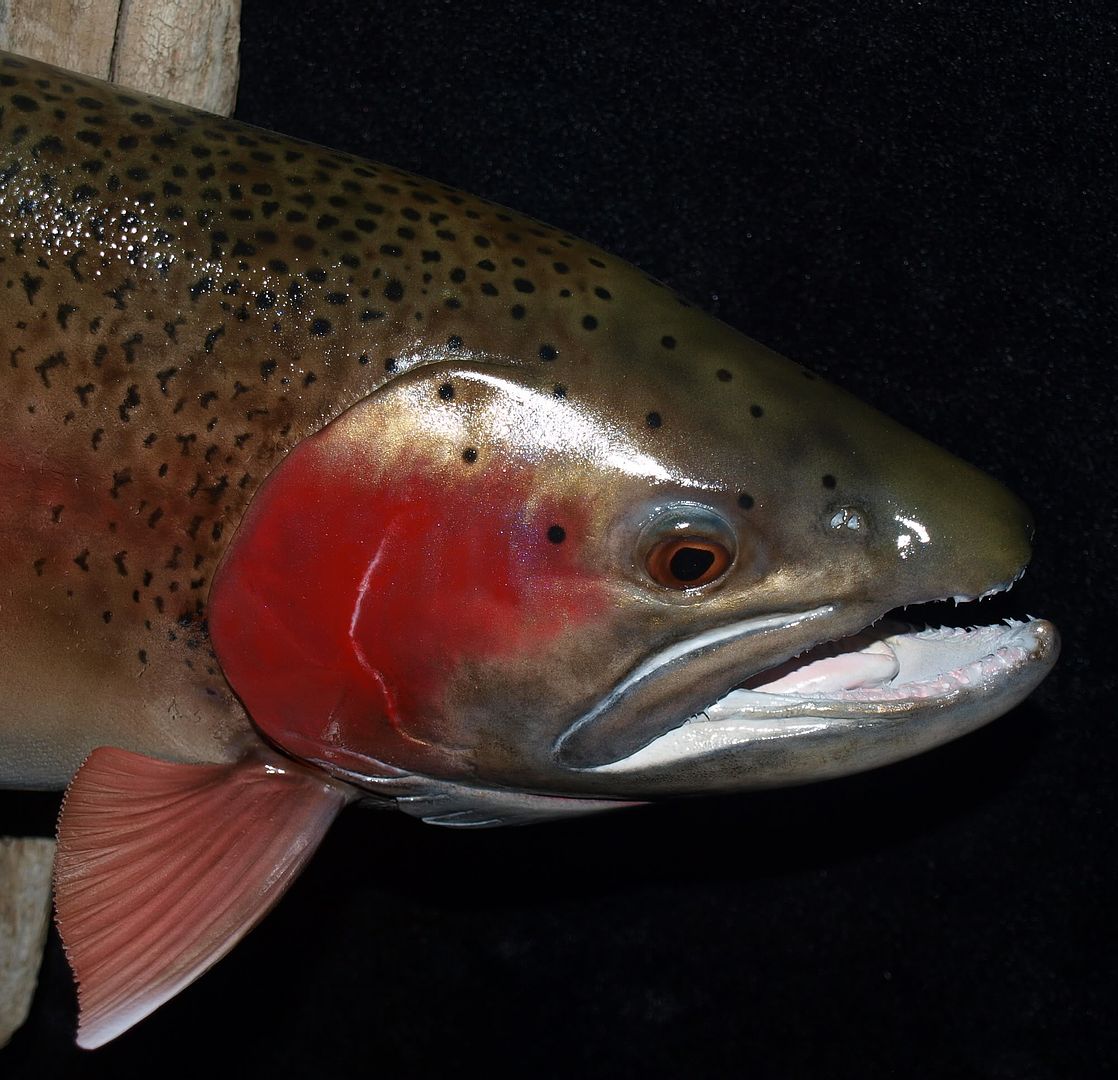
The specimen is a 25" male Cuttbow (Rainbow/Cutthrout Hybrid in spawn colors) which I caught in North Park last year.
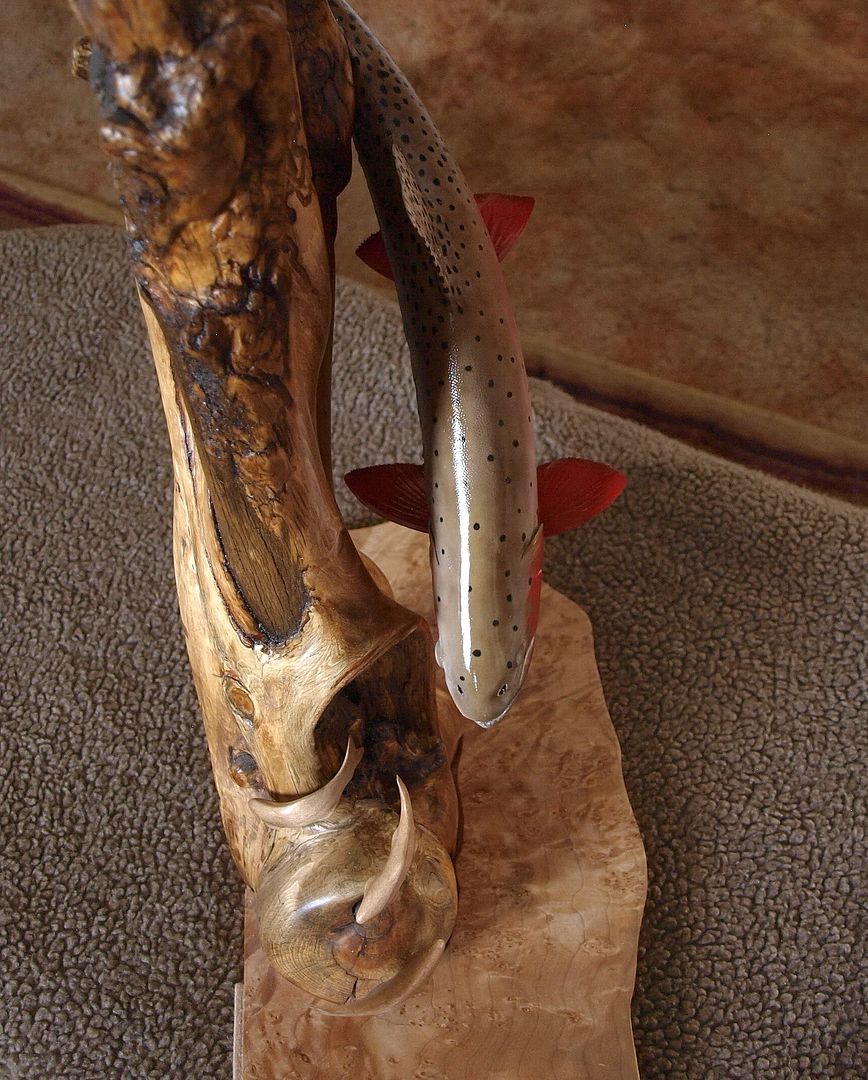
I have included several pics of the head because it was done with metallic paints, powders, and smears to achieve the true holographic characteristics of the real thing. I took pics from different angles in an attempt to illustrate this but it has more depth than the camera depicts. The fish is posed swimming in an "S" curve, although it's hard to tell from the pics.
Fun and challenging project! 

Posted by: Mrs.CP May 15 2011, 03:34 PM
 That turned out fantastic Chris, you did an incredible job on it!! Amazing detail!
  Sweet display mount too! I have seen some displayed in shops that didn't look half that good. After the pictures, I don't think anyone will believe it's your first one though.

Good job!!!
Posted by: swizz May 15 2011, 07:48 PM
Thank you Denise! That means a lot coming from a fellow artist and I appreciate it.
Posted by: ColoradoProspector May 17 2011, 10:41 AM
Awesome job on that project Swizz, that fish looks as if it was caught just this morning!  I'd say the taxidermy would be a good thing to pursue, you've got quite a talent for it.
Sweet fish, thanks for sharing through this project. I'm sure you'll always remember the day you caught that one! 
Posted by: Coalbunny May 17 2011, 06:29 PM
She's right Swizz. You have done a great job.
Posted by: swizz May 17 2011, 08:31 PM
Thanks guys, I appreciate the encouragement and definitely plan to continue. It's fun and could possibly lead to supplemental income during my slow winter work months. 
The poor economy doesn't seem to have effected the taxidermy industry. Our local shop is busy as ever.
Posted by: Mrs.CP May 19 2011, 06:03 AM
Its not just encouragement Chris, your extremely talented! From what I have seen, your ambition with talent and interest will take you to the top.
Keep up the good work, your talents and updates are very inspiring!

Posted by: swizz May 19 2011, 07:32 AM
Thanks Denise! The feeling is certainly mutual. The works created by you, Dan, Jim, and others here are definitely inspirational to me as well. 

Now... get back to work on that hand polished Opal heart, waiting to see that one! 
Posted by: traddoerr Jun 2 2011, 07:39 PM
Swizz, That is a fantastic job on the fish, taxidermy is a feel fun hobbie and can be a good money maker as well, and it looks like your off to a real good start.
Posted by: traddoerr Jun 6 2011, 09:44 PM
Sorry Swizz, I ment to spell real (not feel),
Posted by: swizz Oct 6 2011, 12:32 PM
Hi all,
Just a quick plug for my taxidermy instructor http://www.freestonefineart.com/.
For the year 2011, he took 3rd place in World...
.... and won 4 awards in the Colorado State competition, including "Most Artistic" with this Brookie mount: http://www.taxidermy.com/
I will be learning more from Kevin this winter and my next mount will be a colorful male Eastern Slope Greenback Cutthroat Trout which I caught this spring.
If any of you have a fish that needs mounting... feel free to contact Kevin or me. He's super busy right ow with big game mounts but will be doing more fish this winter, as will I.
Pricing is competitive with other taxidermy companies, but obviously much higher quality.
Posted by: Mrs.CP Oct 9 2011, 07:09 AM
Wow Chris, Kevin does amazing work!
It took me a while to look at all his work, but it was well worth the time! His talents seem endless!
Posted by: swizz Oct 10 2011, 09:47 AM
Thanks Denise! I will pass that on to him.
I just ordered a new Iwata airbrush today, it's been on my wish list for a while.
Posted by: swizz Nov 1 2011, 10:14 AM
I am beginning my next fish this weekend. It is a male Greenback Cutthroat Trout in spawning colors.... maybe 17" or so.
I have begun stripping this gnarly, knotted piece of wood which I will craft into a nice base. I have some good ideas for this one, stay tuned! 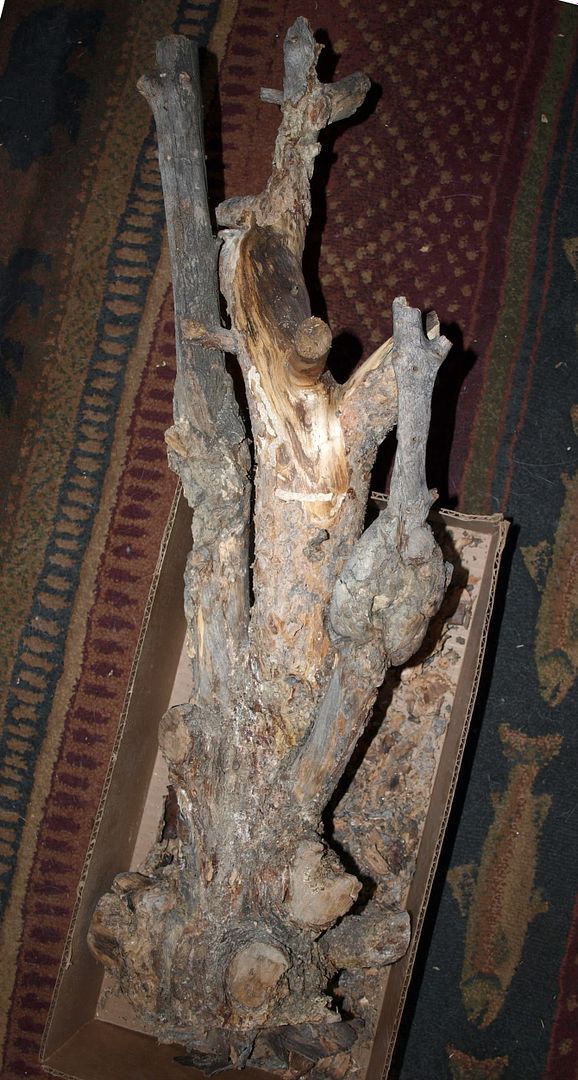
Posted by: Mrs.CP Nov 4 2011, 08:20 AM
Cool piece Swizz, I'm looking forward to seeing more of this project! We have a really cool piece of wood that would work great for future projects I think. It was given to me for woodcarving but I have just been staring at it for years trying to think of what to do with it. I will have to get a picture of it and send to you.. I think you would be able to think of something to do with it faster than I have.
I always thought it would look cool to mount a fish to a rock setting, but Dan said those would be hard to wall mount. Duh! 

Posted by: swizz Nov 4 2011, 08:28 AM
Duh! Dan is correct, rocks are not typically used on wall-mounted fish (or any other taxidermy projects for that matter). The main reason is due to weight.
Many of the fish mounts on Kevin's site incorporate rocks... but they are not real. They are cast from real rocks, then realistically painted. The untrained naked eye cannot tell the difference.

Posted by: kmontoya911 Nov 4 2011, 07:35 PM
Could you use a rock for a table or shelf mount? I too, think that would be cool.
Posted by: swizz Nov 4 2011, 08:29 PM
Yes
Posted by: swizz Nov 14 2011, 12:58 PM
Here is a quick update for those interested.
I am making progress on the base.
Stripped, shaped, sanded, and finished. Done with the base.
I added a free-form Birdseye Maple shelf (routed in).... this piece will hang level on the wall or could be placed on a table. 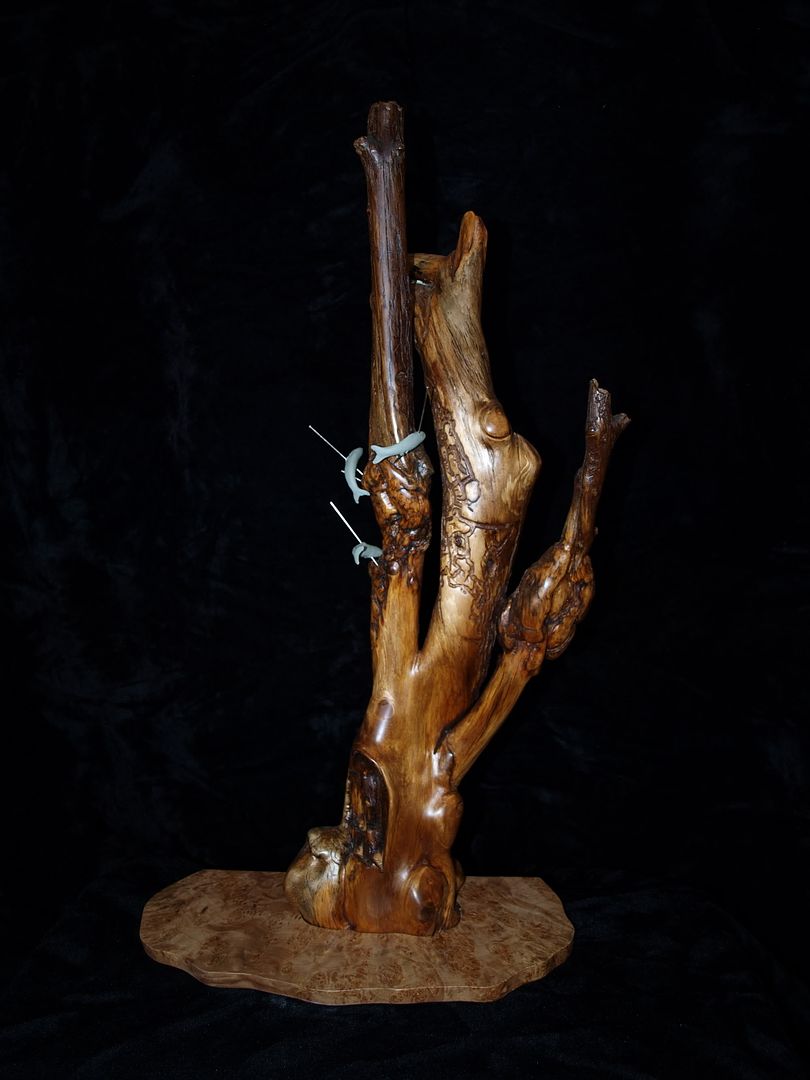
These are baitfish which I sculpted from modeling clay. They are pose-able and I am tinkering with various positions now. They are temporary.
The idea is to display panic... my Cutthroat mount will be chasing/surprising them. 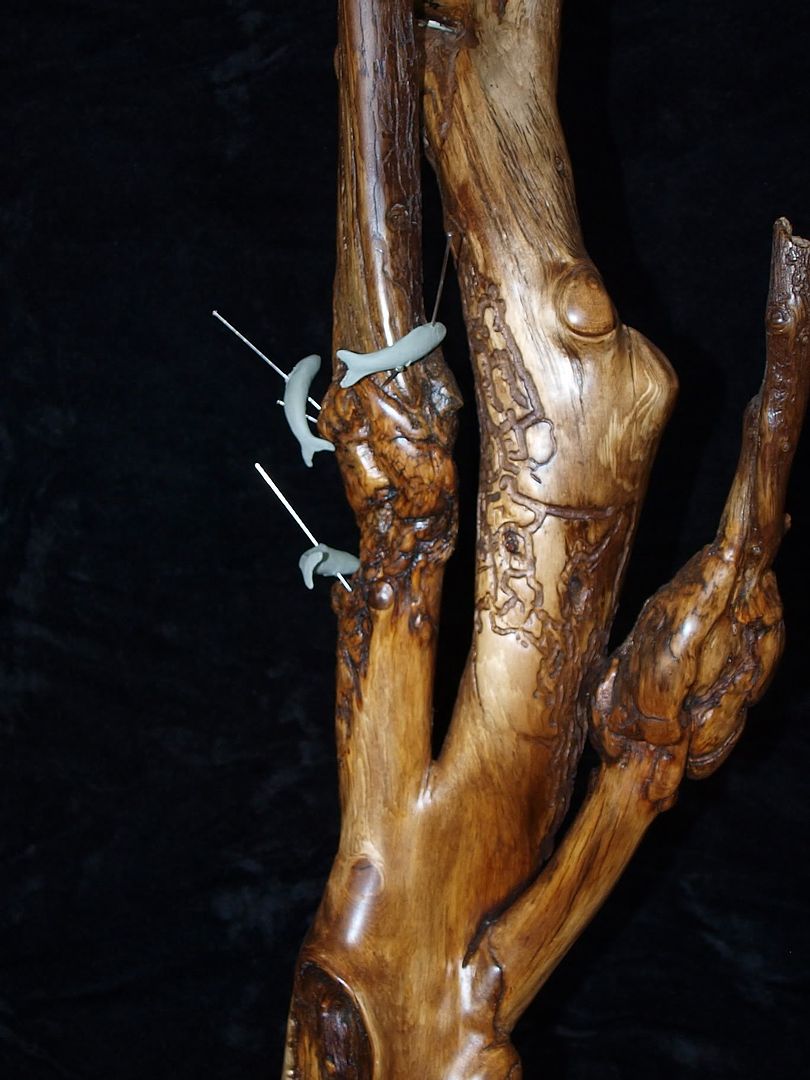
I am woodcarving the real baitfish out of Maple to vaguely replicate the http://ndis.nrel.colostate.edu/wildlifespx.asp?SpCode=010633. The Flannelmouth (also known as Mountain Sucker) is found in Colorado highcountry streams/lakes and a common food source for the larger Trout. They are common in the pristine high lake where I caught the fish which will eventually be mounted to the base. I hope to someday have the skill to carve and polish these from stone. 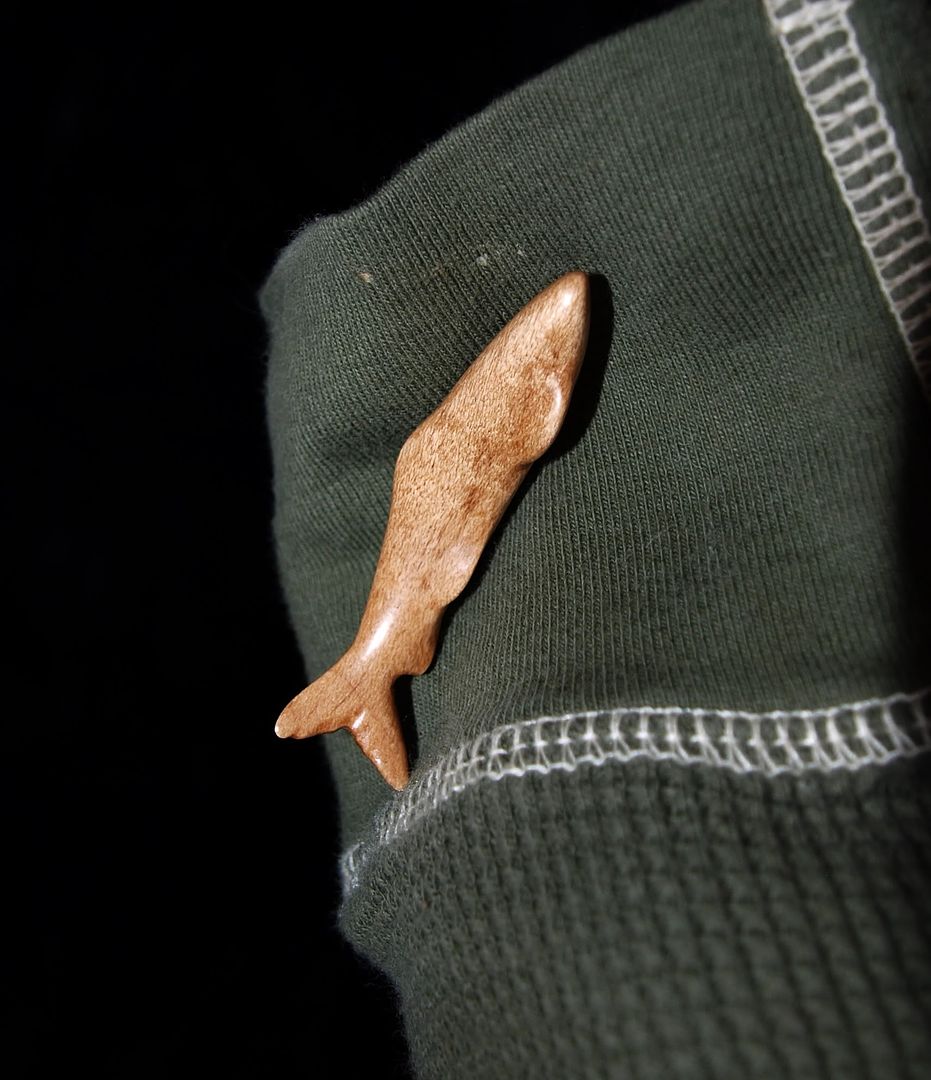

Meanwhile... I am making progress on the Cutthroat as well. This is the body carving I did based on many caliper references from the actual fish. The head, tail, and fins (not attached yet) were molded and cast from the real fish. I have mounted the skin to the body already but not pictured. This body is sculpted from styro and shaped with filler.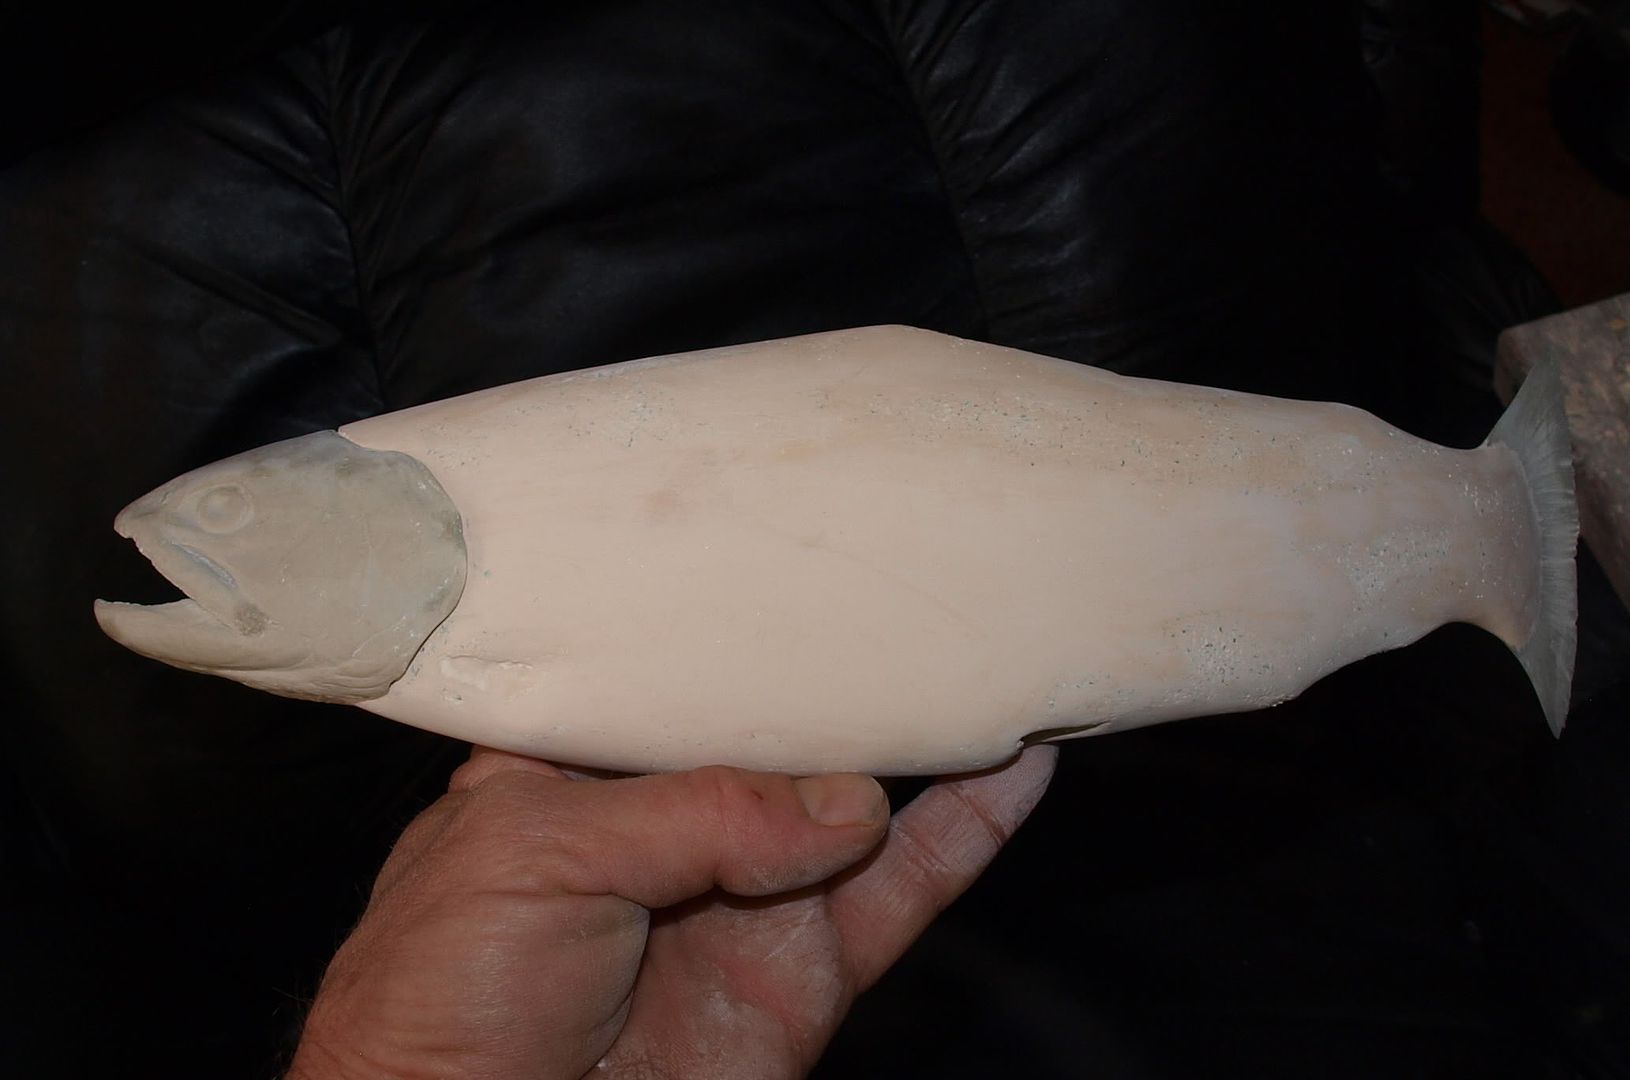
Posted by: Woody Nov 14 2011, 10:03 PM
Looks excellent,
You may not have been doing taxidermy long but it sure looks like you have an eye for it. I think you have found a fantastic way to off-set the winter blues. I can totally see how your mount will come together, busting those sucker baitfish. Sucker meat is a favorite of mine when I am fishing for big Macs at Blue Mesa.
I wish I had your talent. I would quit my day job. Cant wait to see more pics, Woody.
Posted by: Mrs.CP Nov 15 2011, 08:39 AM
 Fantastic work Chris!!!
I agree Woody! Your talents are amazing Chris, and I have no doubt that you will be sculpting rock fish in no time.
The piece is going to be awesome when finished! Keep up the good work, it's looking great!
Posted by: swizz Nov 15 2011, 07:47 PM
Thanks guys!
I'm having fun with this one... will keep you updated.
Posted by: kmontoya911 Nov 15 2011, 08:42 PM
I am blown away by your talent, chris. I would expect this kind of stuff from someone with 20 years experience, but your second one? I would like to have you do a piece for me. I haven't caught it yet, and may not for years, but i think you might be in high demand by then. Put me on the list now.
Keep it up, abd keep us posted.
Posted by: swizz Nov 16 2011, 08:30 AM
Thanks Ken you got it!
Posted by: ColoradoProspector Nov 24 2011, 09:49 AM
That is going to be one sweet and very unique fish mount.  I'm looking forward to seeing the progress and end finish with it all assembled.
Nice job Chris, Ken's right, you've definately got an eye for this kind of work. Looks great.
I haven't fished in a long time but I want on the list just in case now too. I could happen to catch a trophy someday ![confused0082[1].gif](http://www.coloradoprospector.com/forums/style_emoticons/default/confused0082[1].gif)
 ........ the waiting list is gonna' get long quick if/when you take this up professionally!
Posted by: swizz Nov 27 2011, 06:39 PM
Acupuncture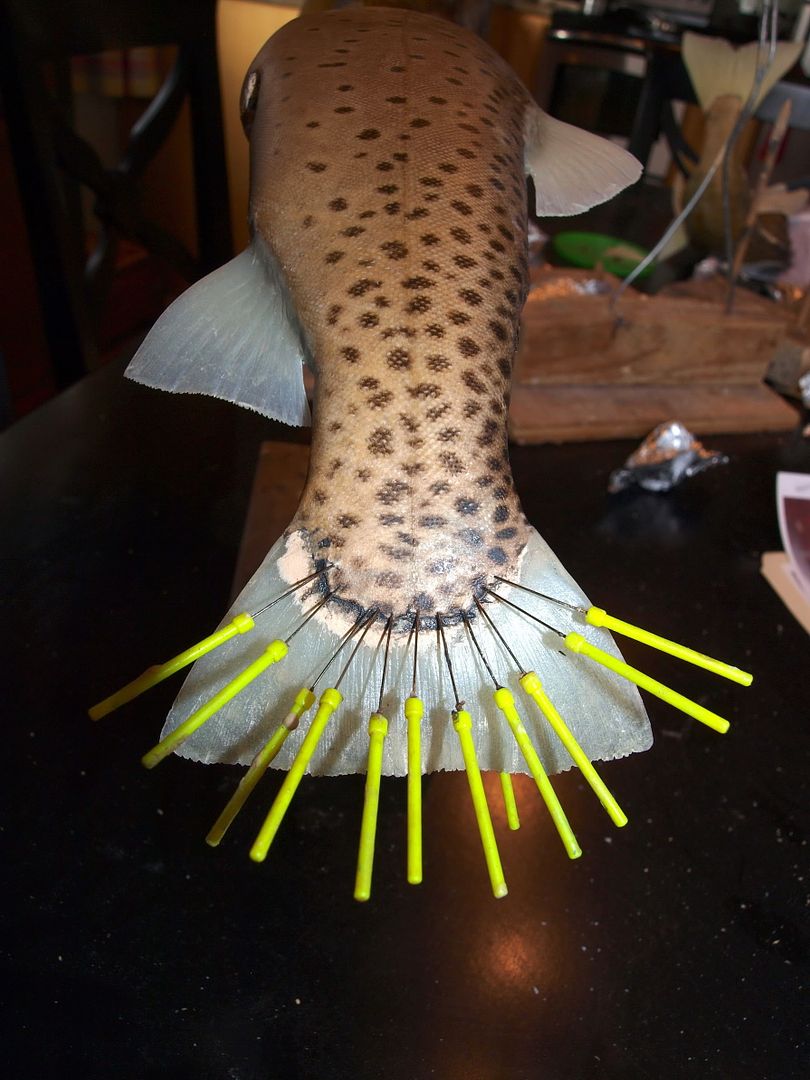
Posted by: Mrs.CP Nov 28 2011, 12:47 PM
Interesting Chris.......  but I can't seem to figure out what your doing to it. Acupuncture at this point won't suppress it's appetite. So what's the scoop?
Posted by: swizz Nov 28 2011, 01:26 PM
The pins are used to secure the skin to the foam-carved body. The skin is adhered to the body using a water/latex mixture then sewn together on the reverse side (not pictured). Wherever there is a skin termination, like here around the tail, pins are used to ensure that the skin does not peel or curl up during the drying process' of both the skin and water/latex mixture. Fish skin reacts very much like leather. The pictured junction of tail-to-skin will later be smoothed/sculpted to a natural look using an epoxy putty prior to the airbrush stage.
You can kinda see where I have already done this (pins removed and putty)... where the dorsal and anal fins are connected. The putty is gray.
Posted by: Mrs.CP Nov 29 2011, 02:02 PM
Amazing how many processes go into doing this. Sounds like you even need some sewing talents to get it done.
It's coming along great Chris! Thanks for the updates, it's very interesting to hear how it's all done.
Posted by: swizz Nov 29 2011, 06:49 PM
Most definitely. I am not highly skilled at sewing but getting better in that department. I can do it well, just need to be faster.
It's like sewing slimy wet leather... wearing latex gloves.
Posted by: Mrs.CP Dec 19 2011, 09:27 AM
Ewwww.......... Sounds like it gets all the senses going as well.
Looking forward to the next update!
Posted by: swizz Dec 19 2011, 10:01 AM
I'm in the painting phase now. Next weekend no class, so it'll be a few weeks until completion and update.
If my airbrushing goes well, it should look like this (obviously lots of red):
Posted by: Mrs.CP Jan 26 2012, 08:42 AM
Thats a beautiful fish Chris, fantastic color! Looking forward to seeing your airbrushed work on it. 
Posted by: swizz Jan 31 2012, 07:52 PM
Thanks Denise! That is a purty one and I think I can do it justice.
This is the very early stages of airbrushing it now. It will gradually get darker and more color-correct as I move along. Still a lot of work to do as you can see.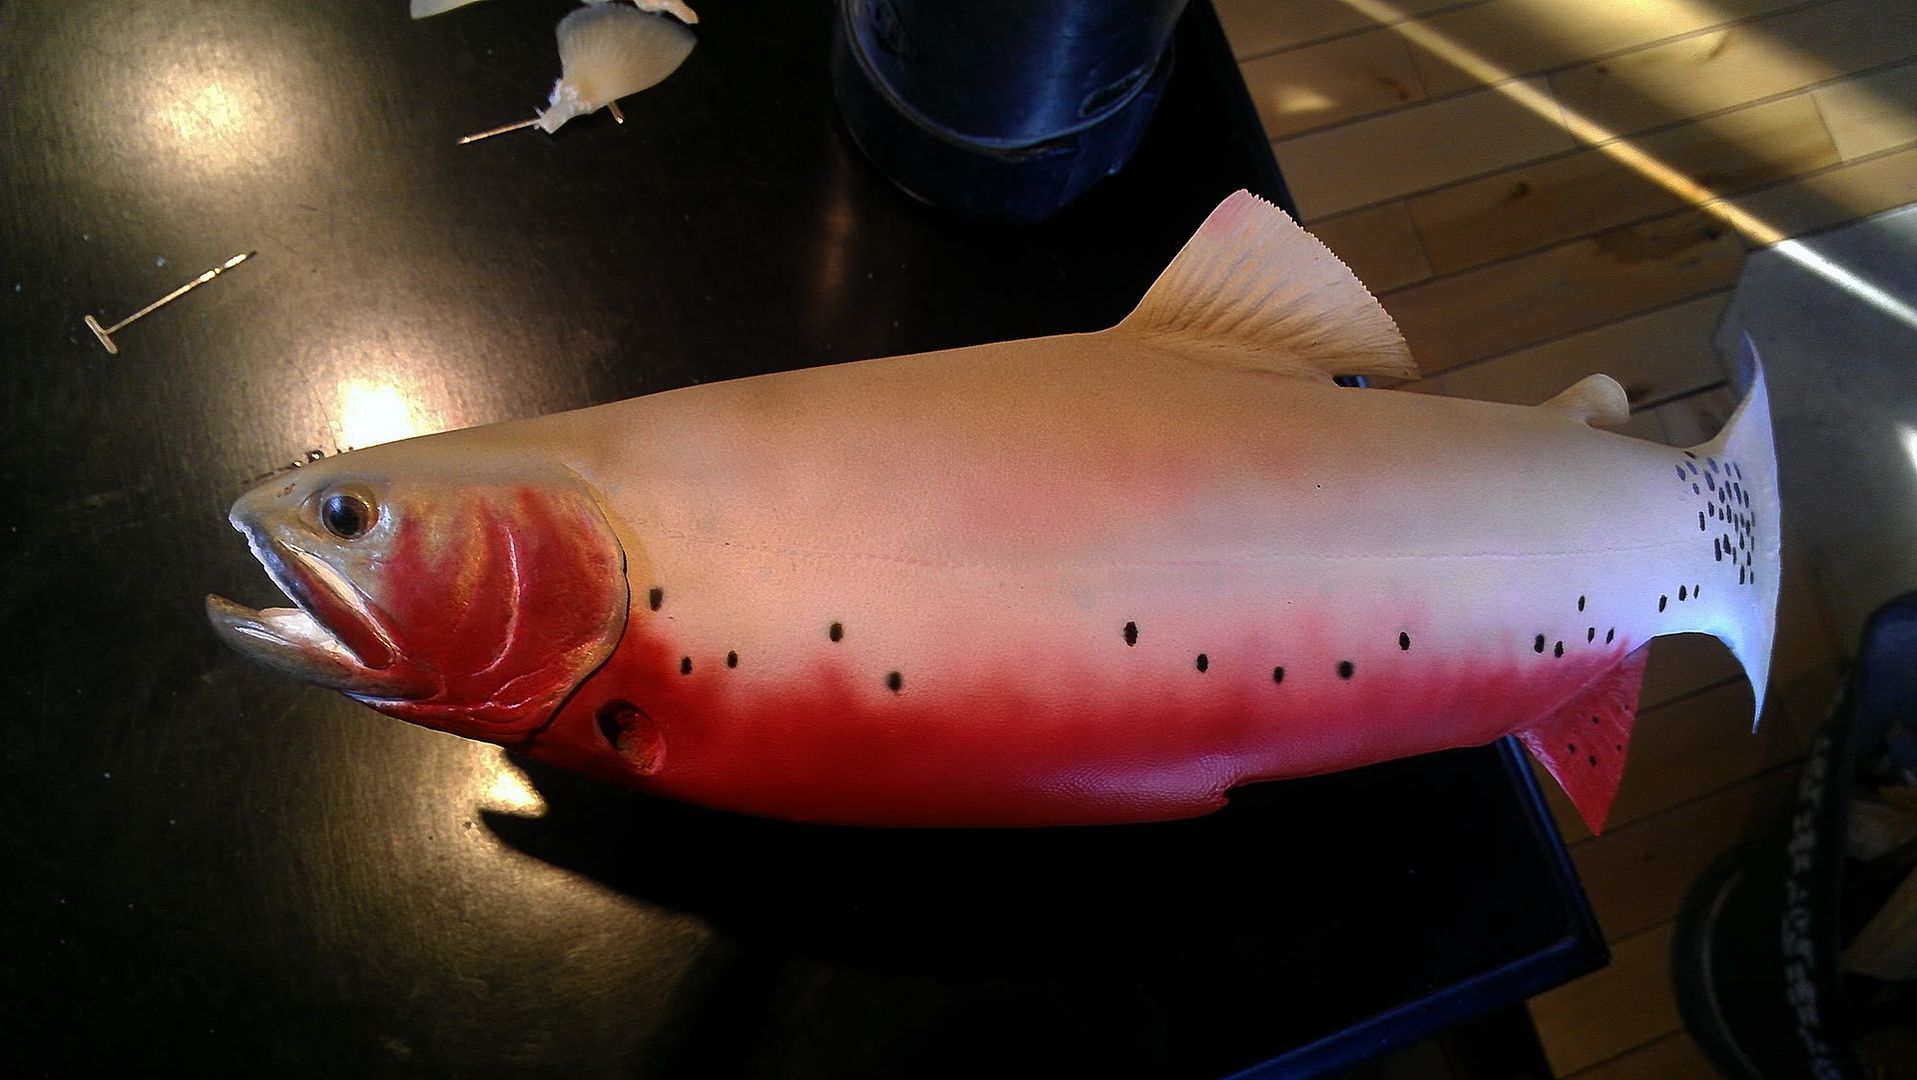
Posted by: Mrs.CP Feb 2 2012, 02:18 PM
It's coming along great Chris! Keep up the good work and thanks for keeping us posted on it's progress.
Posted by: swizz Feb 28 2012, 05:54 AM
Might have this one wrapped up this weekend.
Coming along well.
Posted by: Woody Feb 28 2012, 07:32 AM
Can't wait to see it.
Posted by: swizz Mar 3 2012, 08:29 PM
Project completed!
I will try to give it a photo session tomorrow and post up some pics. 
Posted by: swizz Mar 5 2012, 06:13 PM
Colorado Greenback Cutthroat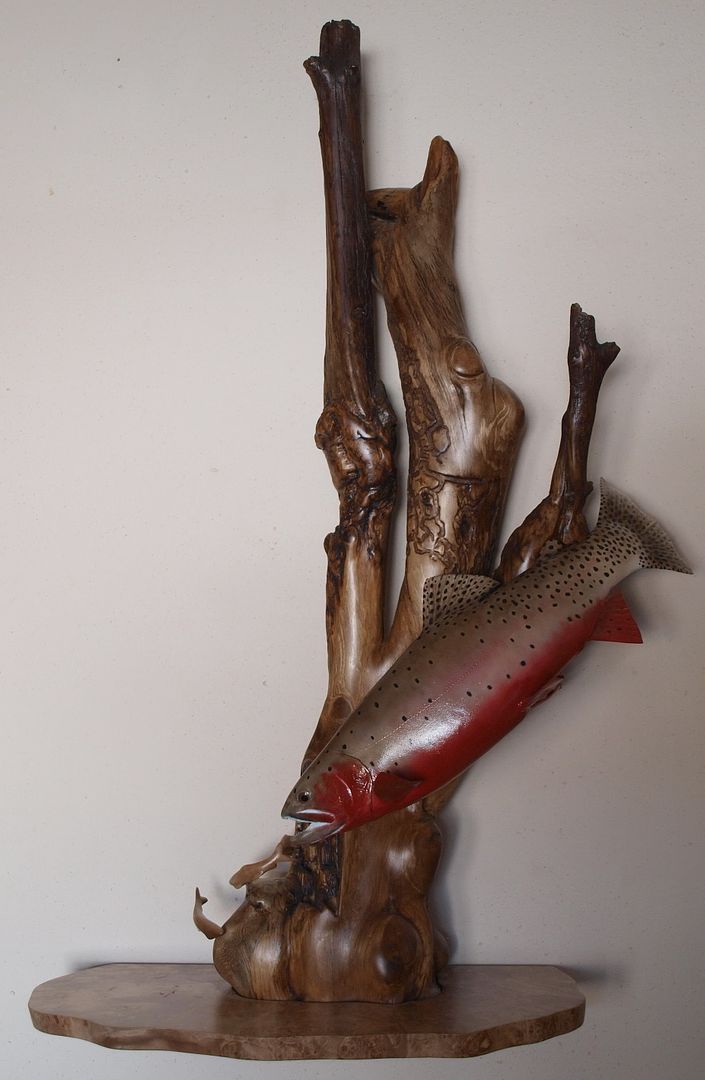

Posted by: traddoerr Mar 5 2012, 10:40 PM
Fantastic job Chris! that really came out great, how many hours total do you think you have in it? It makes me want to get back to doing my own Taxidermy work again, just one more hobby to spend money on, LOL. but at least this one, one can make some good extra cash. Once again great job, really like the how the stand came out.
Posted by: ColoradoProspector Mar 6 2012, 08:59 AM
WOW!!! That is fantastic I agree, very nice Swizz! One of a kind for sure, thanks for sharing this project with us all that really turned out well! Beautiful fish and world class mount, two thumbs up.
Posted by: Mrs.CP Mar 7 2012, 07:26 AM
Fantastic Chris, you did an amazing job on it!! I really like the little wooden fish scattering from the cutthroat. You can almost feel their fear. The coloring looks completely natural. It looks like it was caught yesterday.
Posted by: EMac Oct 24 2014, 12:31 PM
These really are incredible! I agree with Woody and wish I had your talent!
Posted by: Caveman Oct 24 2014, 04:52 PM
It is an incredible piece of work, Chris!
Posted by: swizz Mar 6 2015, 05:25 PM
Bad Kitty! Super lifelike.
This is a recent big Cat mount from my buddy and taxidermy instructor (Kevin from this thread). He is a muti-talented artist. http://freestonefineart.com/
https://flic.kr/p/rdr1Wqhttps://flic.kr/p/rdr1Wq by https://www.flickr.com/people/121086004@N07/, on Flickr
https://flic.kr/p/rv1jTnhttps://flic.kr/p/rv1jTn by https://www.flickr.com/people/121086004@N07/, on Flickr
Powered by Invision Power Board (http://www.invisionboard.com)
© Invision Power Services (http://www.invisionpower.com)